Here’s the opening post if you want to get caught up with my passes through the Nerve Tower and blind analysis
The Nerve Tower is visible in the opening cut scene, with three Sense Spheres visible on the top.
The view of the Nerve Tower upon spawning into existence likewise appears bracketed by two structures, like the alley in the opening cut scene. Even the three Sense Spheres are in evidence (I think…?).
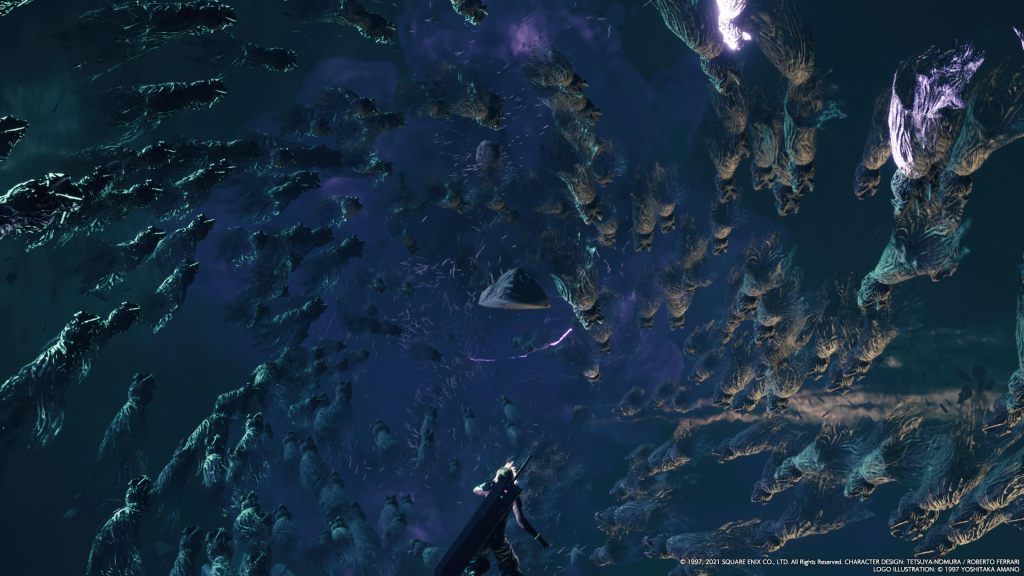
In light of subsequent passes through the Tower, the symbiosis and separation of the main character from another half (potentially Alice) is referred to in the opening cut scene as well. The opening cut scene ends with a look at what appears to be a white Distorted One or grotesque resembling a pair of conjoined twins, bleeding from their mouths. The Distorted One is cut down by the apparent viewpoint character. A bloody feather see-saws to the ground. The camera pans up toward the Nerve Tower, seen at roughly the same angle as the earlier alley perspective and the perspective of the player character once the game starts.
Also concerning symbiosis and entanglement: if you attack Alice, she says “I shouldn’t have been born. There are times when I think that. (…) I want to remember the times before I met you, when we were melded with each other.”
When you fire the Angelic Rifle at the God of Preservation and Creation on the seveneteenth basement floor, she says she wanted to be “one with you” again before she dies.
Alice only “met you” once she was separated from “you”. Under your onslought, she seeks a comforting memory: the time when “you” were both “melded with each other.” It sounds like a yearning for a time before the separation but what to make of the use of “melded”? Were they somehow combined from separate entities to begin with?
From the way Alice and others talk about this event, you would think it was a trauma inflicted from without, as if they were the same being and always had been. It could have been an externally imposed trauma simultaneously with the initial “melding” not being original. There’s that glimpse of the naked man and woman embracing- perhaps they joined together as a kind of corporeal marriage? If so, the pain of the separation leads us to think that this existence was harmonious. Whatever was done to them was done against their will.
Some of the Distorted Ones (like the Sack Thing) talk about your experience, in particular. According to them, you suffered horribly.
The Sack Thing also attributes the following quote to the Archangel: “If the Creator and Preserver has a core, then the world can be remade as many times as one pleases. The next world will be created and preserved by me. I will return the world to normality in an instant.”
Some of Sack Thing’s earlier dialogue: “The Pretend angels are speaking. They’re saying ‘Go to the Nerve Tower’.”
Eliza wants to give birth to a Sense Sphere to heal her mother’s insanity. She also makes cryptic mention of an “insane Sense Sphere”. Where else have we heard discussions of insanity? The God of Preservation and Creation has gone mad. This is the player character’s “sin”, according to the Archangel.
How did the God of Creation and Preservation go mad? Getting torn in half. Kinda like the player character. Oh yeah, and Eliza and the Archangel resemble each other as closely as the player character and Alice. Maybe they were similarly torn in half. Beside Eliza are multiple non-funcitoning Sense Spheres.
Alice, who appears in a room with a single functioning green Sense Sphere, says that the Archangel is the one who tore you apart. “In order to drive the Creater and Preserver mad. In order to become the Creator and Preserver himself.”
Alice, on the fifteenth basement floor: “You’ve been torn apart twice now.”
The Mind Reading Thing, on the sixth basement floor during either my fifth or sixth pass, says “(t)he image of another can sometimes be seen within master. Nearly identical, and yet quite an entirely different person, it seems.” Evocative of both the player character and the Archangel.
On a different occasion, the Mind Reading Thing says “(m)aster’s mind is quite like a landscape, painted with layer upon layer of grief. (…) There is a scar on master’s waist, yes, a large scar under your clothes which was not caused by the Great Heat Wave. Master is haunted by that large scar from so long ago…alas, pitiful.”
On the early basement floors, a ghostly, feminine face appears and says “(d)o you remember our wounds? Have we forgotten the origin of that scar?” (…) “I recall that pain, even now. My final day with you, when I was murdered!” (…) “We used to play chess, didn’t we? We’d take a turn as we awoke one by one.”
In our simulation paradigm, our obvious representatives of the simulation’s function appear to be the Archangel and the Nerve Tower. What do nerves do? Connect brains to bodies. Some of the Horned Woman’s dialogue after the fourth pass: “Regret. Distortion. Archangel. Dabar Fusion.”
In Baroque, there are characters that have other beings or worlds inside of themselves. This includes the player, the angels, Distorted Ones and the Koriel. They have things inside of themselves or a receptacle that they wish to suppress, manage or embody. The Box Thing describes this exactly, the Mind Reading Thing describes someone called “the master” experiencing this. Eliza wants to “give birth” to a Sense Sphere and the confined, metal-plated angel in the lower basement levels (held before an off-limits Sense Sphere by a black and a white bird) says that the memory of their “SINS” are in the “SENSE SPHERE”.
They say they cannot be “PURIFIED”. I wonder if to “purify” is to separate something from yourself. It gets kicked down the ladder of nesting-doll worlds (becomes an Idea Sefirot) and you regenerate healthy tissue like a starfish and remain intact on your own level. Should you die on your level, you will go up the ladder and emerge from a Sense Sphere. The spheres from space (Idea Sefirot and Sense Sphere) are the ladder.
In the world of Baroque, Sense Spheres are treated like objects that can send and receive matter between two different points. If I’m right about the design of the Nerve Tower, then Sense Spheres and their matter transmission were incorporated into engineering and technological infrastructure. Just before the Great Heat Wave.
This may have occurred “historically” but this is also clearly reflected on the first level of nested Nerve-circuits, within what may be a biomechanical simulation, hosted by a dreaming mind.
The Sense Spheres could have been employed for total control over matter: move it, store it in an information state or wipe it from existence. Thing Thing’s behavior implies that Sense Spheres can be a bottomless source of stuff…but Thing Thing appears to just wait outside of them and see what randomly pops out. Maybe this was done with more intention, once upon a time.
And what was our theorized eliminative use of Sense Spheres, again? It appears to be dividing things from oneself; a scalpel of the soul. On your plane, the excised information-matter is reduced to an Idea Sefirot. Its existence goes down a level. Does it then become possible for you to emerge from a Sense Sphere, one level above? Are your hands now on the ladder?
If the God of Preservation and Creation is the outermost layer, then the dreamer in the suspension chamber may be that very woman. Her subconscious channeling of the simulation embodies half of the world and she herself embodies the other half.
A lot of Final Fantasy VII fans (my age and older) have been overthinking it for a long time. In case this seems like an inordinate amount of thought to put into a video game analysis.
Anyone who played Final Fantasy VII in the late nineties or early 2000s probably remembers the GeoCities and AngelFire fan communities. I could probably write an entire post on those websites. One of them contained a long narrative poem describing the entire game from Sephiroth’s perspective. On an ‘about’ page, the author declared that Professor Hojo was her soulmate. Many of these revolved around gaming urban legends, like the surprisingly common belief that Aerith could be brought back from the dead (not that there was any lack of online guides on chocobo breeding or beating Emerald and Ruby WEAPONs). Many of these websites ended up discussing lore and the grounds for various interpretations.
For example: one prevalent myth about resurrecting Aerith was that there was some hidden way to throw a phoenix down into the pond Cloud lowers her body into. On my own favorite among these ancient websites (link below), the blogger Seraphim debunked a number of theories before getting to his own. When he came to the phoenix down chestnut, he explained that a phoenix down does not actually bring anyone back from the dead. When a character’s HP hits 0, it symbolizes becoming too weak to continue fighting. In a lot of online conversations between fans, the symbolic meaning of the mechanics were a common topic. Another one was the relationship between the battle screen and what was literally going on during combat.
For Seraphim, this mattered because it emphasized the true nature of the dilemma. Aerith is not conked out; she’s actually dead. The nit-picky exhaustiveness of these discussions had some funny foundations. No one would resurrect Aerith because it could not be done…which only drove the search further into the margins. Some bloggers tinkered around with the GameSharkPro and found ways to trigger Aerith’s dialogue for points in the game she’s not alive for, which was taken as confirmation by some.
What actually happened was that Square was going to script at least one permanent character death: Barret or Aerith. They based their decision on play tester reactions which led to the situation we have now.
Brief digression- This proves what a happy accident Final Fantasy VII was. Big name video game developers and film studios make a lot of creative decisions by committee.
Getting back on topic-
Aerith’s dialogue for the last two-thirds of the game was cut, but since the game was originally scripted to have everyone for the whole thing, the dialogue was still there in the code for data miners to find.
The real reason why Aerith had cut dialogue occurring after her death was not confirmed by Square until a few years had gone by. If the fans were determined to find their own answers, though, you couldn’t blame them. Especially since so many of the events depicted within the game depend on interpretation.
Massive spoiler warning for the original game.
The planetary force called Holy barely manifests in time to stop Meteor. When I first completed the game, years before the Advent Children film or any of the additional games and novels that flesh out the lore, it appeared to me that Midgar did not survive Meteor. But the planet, Gaia, did survive.
After this planetary near-miss, we get the ending credits followed by a cut to the relatively far future. The character Nanaki belongs to a species that is extremely long-lived. Although he is over forty years old in the period where the game takes place, that only puts him on the level of a teenager. Presumably, in the succeeding decades, he matures more. Nanaki appears to have cubs in the flash-forward, with whom he is hunting/exploring/playing with. He follows his cubs to a cliff overlooking the remains of Midgar which is completely overgrown with plants and wildlife. Gotta admit, that looks like a conclusive statement on the fate of Midgar.
Our last post-credit scene is a brief cut to the opening cinematic, where Aerith’s face fades in over an apparent starscape.
In the absence of any direct explication within the base game, both of these moments rely on some active reading. These may be the most mysterious scenes in the game- but they’re not the only ones that rely on inference or interpretation.
The crowd that was determined to resurrect Aerith latched onto a few of these smaller mysteries. If you manage to get back into Midgar’s ground level late in the game, there is a ghost of Aerith in the church in the Sector 5 slums. Aerith’s polygon flickers for a moment and vanishes before you have the chance to approach her. In Wall Market, at the beginning of the game, Cloud has an uncanny hallucination of a doppelgänger in the Honeybee Inn which has no clear in-world explanation.
Many of Cloud’s hallucinations are telepathically directed by Sephiroth or Jenova…but not all of them. Cloud has a moment in the opening bombing mission where he freezes and a voice in his head says ‘this isn’t just a reactor’. This is, in all likelihood, a trauma-response like PTSD triggered by memories of the Nibelheim reactor. Cloud’s trauma surrounding his hometown Nibelheim is frequently used by Sephiroth and Jenova as a point of entry for their psychic manipulation. But that trauma still exists irrespective of them.
In light of the story in general, this feels like an intuitive way to make sense of Cloud’s episode during the bombing mission. But there is no direct comment on it within the script. Cloud’s hallucinatory doppelgänger in the Honeybee Inn, however, has no implicit explanation furnished by Nibelheim, Sephiroth or Jenova. Presumably, the doppelgänger hallucination is an organic event.
It feels funny using the phrase “active reading” in reference to playing a video game, but it’s hard to get reeled in to Final Fantasy VII without some active reading.
While the nineties gamers determined to resurrect Aerith would necessarily be disappointed, they were on to something essential.
Final Fantasy VII is about death. A lot of it is, anyway. Two of the main characters exert massive influence on the plot after they die: Aerith and Sephiroth. These two are also deeply enmeshed with Cloud, our viewpoint character.
Seraphim pointed me in the right direction here. My favorite part of his analysis was his assertion that the real main character of Final Fantasy VII is Aerith and that Jenova is the real villain.
Seraphim categorizes Cloud and Sephiroth as victims but he does not offer any comment on Cloud’s function as the viewpoint character. If Jenova and Aerith are the real plot-movers, then Cloud’s place in the foreground is more of a way of orienting the perspective of the player/audience. Cloud is the lens through which we see the story but not a major character within it- almost like a narrator.
Placing Aerith as the main character is not as much of a reach as it might sound. Especially considering one of the most important recurring plot elements in Final Fantasy: the paradigm shift. I ended the intro post the way I did for a reason.
In the intro, I mentioned Cecil, Terra and Zidane. Terra lived much of her life as a mind-controlled war slave. The story of Final Fantasy VI effectively starts when Terra regains control of herself. Cecil begins his quest as an unflinchingly loyal soldier and Zidane as a petty thief. None of them are the same in the end.
The plot of many Final Fantasy games rests on two layers of crisis. There is an earthly antagonistic force which is empowered by the influence of a deeper event. This second layer is often exposed half way through the story and can cause (directly or not) a basic re-evaluation of motives in the main characters. This almost always includes the protagonist. This is the paradigm shift I was referring to.
Final Fantasy X and Final Fantasy XIII situate the paradigm shift within a conflict of free will and determinism. Final Fantasy XV was also about the clash between destiny and autonomy but FFXV was not able to portray their version of the paradigm shift before the second season of DLC was canceled. As the game’s existent material stands, it appears to depict the return of an old paradigm rather than learning to live in a new one. You could reasonably disagree with that, as Square’s plans for the real ending were expressed in the novel The Dawn of the Future. But none of the video game material communicates that ending.
FFXIII initially props up Lightening as the main character but in the end Fang and Vanille move the plot more than anyone else. FFX, XV and XVI examine doomed martyrs and their growing bonds with those they must leave behind. FFXV may not have had the chance to depict its paradigm shift as intended but a thematic echo survives in the arc of Noctis. All of these games were also flagship titles for the new consoles of their day. It makes sense that there might be influences behind them that are parallel or derivative from one another. Final Fantasy VII was also a flagship release for a new console.
The paradigm shift within Final Fantasy VII happens on a number of different levels and story junctures. One such connecting moment is the party’s exit from Midgar. And, of course, the occasion for it. Intriguingly, Final Fantasy VII Remake follows the story up to this same plot point. Final Fantasy VII Rebirth picks up from there.
This early glimpse of the paradigm shift happens when the second crisis absolutely T-bones the first. The automated systems of the laboratory are dead, including the locks on your cell doors. President Shinra is dead. A ghostly sword vanishes from his body and Palmer swears he saw Sephiroth kill him.
In roughly 1 & 1/2 scenes, one big bad is eclipsed by another. Before this, the moral paradigm of the story was plain: a small handful of rebels versus a powerful establishment. Now, there is something that both the party and Shinra are equally threatened by.
Cloud (ever the strong, silent type before now) suddenly starts talking. He is the only one offering answers, however flawed or psychologically filtered. This puts his memory and testimony squarely in the foreground.
If not the main character, Cloud is definitely the viewpoint character. This viewpoint is mostly consistent across the paradigm shift and is consequently shaken by it.
Not many other Final Fantasy games tie the audience point of view so specifically to one character. Final Fantasy X did it. In VIII, the cuts back and forth through time at first appear to be some kind of direct reflection of Squall’s mind. XIII has an omniscient narration that later turns out to be the voice of Vanille. None of them pushed it as far as VII, though.
This transitional moment between Midgar and the rest of the world is also when the (eventually) two dead characters draw closer to the center of the story. The rescue of Aerith draws the party to the Shinra Building and the apparition of Sephiroth takes them out of it.
Let’s flesh out the thematic function of those two as “dead people” a bit more.
Aerith is kind of a no-brainer. Her greatest influence on the plot is exerted after her death and she seems to anticipate that something like death will be necessary before she can summon Holy. Sephiroth is a bit more tricky.
As is typical of Sephiroth, Cloud is directly affected. This is one of the reasons I’ve been at such pains to establish Cloud’s function as a narrator. This also relates to the fact that Cloud does not belong to the same “dead” category. But he’s not really like anyone else, either.
The transition between the two crisis layers is intimately tied to the shifts in Cloud’s mind. This creates an association between Cloud’s mind and the story structure. The link is preserved through his mental collapse and the summoning of Meteor. After that, Cloud disappears beside Sephiroth’s frozen body and resurfaces in Mideel, incapable of speech or any other outward expression. His reintegration into the party requires Tifa to join him in his mental solitude.
This is important for a few reasons. One of them is balancing Cloud’s point of view with the outside world. This then has to reconcile with the rest of the story, in which Cloud’s point of view dominated the foreground. The weight of the outside world is clear when Cloud himself has to accept it. The scope of the story gets bigger than Cloud once he “gets over himself.”
Sephiroth’s place in Cloud’s mind changes as Cloud himself does. With that in mind: excluding the blurring of Cloud’s stories and memory dynamics, what actually happened to Sephiroth?
He fell into a mako reservoir. Because of Cloud. Put simply- Cloud killed him. Along with everything else Cloud lied about and ignored…Cloud has also been carrying the private knowledge that he killed Sephiroth. And that, to the best of his knowledge, Sephiroth has been dead for five years.
Five years later, his reappearance is not unlike a haunting. Before Sephiroth began sending his consciousness through a telepathic network of Jenova cell carriers, he existed in his original body. That body was pushed into a mako reservoir by Cloud, and ghosts often haunt their killers. Just like Barrett conjectures in Final Fantasy VII Remake, Sephiroth’s body ends up in the center of the planet, from which he and Jenova project their hauntings.
The psychoanalytic theme of suppression is emphasized by Cloud’s retelling of the Nibelheim incident garbled with his neurotic identification with Zack. One of the subconscious functions of this identification appears to be avoidance or disguise. The pain implied by this avoidance easily matches something very Freudian.
In Frued’s outline of the Oedipal complex, the castration anxiety at the dawn of the genital stage of psychosexual development is suppressed by rejection of the opposite-sex parent and identification with the same-sex parent. Cloud’s rejection of his own weaknesses prompts a sort of denial within himself which compels him to blend his self-image with male identity models, like Zack and Sephiroth.
If Zack’s example provided Cloud with a story that he would choose over his own memory, then Cloud’s stated motive (later in the original game) of neurotic shame makes sense. It makes just as much sense, though, when one considers only the truth of the Nibelheim incident without any stated motive in the present. We have already seen Cloud state his admiration for Sephiroth and his desire to be like him as a child, during the flashback with Tifa at the water tower. Watching your hero lose his mind and massacre your hometown is a blow…but so is killing your hero with your bare hands.
Many of the psychoanalytic themes become clear at this point. Cloud’s character arc rises and falls around how he crafts his identity. In his formative years, he preferred to deny his emotions and emulate others. In psychanalysis, one’s shadow self is a version of yourself containing every trait you wish you didn’t have. Zack and Sephiroth gave Cloud’s juvenile mind identity models that he used as an escapist fantasy. If Cloud was ‘escaping’ the weakness he perceived within himself, then identification with Zack and Sephiroth is determined more by what Zack and Sephiroth are not rather than what they are. Cloud only drops Sephiroth off the mako reactor catwalk after Sephiroth goes on his rampage.
Sephiroth and Zack represent power fantasies to Cloud but they are also the absence of his self-repulsion. When Sephiroth reveals himself as repulsive, the emotional betrayal is visceral. This anguish would have been present when Cloud made his suicidal, single-minded effort to kill Sephiroth. Cloud also spent most of his life wishing he was Sephiroth, which would continue to be part of the backdrop of his mind after the panic and agony of the moment was over. Responsibility for Sephiroth’s fall would not be easy to accept.
Meanwhile, all the psychic projections into the bodies of Sephiroth clones and SOLDIERs are proving that Sephiroth is not dead after all.
The metaphysics of souls, transmigrations, the uncanny and the parallels between a body and a puppet still matter…but before moving on from psycholoanalysis, I want to spend some time on the differences between Cloud’s memory of Sephiroth and Cloud’s memory of Zack. The memories of both figures furnished subject matter for Cloud’s delusions but I do not think they are equal. Final Fantasy VII Rebirth takes pains to emphasize this difference.
Consider two levels of power fantasy: one is that the world comes second and everything is about you. Others barely exist and when they do it’s for your benefit. The second level is to be valued by others.
Since Rebirth concerns the events between Midgar and the Forgotten Capital, Aerith’s place in the love triangle is foregrounded. Meanwhile, in an adjacent timeline, Zack managed to survive his last stand outside Midgar and jumped forward to the present of the main timeline. It looks like Zack has wandered into a world with no place for him, with a comatose girlfriend and bestie. On the other side of the wall of destiny, Cloud the bestie is subconsciously emulating Zack and growing close with his ex-girlfriend. One begins to wonder if the original love triangle (Aerith-Cloud-Tifa) matters as much as the new one (Zack-Aerith-Cloud).
A Freudian assessment comes easily to mind. Within his cluster of subordinate timelines, Sephiroth is omnipotent. In VIIR, Sephiroth’s Whisper-conglomerate contains multiple timelines worth of Gaias. The universes within (which haven’t been devoured yet) all have skies with a massive light-phenomenon called the rift in the sky. Zack may be in VIIR because he happened to be outside of Midgar when the wall of destiny appeared but it is just as likely that Sephiroth wanted him.
In Rebirth, Marlene tells Zack that- unless Cloud wakes up soon -a “scary man” with long white hair will kill Aerith. Zack looks over his shoulder at Cloud and I found his facial expression difficult to interpret. Rebirth also introduced the idea that- when a SOLDIER “degenerates” and succumbs completely to Jenova -their hair usually turns white. Marlene may be “talking about” Sephiroth but when Zack looks at Cloud, he might not be thinking about Sephiroth.
If we assume that this situation is constructed by Sephiroth, then maybe the Zack-Aerith-Cloud triangle was also Sephiroth’s doing. In my Rebirth theory (check the ‘Final Fantasy’ section in the menu for the whole thing), I entertained the possibility that VIIR’s extra-dimensional Sephiroth came from his own timeline, separate from the one we all know as well as the slightly different one that Zack ended up in. There are circumstances in Rebirth which made me wonder if Cloud had a special role to play in extra-dimensional Sephiroth’s timeline of origin- an essential ally.
In Rebirth‘s Kalm-narrative, Cloud remembers the death of a soldier who accidentally fell into the rapids of Mount Nibel. Later, he seems to recall that this person had been Zack. Also in Rebirth, Cloud remembers Tifa’s death at the hands of Sephiroth. As Cloud tells this version of things in Kalm, it feels almost as if Tifa was why he stopped his story when he did. Her death is a painful memory that he would rather not dwell on, at the same time that Tifa is sitting right in front of him.
This made me wonder if Cloud’s role in extra-dimensional Sephiroth’s original timeline depended on a personality change that was brought about by the deaths of Tifa and Zack. In Gongaga, extra-dimensional Sephiroth tries to convince Cloud that Tifa is dead and that the Tifa seen in the present is a shape-shifted cell-carrier.
As a traveller between timelines, extra-dimensional Sephiroth understands that any other Cloud he meets will probably not be the same as ‘his’ Cloud. He may therefore decide that, if he ever wants ‘his’ Cloud back, he would have to create him. As in- find Cloud in another timeline and make him viscerally experience the deaths of Zack and Tifa.
At the same time, there is blossoming romantic chemistry between Cloud and Aerith. Love for Aerith was also the threadbare hope carrying Zack through much of his arc in Rebirth. An acrimonious love triangle in which Cloud kills Zack out of jealousy would play into extra-dimensional Sephiroth’s hands. Perhaps more so, if Zack’s jealousy was aroused first and Cloud was forced to defend himself.
In classical psychoanalysis, suppressed jealousy and suppressed desire are inexorable forces. This story doesn’t play out that way, though, and I think that matters.
Since Square Enix has encouraged an association between Crisis Core: Final Fantasy VII Reunion and the VIIR project, the Crisis Core plot is relevant to this. There’s a decent chunk of the latter half of Crisis Core that consists of a kind of escort mission: Zack escaping Nibelheim with Cloud.
Owing perhaps to a difference in tolerance between SOLDIER graduates and everyone else, the concentrated mako bath within Hojo’s lab hits Cloud harder. He is inert and incommunicado for the entire time he is on the road with Zack. Yet Zack always addressses him and otherwise behaves as if Cloud is lucid and mentally present. Cloud could not express himself and was completely dependent on Zack. With Zack’s allowances for Cloud’s presumed perspective and interests, it’s almost as if Zack is exteriorizing two sides of a conversation. This is done, specifically, as Zack’s means of determining and caring for Cloud’s interests. Later, Jenova uses Cloud’s projections upon Zack as material for false memories.
We know that Jenova has been using cracks in Cloud’s self-worth for psychological leverage. Feelings of unworthiness can furnish morbid envy…but the Crisis Core story introduces an essential difference between Cloud’s memory of Zack and his memory of Sephiroth.
Given Cloud’s perspective as a Shinra tropper, we can imagine that the visibility and status of Zack and Sephiroth would be enviable. Zack did something that Sephiroth never would, though: carry him out of love and try to understand and care for him in spite of the communication barrier.
No, this is not (as far as I know) discussed in the open. The inclusion of CCReunion into the VIIR canon means that it still matters, though. Barring future lore elaborations, I wonder if it is never discussed on purpose: these would, for Cloud, be memories of silence and vulnerability.
(During the times he was conscious, anyway. Cloud’s reaction to Zack’s death implied that he was aware of his immediate surroundings and situation at least some of the time.)
In the timeline where Zack finds himself in Rebirth, both Cloud and Aerith are rendered mute and motionless by mako poisoning. Once Aerith’s surrogate mom Elmyra enters the picture, she fully takes charge of Aerith’s care, leaving Cloud in the hands of Zack, just like the Crisis Core roadtrip. Sure enough, Zack continues to talk to Cloud, in the way that he always has (not to mention talking to Aerith). A few different scenes start from Cloud’s alternate timeline POV in the wheelchair (above), which plays well when the scene immediately follows Cloud taking a nap, as though he’s dreaming of the other timeline.
In other words, Rebirth shows Zack caring for mute and helpless Cloud…while Cloud in another timleine is emulating Zack with uncanny, The Talented Mr. Ripley-like ease, as sparks fly between him and Zack’s ex.
Between the two identity models (Zack and Sephiroth), Sephiroth telepathically urges Cloud to take any delusiory short cut to make things fit in the present. Whether or not Cloud is emulating Zack just as cynically is an unspoken question in Rebirth. Then the final battles start crossing dimensional boundaries and Zack and Cloud find themselves pitted against the same foe. After they are separated again, two different alternating scenes play of Cloud and Zack reciting the same oath with the Buster sword.
What really establishes the differences between the two identity models, though, is that Cloud cannot beat Sephiroth alone. After the dimensional rifts happen during the final battle, Cloud fights first alongside Zack and then with Aerith.
And, of course…those of us who played the original know that Cloud and Aerith were never meant for each other, anyway. All of this makes it difficult to think that Cloud could ever wish to steal Zack’s life no matter how Jenova takes advantage of his feelings.
And now, back to metaphysics and the soul.
In the intro, I spent a lot of time on the aesthetic motivations behind Final Fantasy character design leading up to and including VII. Hironobu Sakaguchi has explained that, up through VII, characters were modeled after puppets in dioramas. Since the influence of Dungeons & Dragons is all over Final Fantasy, I’ve occasionally wondered if they were also modeled after miniatures on a map. Especially given how the combat screens from the 16 bit games retained the chibi-doll character sprites whereas the monsters looked hand-drawn or painted. VII used the symbolism of non-literal chibis to acquaint the player with non-literal imagery in general, to build a foundation for a larger-than-life story.
I cannot help but wonder if the role of bodies, souls, hauntings and transmigrations in the plot is a knowing elaboration on the metaphorical language of puppets. Both Jenova and Cait-Sith talk about toys and puppets in a metaphysical context.
The metaphysics of the soul in FFVII also mark a central event in any other fantasy story: the unveiling of the cosmology. Lord of the Rings depends on our knowledge of Middle Earth history and the role played by Sauron. In FFVII, we get little snippets of cosmology throughout. But the metaphysics of the soul, projection, transmigration, haunting and the like are when the player/audience sees the cosmology- free from explication- in the present of the story.
Fantasy typically relies on an internal consistency to establish its own rules. That is why cosmology matters so much. In other words: fantasy depends on a central myth. Through explication, we hear a lot about Lifestream, mako extraction and Jenova. But we only see the central myth at work through Cloud, Aerith and Sephiroth. Mostly, we see it through Cloud- even when Cloud is seeing Aerith and Sephiroth.
If Cloud has visions of the afterlife and the “true nature of reality”, then he appears to embody the mythic archetype of the pilgrim. And he resembles one pilgrim from world literature, in particular. One who, “midway along the journey of our life”, woke to find himself “in a dark wood”, having “wandered from the straight path”, who is then led through Heaven and Hell by two separate guides. Both are deceased souls. One of them was an inspirational identity model of his youth. The other was a woman who elevated his romantic yearning to spiritual wisdom.
Even the love-triangle subplot of FFVII plays into this. Dante Alighieri modeled Beatrice after a woman he had fallen for. He avowed that he would write about her in a way that no woman had ever been written about.
If Cloud is an archetypal pilgrim, then he gets the literary fantasy treatment. He is not just a mythic pilgrim, he is Nojima and Kitase’s (to say nothing of Sakaguchi’s) version of a mythic pilgrim. He was also the last Final Fantasy main character to have the chibi-doll design. A design pattern that Sakaguchi felt was evocative of a puppet show.
The layering of the soul-investiture and puppet themes indicate the central myth. Cloud, the pilgrim, sees the world beyond the tangible. In the end, he masters his fear and grief and is less daunted by death. Not unlike Gerda from The Snow Queen or Dante.
Yes, all that explication about the Lifestream and mako and Holy still matters. But something told through explication just doesn’t shine as bright as a dynamic that unfolds through the course of a story.
Not that there’s any conflict between one or the other in this case. The major emphasis of the world-building is the transmigration of souls. Holy is a cumulative spiritual force embodied by souls en route to their next life. The exertion (or will) of this force is what people in FFVII are talking about when they say “the planet.” This holistic divine will is what is invoked with the white materia and the plot depends on it.
The central myth concerns the afterlife and its relationship with the rest of the world. Anything beyond that point is a matter of interpretation. That being said, I think there are a number of probable interpretations. The frequent use of psychological imagery depends on a distinction between literal and non-literal. References then stand out even more.
References to World War II are particularly hard to miss. Heidegger is named after Martin Heidegger, the German philosopher that collaborated with the Nazis and had a few of his students sent to concentration camps. Professor Hojo is also clearly modeled after Josef Mengele and the Cetra have an ancestral legend of a place called The Promised Land. The first Cetra victim of Hojo we see is Aerith, who is one of our two dead main characters.
Sephiroth has been initiated into a zero-sum game by Jenova. Among the cell carriers, Sephiroth is the dominant personality beside Jenova herself. In the Northern Crater, Jenova attacks the party in her original body for the first time (Jenova-SYNTHESIS). After defeating her, the first clash with Sephiroth (Bizarro) has two separate torsos, as if the body is split between two occupiers. In Sephiroth’s next incarnation (Safer), he has clearly come out on top. The extraterrestrial being is still the same except now it’s named Sephiroth instead of Jenova. After Safer-Sephiroth goes down, he tries to jump ship into Cloud’s body.
Sephiroth strives to absorb the Lifestream transmigration nexus into himself. Aerith, meanwhile, is attempting to channel the planetary will, shared by all in the transmigration nexus, for their own benefit.
The first allegorical Jew of the game lays down her life to preserve the divine and familial (one might say “brotherly”) harmony between all souls.
There are two basic concepts from Hinduism which also appear in Bhuddism: Atman, the individual soul, and the greater universal tapestry to which in belongs, called Brahman. Interpretive traditions like Advaita Vedanta maintain that the wholeness of one depends on connection with the other. This is evocative of the Bhuddist concept of interbeing: the irreducible essence of the individual is nurtured and cultivated by the outside world. One necessitates the other.
In Final Fantasy VII, a soul grows and matures during the mortal journey and takes that accumulated vitality with them when they die. The soul passes into the Lifestream transmigration nexus, where the maturity of that soul will diffuse among all others and nurture them, before starting the cycle over again in the next life. This also analogues the indivudual / collective unit of the Jenova cell carriers. Some fans theorize that a being like Jenova is what happens to a Lifestream once it’s excised from a planet.
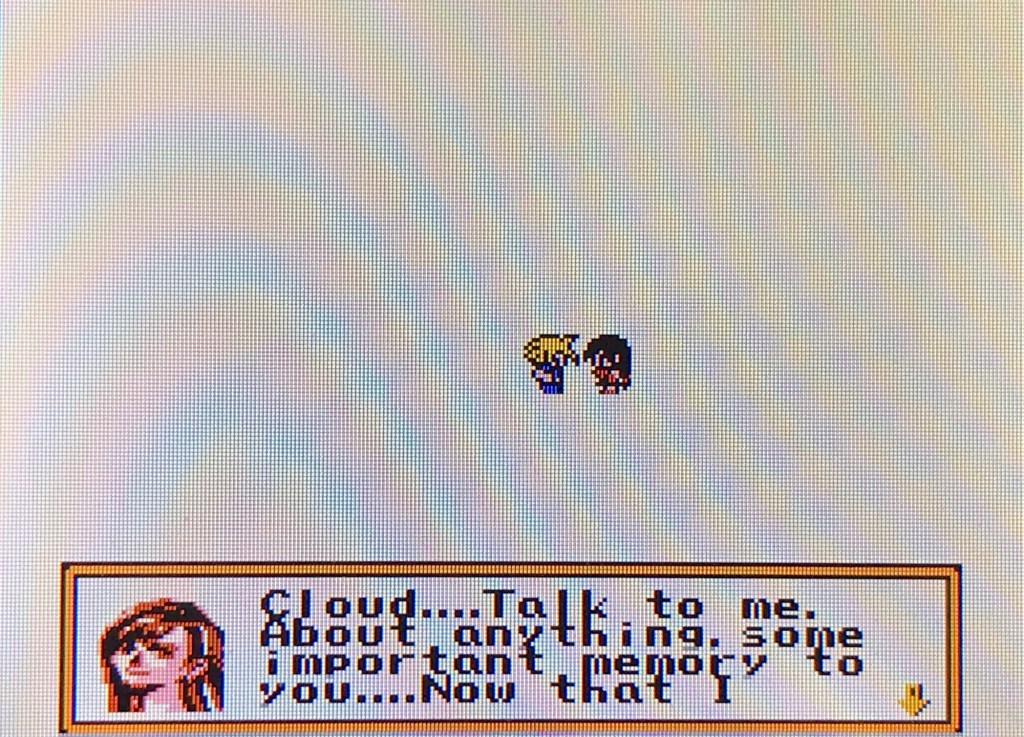
Then there’s the combined Semitic and Christian symbolism of Aerith. A few years ago, I replayed the original FFVII with a close friend. During the last psychic exchange between Aerith and Cloud in the Sleeping Forest, my friend commented on the similarity with the Agony in the Garden of Gethsemane: the kiss of Judas by which the Romans knew Jesus.
Cloud as an archetypal traitor makes too much sense for comfort. I remember, when I first played through the Temple of the Ancients, I was horrified when Sephiroth’s mind control took hold. A different, child-like segment of Cloud appears to separate from his body, and then he beats the shit out of Aerith.
I guess this is one of those moments in which the puppet show either works or it doesn’t. In my opinion, it was uncomfortably successful. That scene, along with the first two scenes with the ‘Who…Are You?’ scoring, were nightmare fuel to me as a preteen (pretty cool reimagining of that song in Rebirth, btw, which somehow didn’t make it onto the commerically released sondtrack).
I’m tempted to read that implication as more relevant to Cloud’s feelings about himself at that moment, than anything else. All of Cloud’s guilt- all of his worst thoughts and feelings about himself -have accumulated into a perfect storm by the time the party arrives at the Northern Crater. Sephiroth then goes for the psychological / telepathic jugular by erasing his sense of self and convincing him that he’s a botched Sephrioth clone.
The gradual, layering use of non-literal and psychological imagery allows the historic, literary and religious allusions to rise to the surface without speaking too loudly. This is, pretty much, why I’m confidant that the commercial and cultural engineering of upper Midgar has a soft 1940s influence. That, in turn, creates a close degree of association with the cinematic themes I mentioned in the intro. I thought that cinematic expressionism was a close relative of literary fantasy to begin with since they establish internal consistency using very similar narrative cues. More than anything else, though, I find it easiest to associate the early 1940s-ish imagery of the original’s beginning with the two most visible nuke analogues: mako reactors and WEAPONs.
The analogues between mako reactors and fossil fuels and nuclear anxieties are apparent. The WEAPONs are a bit less obvious, though. WEAPONs are ageless beings originally conjured by the planet to fight Jenova. Since Jenova’s cells have been dormant for thousands of years, so have the WEAPONs. Once Meteor is summoned, the primordial kaijus start waking up.
Kaiju movies showed up just after WWII. Nuclear fallout creates giant monsters that level cities. The kaiju cultural footprint has become ubiqitous enough to lose any specific association with the post-war era but the rest of the original FFVII makes the WWII themes difficult to ignore. The WEAPONs may not have been created by human meddling but they are summoned by it. They were originally created to fight a hostile alien and humanity- in late FFVII -has made itself equivalent to hostile aliens. Human meddling didn’t create them: it was just the last straw.
When Shinra goes completely off the rails, there is no one to say no to Heidegger, Scarlet and Hojo. Scarlet and Heidegger build a giant mech called the Proud Clad which has no in-world model other than the WEAPONs, as if Scarlet and Heidegger saw them and thought “that looks cool, let’s do our version”. Heidegger and Scarlet build their own WEAPON while Hojo is using every reactor in Midgar to power the Sister Ray and blow the seal off of the Northern Crater. The kaiju born of human meddling only appears when the most powerful humans lose their minds. After that, the world has seven days until Meteor and barely makes it by the skin of its teeth.
Then VIIR and Crisis Core introduce the possibility that Midgar has never been in a period of peace. After the ceasefire with Wutai, Shinra experiences a rash of SOLDIER desertions and defections. Rebirth tells us that at least a few of them (not depicted in Crisis Core) joined Wutai, such as Glen Lodbrok (even if he’s little more than a Sephiroth finger puppet like most of the cell carriers).
In the VIIR games, AVALANCHE is a global, decentralized guerrilla network with ongoing operations against Shinra. To the chagrin of Barret and the Midgar cell, AVALANCHE also has interests in common with Wutai and collaborates with them.
So Shinra declared victory against Wutai and has still never known peace. Since Hojo’s work on the SOLDIER program, there just hasn’t been an incentive for peace. The military apparatus of Hojo, Scarlet and Heidegger has become a self-perpetuating institution. The historical parallels are apparent.
I was not expecting how much this game was going to charm me. I mean, I knew it would be memorable, at least: I first read about Fantasian in a 2021 Washington Post article that I ended up referencing in another entry about Final Fantasy VII. Why was a PS1 game from 1997 capable of telling a story that cinematic, human-scaled storytelling of modern game design can only handle a little bit at a time?
This is, pretty much, what’s going on with the modern VIIR trilogy. Midgar, in the original FFVII, consisted of a handful of corridors to walk through, random monster battles in the corridors, two mini-dungeons (mako reactors) and a normal dungeon (Shinra Building) and a sort of corridor-dungeon hybrid (the sewer). Midgar, as a fictional premise, is two massive, metropolitan cities stacked on top of each other. To reinterpret the beginning in Midgar according to modern game design, you can’t rely on the same handful of corridors, 1 and 3/4 dungeons and some fights.
One obvious reason for this is modern game development conventions that (on one level or another) emulate film and photo-realism. These conventions turn against a fundamental design principle of 80s and 90s JRPGs, though, which gave them much of their vitality.
Some of this was incidental to early video game development: software was a simpler thing, back then. The first intuitive solution was that games needed to be simple and self-explanatory. See Tetris, Centipede, Q*bert, Pac-Man, etc. The second solution is to have simple game mechanics cover more conceptual ground like some of Nintendo’s early hits like Mario, Zelda and Metroid.
Final Fantasy derives from the second group but has older roots. Today, FF is known as a foundational JRPG. Most of us know that the J stands for ‘Japanese’. These kinds of games are typically Japanese but they are also most often video games. Then there’s the history behind the other three letters.
Tabletop RPGs are all about a gaming rule-set covering larger conceptual territory. If the design of early video games necessarily co-existed with board game design, someone was bound try to pull off video game Dungeons & Dragons. Not only are tabletop RPGs built on appealing to the imagination with a gaming rule-set…they are built on using that rule-set for everything that the people at the table can think of.
I heard that tabletop RPG kits in the 60s through the 80s made use of both miniature figurines and paper cut-outs. In FF I-VI, the player characters are represented in combat by simple, chibi-like sprites. The enemy sprites were a bit more detailed; appearing almost hand-drawn. They look like miniatures and paper cut-outs to me, anyway.
It now becomes easier to understand how 16 and 32 bit games were capable of telling stories that make modern developers feel burdened rather than empowered with realism. If you can connect a simple rule-set with imagination, then you can turn a handful of corridors, battles and roughly one dungeon into a sprawling dystopian cityscape.
Such a basic appeal to the imagination hinges on the player’s understanding that they are interacting with symbols rather than portraiture.
The Washington Post article confirms all this in almost as many words. While discussing the aesthetics of early Final Fantasy, Sakaguchi and the interviewer hit upon the analogy of puppet shows. Fantasian was meant to be a return to this kind of JRPG design.
See…I’m spending all this time not talking about the game itself because it’s hard to nail down the kind of depth and richness this brought to early JRPGs. Part of becoming more realistic means becoming more concrete and less interpretive. Video games have become more realistic but- like modern film -they have also become both more visual and more literal.
This does not mean that video games are worse off nowadays (any more than film is) but it does mean that video game narratives need to work harder to cover shorter distances.
So the WaPo article piqued my interest. I wanted to play Fantasian as soon as I read it but- at the time -it was only available on Apple Arcade. I don’t object to mobile games on principle but they’re definitely not in my lane. Luckily, there’s a modern console version now.
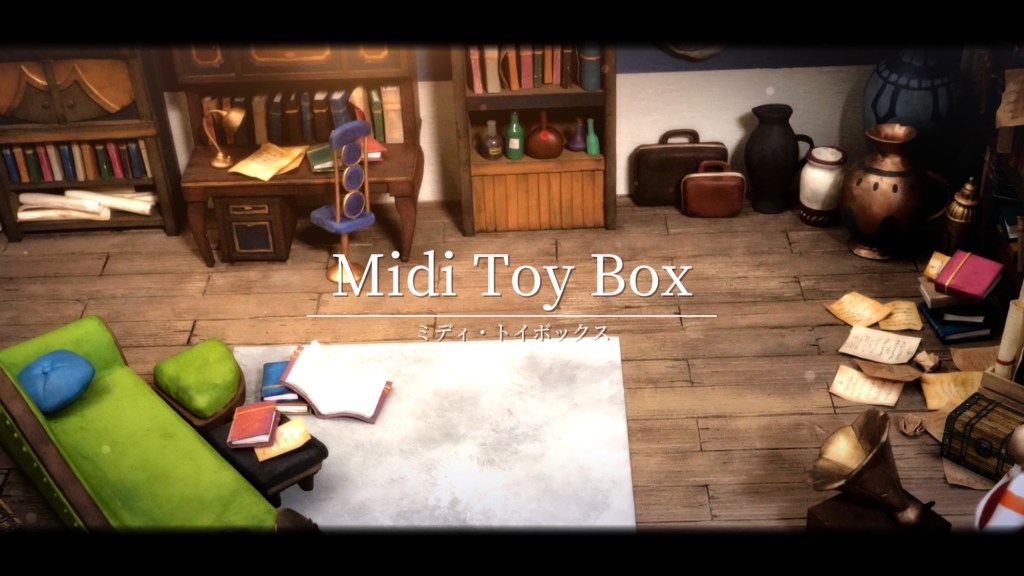
The environments in Fantasian are built from photographs of intricate little dioramas.
That means lots of opportunities for stuff like this. In general, locations operate like the layouts of the PS1 Final Fantasy games, with the pre-rendered backgrounds. The diorama imaging means- along with the PS1 style layouts -that there can be things like circumstantial cuts and close-ups. Every location has a kind of preferred camera angle but you can still do things like see the diorama layout by approaching a location from different entrances.
Fantasasian Neo Dimension looks better than the old Rankin/Bass stop-motion Christmas movies…but something about the magical, moving toy world reminded me of those movies. This effect would be stunning for a game like Kingdom Hearts.
Especially transitional shots, like the one that connects these two images. On a certain level, it’s obvious (even without context) that these are dioramas. At the same time, the camera is used to imply appropriate distances and size proportions.
Nor are the aesthetics the only reinterpretations of older concepts.
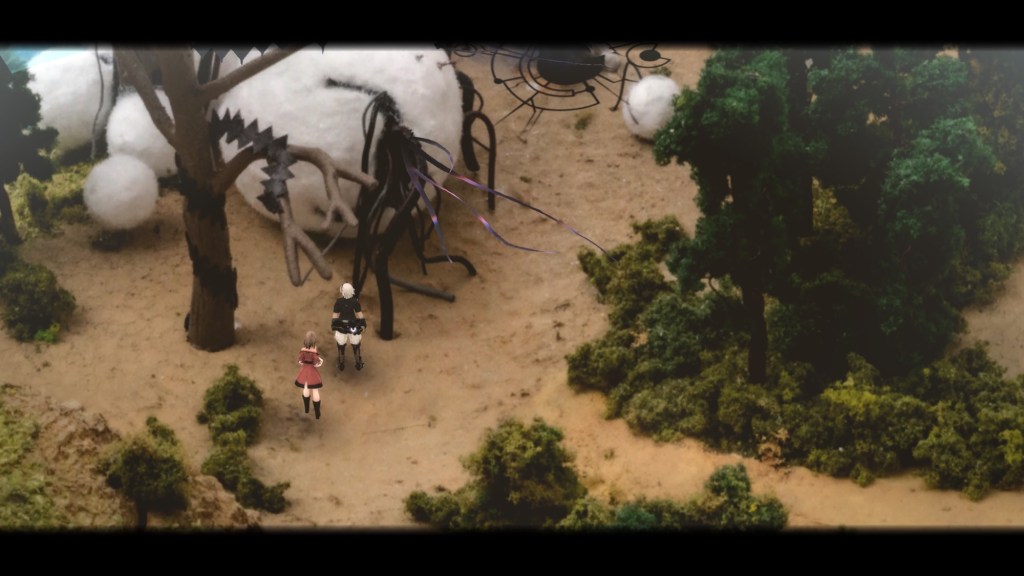
When you start developing more of a party, most of your squad has some way of making use of the three dimensions of the field of battle. Leo, our main character, uses piercing attacks that can be aimed through rows of monsters for maximum damage. Cheryl has a wide damage radius and Kina can launch spells in bending arcs.
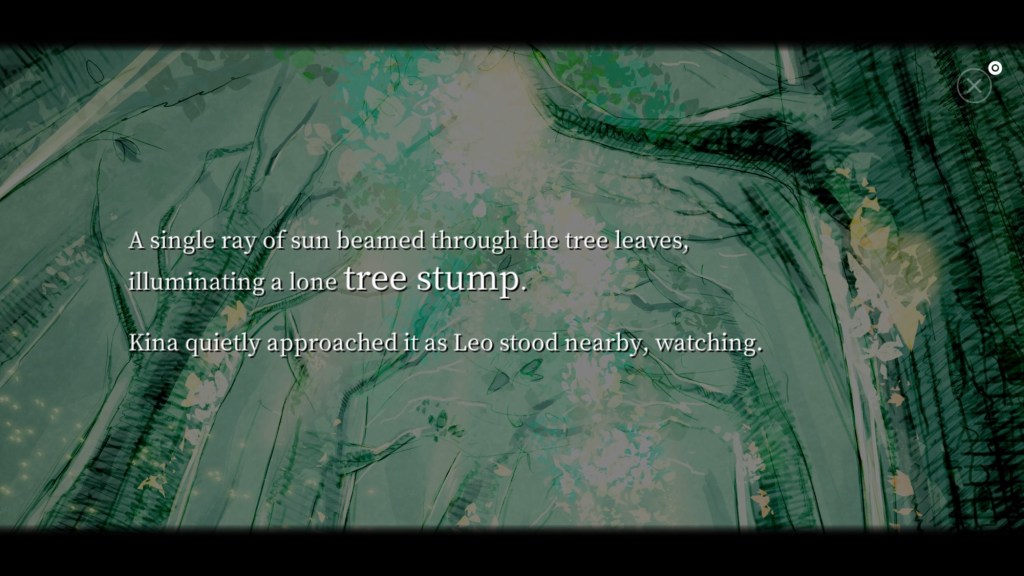
I’m not that far yet but even stuff like these little moments of gondola navigation in Vence feel really natural and fluid. Then there’s the cut-scenes.
A lot of them look like this; especially the quieter, character-driven moments. The first few story book segments cover flashbacks but soon even character interactions in the present unfold as prose.
It’s a small part of the overall game and it wouldn’t surprise me if most people skip these on principle. But I absolutely love the commitment to the mid-nineties JRPG narrative cues.
Once voice acting showed up in gaming, it was everywhere. I’ve also mentioned before how Diablo II and Final Fantasy X seemed a little over-eager. Lots of devs apparently thought that American accents reading lines with no inflection was better than no voice acting at all.
What we lose in translation is a seat closer to the action. For me it does, anyway. Reading the dialogue of character interactions enables me to experience those narrative beats through my own intuition.
Maybe this will clear it up: what did Cloud’s voice sound like in the original FFVII?
Just think about it. I feel like I know what he sounded like. The same way I know what the voices of characters in novels and comics sound like. It’s a really simple design nuance but it’s capable of a kind of immersion that visual and audio realism is not.
Not that this is a super-serious, super-artsy joint. It’s still a video-game-ass video game with an anime-like story. It doesn’t take itself too seriously…but it does take a moment to breathe and get comfortable in the space that it’s capable of filling.
One of the first things you do is battle a tree that magically grows money. Your party gets stalked by a goofy Team Rocket / Ginyu Force villain posse with outfits and poses. The story book segments can also be a little goofy. Just a little. Some funny grammar here and there, maybe a few too many words that end with “ly” (laughingly, captivatingly, etc).
There is also a cartoony love triangle that involves the main character’s backstory, adding a touch of humor to the mysterious lost-memory subplot. There is an implication that Leo was a Zidane-like flirt, once upon a time.
So far, the tone could not be more balanced. But…
This. Just this. Not taking things seriously- just getting comfortable in the space that’s already there. Maybe it’s a little thing but I didn’t know how badly I wanted this kind of narrative experience back.
The Sense Spheres are an interesting piece of world-building. The Neck Thing says that they came to Earth through outer space and are composed of an extraterrestrial substance. Furthermore, the Sense Spheres appeared simultaneously with a global, destabilizing event called the Great Heat Wave. Also known as God’s Wrath.
Thing Thing didn’t exist in the original version of Baroque, so I don’t know how seriously they figure in the lore. Those sources exist on the internet but I’m doing this blind. Taken at face value, though- the behavior of Thing Thing implies that the practice of grabbing things that emerge from the Sense Sphere has precedent.
This appears to be the main difference on the PS1 version: if you read Thing Thing’s dialogue closely and you connect the right dots in the Nerve Tower…it’s possible to get a clear picture on what the Sense Spheres are useful for. As far as I know, the Sega Saturn version required you to figure out the use of the Sense Spheres on your own. Additionally, the Sense Spheres in the first Baroque only sent items to the sixteenth basement floor.
I dwell on how much Thing Thing matters in the lore because it could effect the world-building. If we accept Thing Thing as canonical, then their behavior implies that the use of Sense Spheres to send stuff back and forth is common knowledge.
Or was common knowledge, anyway. I wonder if the Sense Spheres were used as technology in the final days of civilization as it was known.
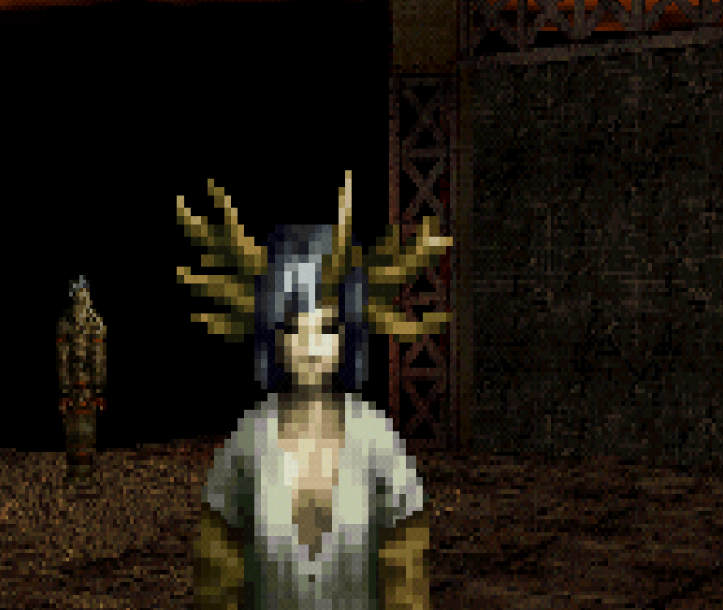
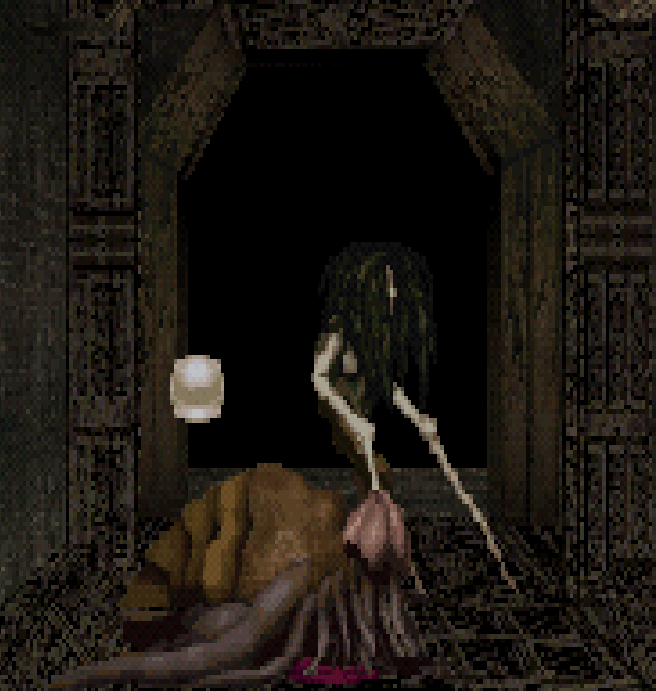
On the fourth level of the labyrinth, there is a ghostly woman named Eliza. In one pass or another, she says that she wants to give birth to a Sense Sphere to restore her insane mother. Above her, things that look like small Sense Spheres float near the ceiling.
Also on the fourth floor (so far), there seems to usually be another woman called Alice. Like Eliza, Alice floats and vanishes like a ghost.
Alice disappears beneath a green Sense Sphere. To date, I have not encountered the green Sense Sphere outside of the room where the random map generation places Alice. Alice’s Sense Sphere is functional but the many small Sense Spheres of Eliza are not.
Otherwise, Sense Spheres are usually red and fixed to the ground. The contrast this has with the floating Sense Spheres feels relevant to their possible origins, mentioned by Neck Thing. If they came to Earth from elsewhere, it sounds like the kind of thing that humans might tether in order to make use of. The presence of grounded Sense Spheres at the entrance and the deep basement looks like an engineering choice. One might suspect that the grounded Sense Spheres relate to the purpose of the Nerve Tower.
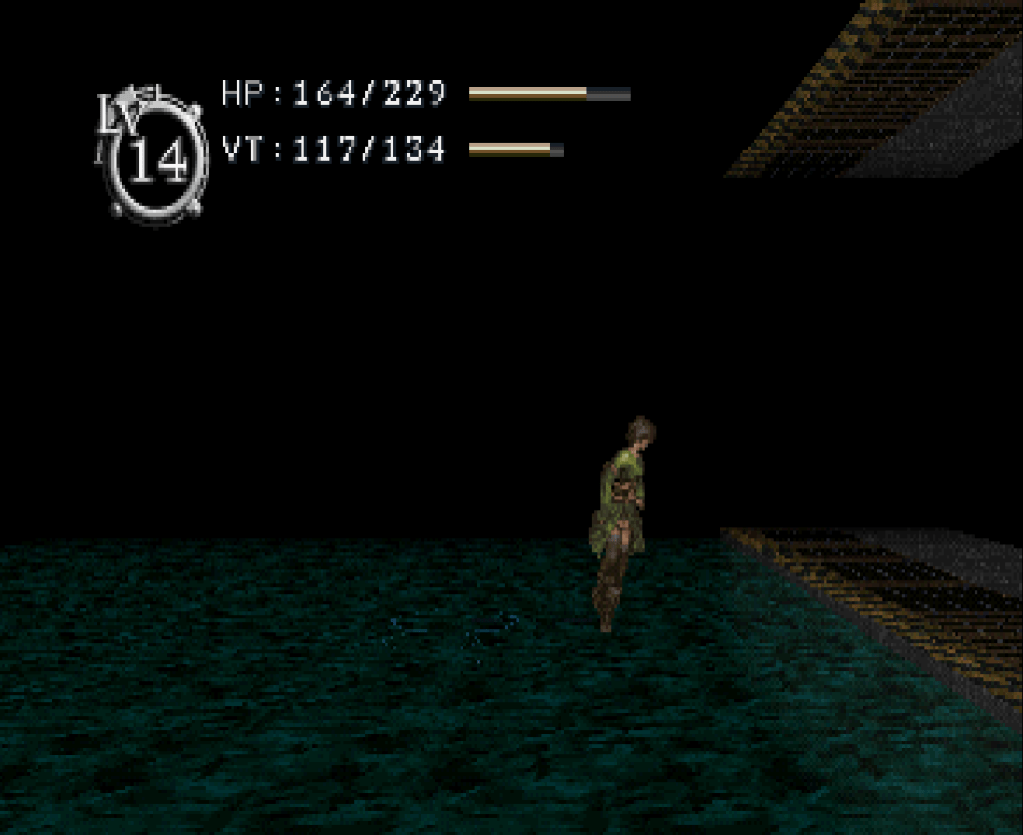
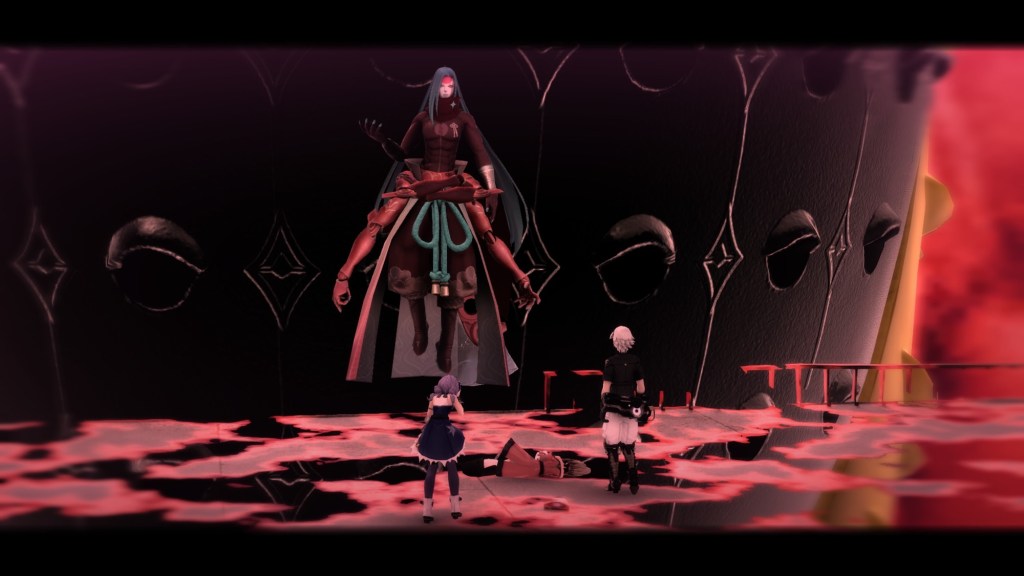
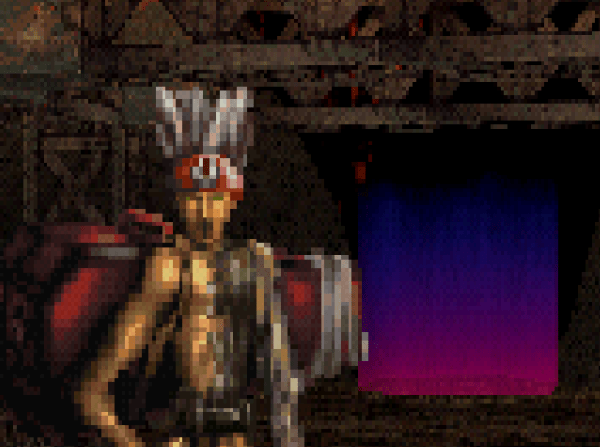
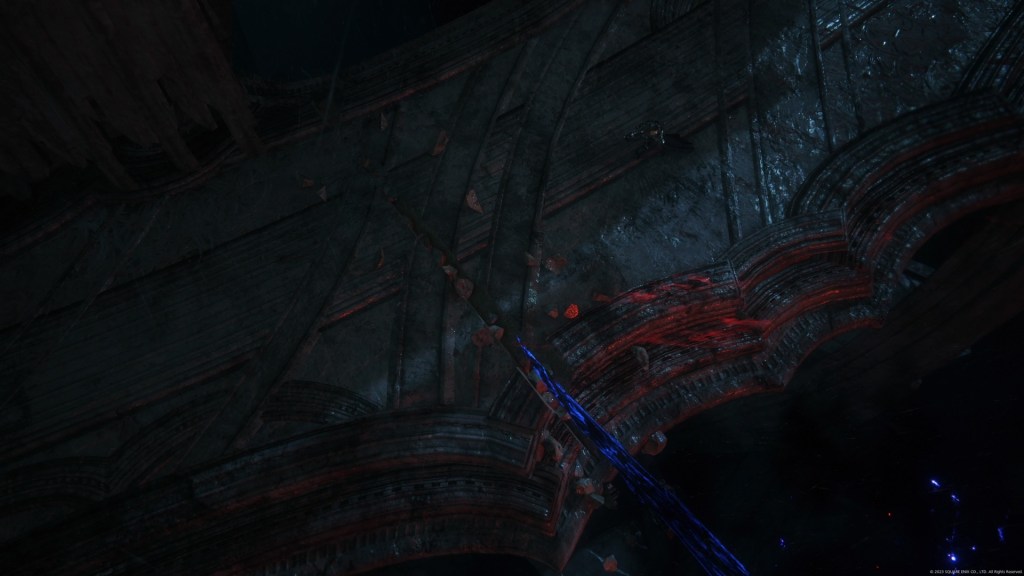
Then…there’s the apparent connection between the player and the Archangel. The Archangel has a projection outside of the Nerve Tower. Inside, you discovered their body impaled on a spike protruding from a Sense Sphere.
So, after another Tower circuit-
You recover a memory of looking down at another version of yourself from a higher floor in the Nerve Tower. It might also be worth mentioning that the you on the ground watched the upper you fall to your death. At what appears to be the moment of impact, several white feathers flutter by the ground-level you.
If anyone was wondering: I’m not sure what triggered that. At first, I thought it was because I found Koriel, languishing in a biomechanical immortality device, who gave me his Idea Sefirot (i.e asked me to kill him and take it).
While I don’t know exactly how I triggered the “watch yourself fall to your death” ending…it’s possible that it was because I did it with Koriel’s Idea Sefirot in my inventory. Maybe that’s it, but I’m hesitant to make assumptions. Or maybe it has to do with passing through the Nerve Tower roughly four times in a row. Dunno, just now.
What an ‘Idea Sefirot’ is comes through, of course, by the words of other people and implication. While I was experimentally attempting to give it to various distorted ones, they treated Koriel’s Idea Sefirot with tight-lipped avoidance that seems half emotional repulsion and half propriety. The Coffin Man says that “holding stuff like other people’s Idea Sefirot makes me feel depressed.” Thing Thing, normally happy to hold onto other people’s stuff, wants no part of it. They almost sound prim: “It would be better if you held onto this. I’m fine”. When you try to hand it to the big guy wearing the white robe with the cross…he says he thought he recognized you: “You’re a member of the Koriel, right? I don’t need the crystals of any Koriel”.
Eliza, in the Nerve Tower, likewise spurns the offer: what she needs is your “pure water”. The one you just tried to give her is undesirable, apparently, because it is not “yours”. Idea Sefirot’s are unique for each person and to offer one to another seems to provoke taboo-avoidance. Maybe because Koriel gave this to us while serving a neverending prison sentence. I wonder if an Idea Sefirot is some sort of ephemeral, after-death vessel.
Speaking of: the Archangel delivers some interesting dialogue, after you make your first complete circuit through the Nerve Tower. Feller says that we must learn to survive, even if it takes awhile. As if by way of explanation, he adds that the Sense Spheres are everywhere. He goes on to explain that the whole world is connected and that a piece of your consciousness is “absorbed by the orbs” and fed back into another version of you. The process is reminscent of the Idea Sefirot. I don’t know if it’s possible to run into Koriel before the third circuit but I at least didn’t find him until round four (‘Myself +3’ lingering mysteriously in the inventory screen). If he is off limits until the fourth pass, then the Archangel’s speech after the first one makes narrative sense. Set-up, y’know.
Yet our situation differs from Koriel’s.
Rather like the Archangel, you are (on one ocassion, anyway) bilocated at two ends of the Nerve Tower.
The distorted ones also have different, successive dialogue. It is from them that we get the earliest overview of the wider chronology: first, there was a global environmental disaster called the Great Heat Wave, which appears to have happened simultaneously with the apparition of the Sense Spheres. Between now and then, the Great Heat Wave turned the world into Baroque.
Between Neck Thing, Alice, Eliza, Thing Thing and the Archangel, we learn that there must have been an intervening period. Human society discovered they could use Sense Spheres for instant travel. Someone eventually builds a complex, Tower-like machine which incorporates multiple grounded Sense Spheres. Two red ones outside of the entrance and one in the deep basement. Having only gotten so far as the middle of a fourth circuit, I’ve usually encountered two additional red Sense Spheres between the surface and the bottom. Lastly, there are the small, non-functioning Sense Spheres of Eliza and the functioning green Sense Sphere of Alice.
(I’m pretty sure that there have always been two red Sense Spheres outside of the Nerve Tower…right? I have this nagging suspicion that there was only one Sense Sphere at the entrance to begin with and a second one appeared later. I’m not sure of it, by any means, but it’s crossed my mind)
However short this intervening era was, many of the present circumstances arose during this period. Neck Thing tells us that the Great Heat Wave is known, to some, as God’s Wrath. Similarly religious language appears even earlier than this: during one of the opening cut scenes, there is a flash of black letters on a white background: “(w)hat must we do to heal our sins?”
Next, consider the discussion of “madness”.
In one of the earliest (if not the first) encounter with Alice, she asks if you remember throwing her mind into chaos. When you do not appear to, she bristles: was it only a game, to you? She sinks into the water below, saying that she is not suffering. Nonetheless, she asks why you didn’t hold on tighter.
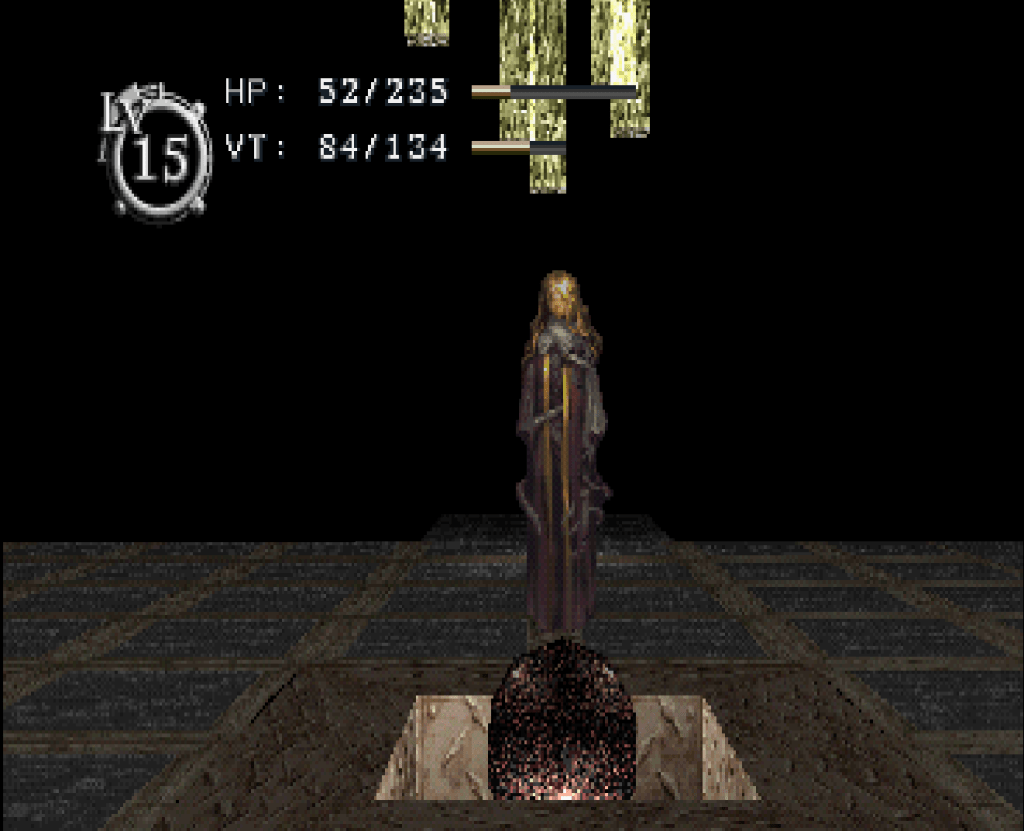
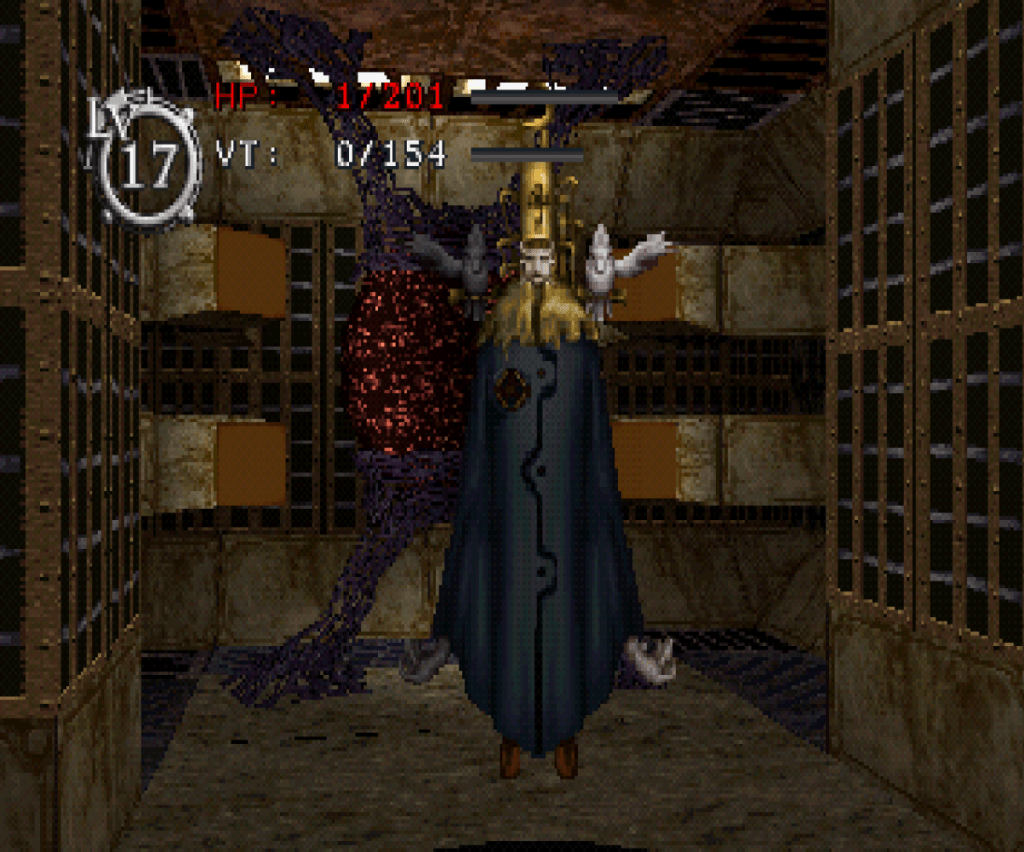
On the sixteenth floor, we find the Archangel’s body impaled on a spike, emerging from a gray, metallic Sense Sphere. This he attributes to the Great Heat Wave, “or should I say, the Wrath of God.” He explains that “this” is all your “sin”. What sin, exactly? Driving the God of Creation and Preservation mad, causing the Great Heat Wave.
The purgation of the mad god is the only way to absolution, according to the Archangel. This, it seems, was the reason he gave us the Angelic Rifle outside. In the final, seventeenth floor, the God of Creation and Preservation waits. If you wait long enough, this feminine being will cover the screen with a giant block of dialogue: “Don’t go mad”, over and over again.
During the fourth pass, Alice asks if we intend to follow the Archangel’s orders. She believes that the Archangel told you to come here, to the fourth floor, and shoot her (Alice) with the Angelic Rifle. She wants to remember the time before she met you, when you both were “melded” together.
If you follow the orders from the sixteenth-floor Archangel and kill the being on the seventeenth, she says that she wanted to be “one with you” again before she dies.
At the beginning of the fourth pass, the Sack Thing says that “(y)ou and the other” screamed during a surgery. According to Sack Thing, the player character said “(w)hy are you tearing us apart? I don’t want to live if it means killing a part of myself.”
On the fourth floor, Alice says that the Archangel tore you both apart. “In order to drive the Creator and Preserver mad. In order to become the Creator and Preserver himself.”
In Baroque, tearing something (or someone) apart could have a few different meanings. For contrast, there is an “angel” worker in the Nerve Tower with a second face growing out of his shoulder. He jokingly refers to himself as a “composite angel”. Alice’s reference to a time when you were both “melded” together could certainly point to a literal meaning: that you were once one being and now you are two. It definitely feels intuitive. But there is another meaning that prior imagery has hinted at.
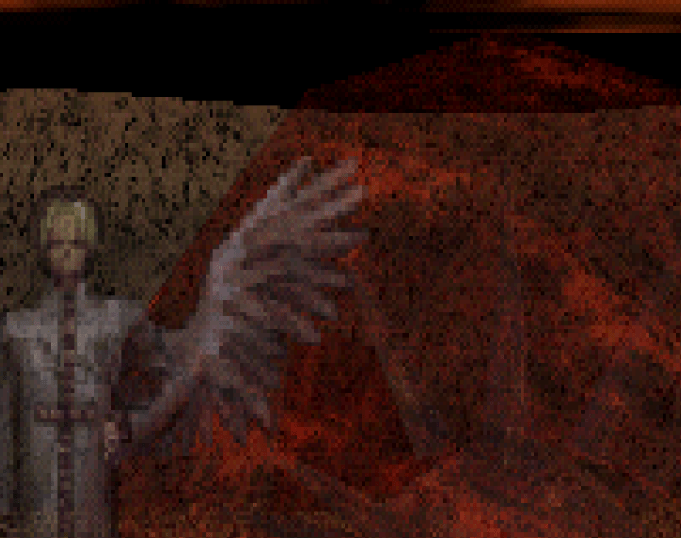
After my first death, this image briefly flashed over the suspension chamber.
After the fourth pass, the Horned Woman has a surprising realization about “that” face. She recognizes it; says it resembled her own. It may be a mistake to assume that normal social cues apply here. Let’s say, for the sake of argument, that she’s not saying this for a completely abstract or non-existent reason. If the Horned Woman is speaking plainly, it is possible that she is reacting to you. Yours is the familiar face that resembled her own.
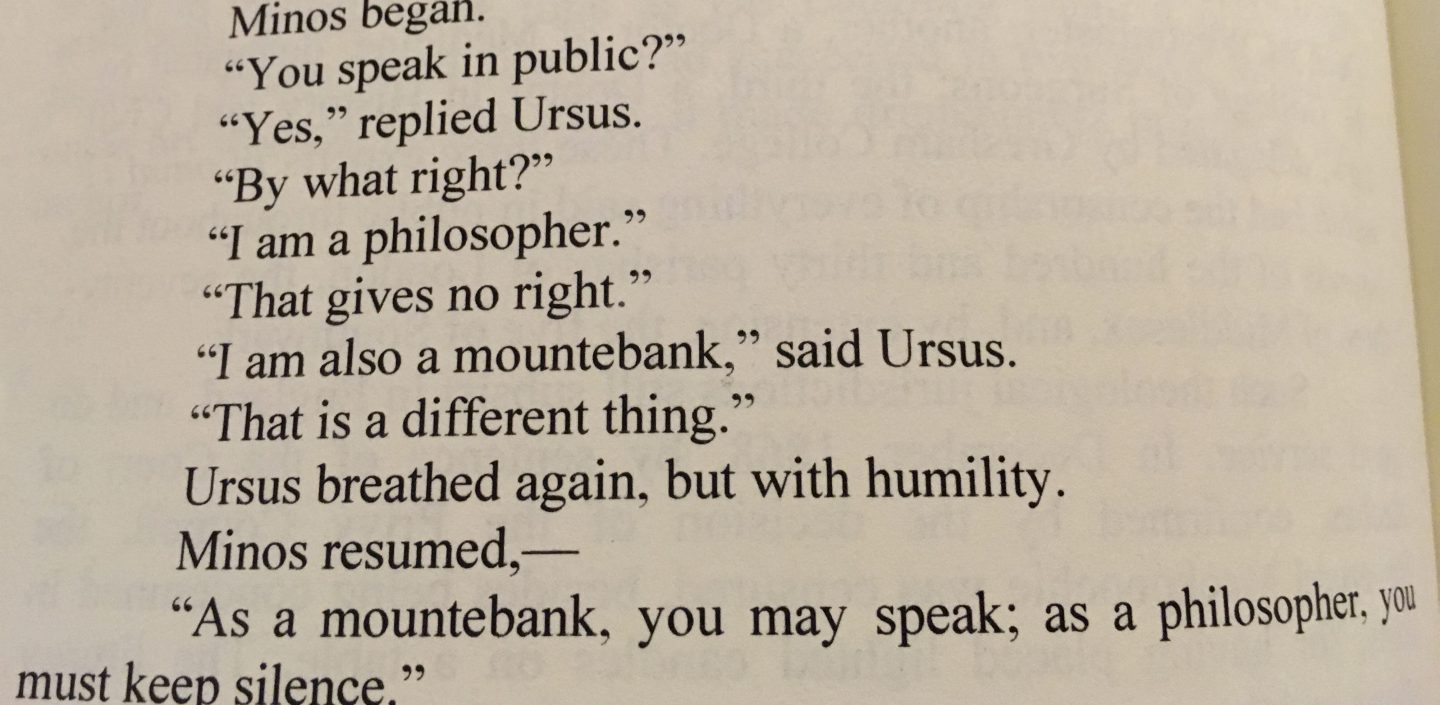
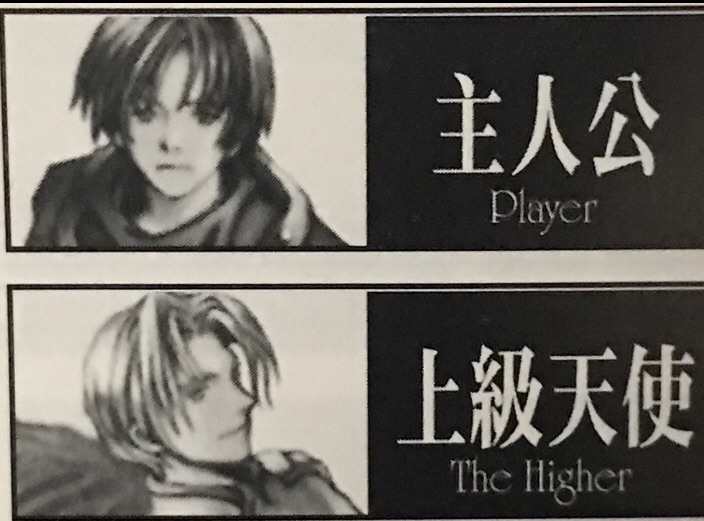
Concerning this…let’s take a look at the instuction manual:
More specifically-
Is it just me, or is there a resemblance between Alice and the player character?
If such a resemblance is intentional, could this tell us anything about the separation they experienced?
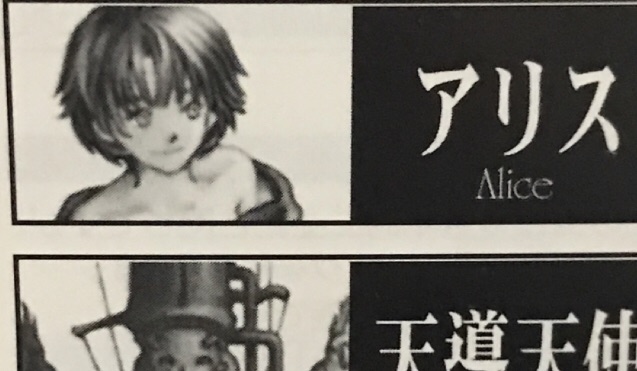
Then there’s this pair-
Maybe I’m giving in to a little pareidolia and/or overthinking it…but I wonder if these two share the same connection as Alice and the player character?
With the Archangel’s (The Higher) place in the sequence of events, they could easily be a kind of alien. They typically influence everything around them and possesses information that they don’t immediately disclose.
Perhaps the Archangel went through a version of the separation before setting foot on Earth? With Eliza being their ‘Alice’?
Contrast that against Baroque’s pre-Heat-Wave human societies. Earth, in general, experienced the Sense Spheres and the Heat Wave as totally unfamiliar, external phenomena. You could say that the Archangel has the contextual knowledge of a non-Earthling.
The resemblance between the names ‘Alice’ and ‘Eliza’ stands out, as well.
Don’t forget the earlier cut scenes with the suspension chamber and the off-screen voices. We are still dealing with the possibility that this is some kind of digital simulation, technologically channeled into the player character’s sleeping mind.
If we keep assuming that the player character is the one in the suspension chamber, whose mind plays host to the simulation…would it then follow that the Creator and Preserver represents a facet of themselves? Such a scenario would readily accomodate the significance of being “torn” from Alice.
Nonetheless…is the resemblance between the Horned Woman, Alice and the player truly innocent?
The prospect that Baroque is occuring in a bio-mechanical simulation leads in the other direction. Dream logic would then be part of the world-building…and uncanny doubling is a common dream phenomenon. The player, Alice, the Archangel and Eliza could be different layers of the oneiric nesting doll.
This also implies that the most common experiences constitute the bulk of the probable design of the simulation. Whatever the simulation is expressing…it is probably doing it through the Nerve Tower and the Archangel. If this is the bulk of what the simulation expresses, then the Nerve Tower and the Archangel are the most direct point of contact between the human host of the simulation and the machine they are connected to in the waking world.
(spoiler warning for original FFVII, FFVII Remake & Rebirth)
So, I was wrong about something-
My only firm prediction for Rebirth didn’t pan out.
It did not end at the Whirlwind Maze, in the Northern Crater. It seemed obvious, at the end of Remake, that the second leg of the story would begin almost exactly at Kalm and Cloud’s first telling of the Nibelheim incident. I figured, since the story would begin with Cloud’s recall-narrative…that the Whirlwind Maze would make for the perfect dramatic ending. Cloud’s memory is challenged directly by Sephiroth with the full force of Jenova’s ability to shape-shift and spell-bind.
Cloud seems almost suspiciously vulnerable to Sephiroth’s psychic duress. He soon becomes convinced that he was a failed Sephiroth clone, made in the aftermath of the Nibelheim incident, with DNA samples from Sephiroth in his post-Jenova state (that, I imagine, is what Cloud recalled Hojo keeping in the tanks in the Shinra Mansion, what with the skin and the hair and blood, most of which could probably have been taken forensically after the Nibelheim incident- skewered leg, other tussles during his rampage, etc).
I thought it was a great opportunity for a cliff-hanger that would, at a convenient narrative stopping point, add maximum drama while expanding the scope of the story, boosting the set-up to the third act.
Cloud’s psychic glimpse, early in Remake, upon meeting a robed cell-carrier for the first time. That background was also a reason I thought the Whirlwind Maze would play a significant role soon
Nonetheless…Lifestream-tinged wind-storms made their appearance in the final act of Rebirth, even if it wasn’t in the Whirlwind Maze. Similar looking phenomena dominates the horizon in the Terrierverse, where we find Zack.
One wonders if these visual cues will come together when the final third of VIIR does portray the Northern Crater and the Whirlwind Maze. If they will mean what they meant in Rebirth but within the Whirlwind Maze, nestled against the edge of the crater.
Before going that far, let’s review what they actually were in Rebirth. They manifested in the sky in a certain cluster of worlds. These include the part of the Terrieverse that Zack wanders into at the end of Remake and the beginning of Rebirth. Elmyra tells Zack that some people think that it heralds the end of the world. Shinra appears completely galvanized around it, in spite of other recent blows to Midgar like the fall of the Sector 7 plate, the bombing of mako reactors and something that was widely perceived as a tornado.
It seems obvious to me that this is because of the interdimensional nature of what happened at the end of Remake. Rather: what usually happens when Sephiroth conjures a wall of destiny. Sure enough, at the end of Rebirth: Sephiroth manifests the wall of destiny on the outside of the Forgotten Capital of the Cetra. The last time this happened, someone (Zack) ended up in a cluster of worlds where the sky is covered with the same Lifestream-like glow as the whirlwinds in the Northern Crater.
One possible reading is that the Whirlwind Maze in the Northern Crater is dimensionally-unique space. The cluster of worlds containing whirlwind-green horizons may be distinguished by the fact that their entireworld(s) are covered with the dimensional uniqueness of the crater, rather than a discrete location within a world.
What if: the Northern Crater is where it all came together for extra-dimensional Sephiroth. The event that broke the Sephiroth/Jenova/Whisper-conglomerate out of the first timeline also set them on the rampage that leads to the other two timelines. An interdimensional phenomena arising from a certain place may express itself in the same place across timelines. In a few different worlds, it looks as if a particular location is haunted by interdimensional weirdness. This could be an outside view.
In the world where we spend the most time with Zack, the whirlwind-glow is commonly called the rift in the sky. That looks like an inside view.
From the ease with which extra-dimensional Sephiroth omnipotentally manifests in the worlds with the sky rifts…it seems to follow that those are the worlds that are under the pressure of extra-dimensional Sephiroth’s Whisper-conglomerate. Directly against it, maybe.
How far out can Sephiroth go, exactly? How far out was extra-dimensional Sephiroth during his appearance in Remake and then in Rebirth?
Speaking of him-
Near the end of Remake and throughout Rebirth, the story can be divided between the timeline containing the party and the timeline containing Zack. At the end of my Rebirth review, I considered the relevance of a third timeline, where the extra-dimensional menace originated.
Before now, I’ve assumed that extra-dimensional Sephiroth originated from the “first” possible timeline that we, as gamers, are aware of: that which begins with the first Crisis Core and ends with Advent Children and Dirge Of Cerberus. That, of course, would go with the assumption that Jenova ultimately “won” in that timeline- either at a future date not portrayed or subtly “winning” in the present. Jenova (and, presumably, Sephiroth) won and turned Gaia into another flaming vessel for Meteor, from which to proceed to new planets and timelines to conquer. Maybe the mysterious fate of Genesis (post-Crisis Core and throughout the Deepground program in DoC) had some bearing on Jenova’s apparent victory in that timeline.
The theory has a ring of truth, considering the tone of the ending of the original Final Fantasy VII. Yes, it left room for some hope. Life, post OG VII, continued after the apparent fall of both Jenova and Shinra. Nanaki, at least, fills out the typical lifespan of his kind and begets a family along the way. Midgar, however, suffered damage from both Meteor’s approach and the abrupt, last-minute intervention of Holy. Some hundreds of years later, Nanaki and his cubs unexpectedly find themselves on a cliff, affording a panoramic view of Midgar, completely overgrown with wildlife and greenery.
Yet Midgar is only one human city-state: it’s downfall can only relate to the downfall of Shinra. Maybe humanity isn’t on top, just then, but wasn’t the whole story about humanity’s growing pains anyway?
The tone of the ending is tough on humanity but it is also fair, considering events up until then. A new planet-threatening crisis derived from human meddling (Genesis, post DoC) would cut against any possibility of a positive arc for humanity…but if Sephiroth and Jenova somehow came out on top “in the end”, then maybe it wasn’t looking good for humanity anyway.
Or, if Genesis didn’t “cause” it, then maybe Genesis was the one who brought Sephiroth’s extra-dimensional Whisper-conglomerate over the veil. Maybe the circumstances need to be the same to make contact with other Gaias, hence the insistence of “enforcing” the original timeline (Nanaki’s flash of the original ending near the end of Remake, i.e. “[t]his is what will happen if we fail here, today [sic]”).
Given some lore introduced in Rebirth, though, I’m not sure if extra-dimensional Sephiroth did come from the original timeline. The behavior of the black Whispers in Remake were clearly interested in enforcing the original timeline. We now know that the intentions of the black conglomerate-Whispers are not just enforcement of its creation, though: maybe enforcement of a temporal entry point? One that depends on the unfolding of the original timeline?
The enforcement of that timeline matters at least a little; the ‘analysis’ blurbs for the Whisper Harbinger’s three lesser Whispers say that they are protecting their timeline of origin. In a recent Ultimania guide, some of the creators of Remake effectively told the interviewer that the three end boss Whispers are Kadaj, Loz and Yazoo from Advent Children. The Ultimania statement, the ‘analysis’ blurb in Remake and the behavior of the Whispers in that game all attest to the enforcement of the original timeline. If not for origin, than for an entry-exit causality juncture which (presumably) enabled them to survive the original timeline.
This would also necessarily mean that extra-dimensional Sephrioth did not come from the original timeline, though.
Jenova-facilitated contact from a third timeline would explain some of Cloud’s memory-flashes in Rebirth. One of them dates back to the beginning of Remake, when Cloud encountered a robed cell-carrier living next door in an apartment building. Lots of robed figures, against a windy, rocky background, with some jagged peaks that I find reminiscent of a location from the original. More recent memory-flashes include the deaths of Zack and Tifa.
Strictly speaking, the original Final Fantasy VII furnishes some intuitive answers. By the end of that game, we knew that Cloud was harboring Jenova cells ever since Hojo experimented on him and Zack in the Shinra Mansion. It’s commonly interpreted that the psychic sensitivity and shape-shifiting potential of Jenova caused Cloud’s personal cell colony to fabricate memories, such as the ones demonstrated in his telling of the Nibelheim incident in Kalm.
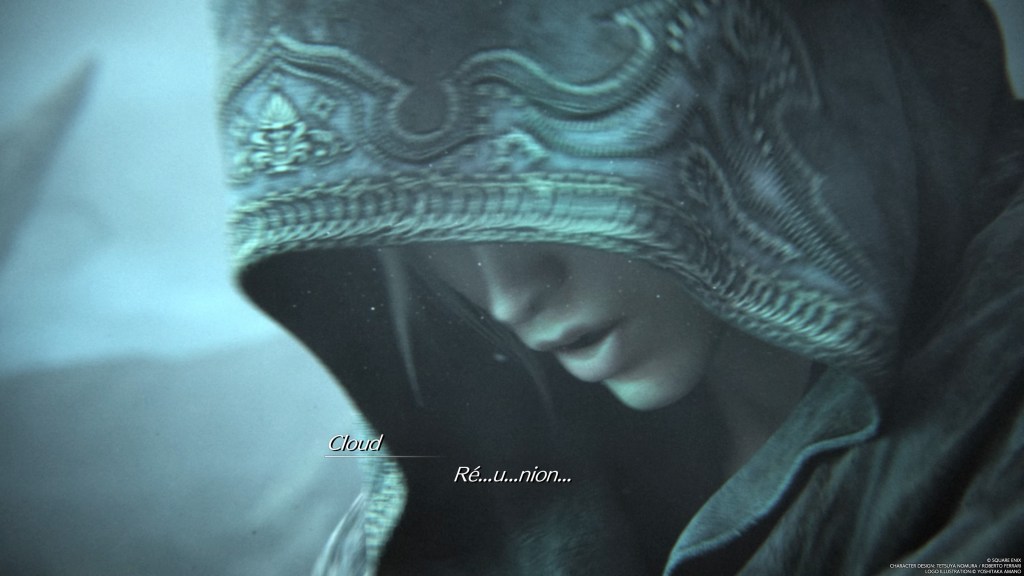
We also know, from the original, that Sephiroth will use any psychic pressure that could possibly help him. If its helpful for him that Cloud start believing that he’s a Sephiroth clone, Sephiroth will see it through. If Jenova and Sephiroth in Rebirth have that much in common with the original story, then artificial memories of Tifa and Zack dying are definitely something that they might try. The vision of Cloud in the cell-carrier robe, seemingly shuffling around the Whirlwind Maze muttering “reunion”, could also be a whole-cloth fabrication, for that matter.
How many whole-cloth lies have we seen from Sephiroth, though?
The frozen, crystalized heart of the Northern Crater, as seen from the scale of viewpoint characters (PS1, obvs)
The biggest candidate would be the idea that Cloud is a Sephiroth clone. Yet, considering that Hojo likely dosed Zack and Cloud with Jenova cells from biomatter left by Sephiroth, it isn’t entirely off base either. Sephiroth and Jenova will control the framing of apparent information and elimate information but they don’t appear to add information, except in a blunt, copy-paste way. Cloud’s delusions of “being” Zack are crafted around his observations of Zack. Cloud can’t even leave out the traits he doesn’t want idealized- those are given to a random Shinra trooper, who just happens to be in all of the situations Cloud himself actually would have.
The telepathic pressure of Jenova seems to lie more in misrepresentation and projection than outright fabrication.
Obviously, if you think that Jenova can do fabrication, then you can sweep those recent memory-flashes into the ‘deception’ category.
I’m inclined to think that the memory-flashes of Cloud in the robe, the death of Zack and the death of Tifa are probably based on something, even if the source and the meaning isn’t direct. A third timeline accomodates this, especially considering that it was probably a timeline in which Cloud turned as ugly as Sephiroth (to say nothing of the role played by the loss of Zack and Tifa).
In the version of this theory that I arrived at during the end of my Rebirth review…this timeline makes itself known to Cloud (potentially from a young age) for very specific reasons. A very specific reason that can hide in the shadow of existing world-building.
Remember how much the VIIR devs have emphasized their attachment to faithfulness. Any new cosmology innovations will not likely edge out existing cosmology.
Narrative changes have been made, of course, but I think the majority of those arise from the modern graphics, which tie the scale of the perspective to human physical proportions. Things that happened in the overall plot of the original game find their way into comparable places, if they can’t be in the same place (Fort Condor-related sub quest in Junon, even if the actual Fort Condor location isn’t there, etc).
Dramatic changes have also been made with extra-dimensional Sephiroth and the Whisper-conglomerate. But I think those changes are more likely to rhyme with the original cosmology than contradict it.
This rhymes with Cloud’s mental wounds.
The dude has had a painful relationship with self worth. His last commuincation with Tifa, before her childhood accident on Mount Nibel, was urging her not approach the rope bridge because there was nothing to find; the local folklore about Mount Nibel is folklore only and the land of the dead is not there. Cloud only made his presence known once Emilio and others left Tifa alone on the mountain. He accompanied her to the rope bridge and brought her back to Nibelheim. In the original, Cloud was smeared by Emilio and the others- stemming, apparently, from the shame of their abandonment.
His first experience sticking his neck out for someone ended with at least a temporary bad reputation and isolation from Tifa. After that, the quiet anger and resentment of Cloud’s early adulthood began to sink through. At age thirteen, he tells Tifa that he plans to join SOLDIER, in emulation of Sephiroth.
Here, it becomes helpful to remember the beginning of Remake: something happened, with a leaky mako pipe, that had some connection with Aerith’s awareness of the other timelines.
Nibelheim is also the site of the first mako reactor. And it’s known to leak. And early-teen Cloud is nurturing his indignance with power fantasies.
The original story accomodated this with the relationship between Cloud’s inferiority complex and his eventual dosing with Jenova cells. Obviously, both of those things are still present and active in VIIR.
Jenova is known to shape-shift and use psychic manipulation. All she needs is a psychological exploit. But this is a world where Jenova is connected, across timelines, to extra-dimensional Sephiroth. One of the trickier parts of differentiating between extra-dimensional Sephiroth and local Sephiroth is that both rely on Jenova which means telepathic influence could be coming from one, the other or all of the above.
What if Jenova had reference material to use on Cloud, from the Whisper-conglomerate? Say, a timeline in which Cloud became a famous 1st Class SOLDIER alongside Sephiroth? Feeling small can create big dreams.
This timeline, as far as we’re concerned, would look completely random unless it was built up beforehand (Cloud in the robe, Tifa and Zack, etc).
The death of Zack (in the rapids of Mount Nibel instead of outside Midgar) is also clearly not meant to be a throwaway memory-flash. When it happens, Cloud says to Tifa that they need to tell Aerith, for her closure. Tifa tells him that she will take care of it, later, in privacy.
Later, if you end up with Aerith during the second Gold Saucer visit, Aerith delivers a combination of familiar and unfamiliar dialogue. She comments on Cloud’s uncanny resemblance to Zack in his mannerisms and bearing. Cloud assumes that she is beginning to grieve because Tifa told her how Zack died. He says (pretty much) “Tifa told you, huh?”
We then get a brief flashback to that conversation and Tifa apparently choked: she only managed to say that “Cloud remembers Zack now” before losing her nerve.
Aerith, therefore, has no obvious reason to know what Cloud was talking about.
To address some concerns of Aerith’s awareness:
Before now, Aerith had revelatory little memory-flashes about the “original” timeline. Throughout Rebirth, those visions are less available to her. She tells Tifa, in Kalm, that she lost a lot of those memories (presumably when they crossed the wall of destiny on their way out of Midgar). Aerith tells Nanaki that she managed to regain some of them and gain further insights. In spite of that, Aerith doesn’t appear to have the whole, intact, extra-dimensional awareness that she did in Remake. When Aerith touches other people in Remake, they get flashes of the original CC-DoC timeline. That touch-effect isn’t present in Rebirth.
What all that means is: Aerith doesn’t necessarily know how things turned out “first time around.” Meaning, she may or may not have any awareness of how Zack died outside of Midgar, much less Cloud’s memory-flash of him falling into rapids on Mount Nibel.
So. Back to Aerith and Cloud, during their Gold Saucer date. Aerith might be unaware of any subtext that would let her know what Tifa was driving at. Aerith may have no idea what Cloud was talking about with the “Tifa finally told you” line. In any event, Tifa did not tell Aerith what she said she would and Aerith says nothing to imply any contextual knowledge of this.
(Not to stray too far from the Gold Saucer date…but consider what Tifa probably thought of Cloud’s dead-Zack-in-the-rapids flash. Cloud has already voiced the idea that Tifa herself appeared to die after Sephiroth slashed her open. Maybe it’s manipulation from the third timeline but Tifa seems to think it’s psychosis. She has also sat through a telling of the Nibelheim incident by Cloud, with Cloud doing all the Zack stuff. Tifa likely assumed that the memory of Zack’s death on Mount Nibel was purely delusional. In that case, she wouldn’t want to freak Aerith out over Cloud’s problem and therefore froze)
If someone starts with the VIIR games with no knowledge of the original, the vision of the Mount Nibel rapids might appear even more significant.
Another reason I find the possibility of a third timeline compelling: in the original, Sapphire Weapon goes down after taking a mako cannon shell at point-blank range, never to be seen again. If that was meant to be the death of Sapphire, then I wonder if the ending of Remake may have included another hint at the third universe.
Basically, I think the Whisper Harbinger in Remake looks like Sapphire Weapon.
In the original, Sephiroth’s organic body- from which he psychically projects into cell-carriers -is suspended directly above Sapphire Weapon’s head in the Northern Crater.
Dunno about this next comparison exactly but I couldn’t help but notice the narrowed eyes-
This always stood out in my memory as one of the few times we see Sapphire Weapon’s eyelids move in the same way they did before (you know, like they did behind the frozen wall within the Northern Crater)
To say nothing of the one obvious deviation from Sapphire’s traditional design-
I think the arms might be the only thing that PS1 Sapphire DOESN’T have, yet allowances must be made- Sapphire Weapon wasn’t originally suffused with an excised Lifestream dominated by Jenova and Sephiroth, so…
These similarities feel even more significant after seing how Rebirth depicted the Lifestream-view of the interdimensional incursions of Sephiroth between worlds.
VIIR features a new Weapon-being, known to come and go from mako reservoirs in at least two ruined reactors: first in Corel and then Gongaga.
After everyone’s first evening in Gongaga, they wake up to disturbing news. Shinra is fast approaching the mako reactor ruin and Whispers are preventing members of the militia from approaching. The party encounters them on their way to the reactor but they seem far less interested in them then they were in Remake. Cloud sees one of them assume the shape of Sephiroth, which I suspect was simply extra-dimensional Sephiroth making his presence known to him.
At the reservoir (which is still somehow drawing mako despite being non-functional), the Whispers are swarming in a spiral overhead. Cloud is overwhelmed by Shinra troopers when extra-dimensional Sephiroth manifests, telling Cloud that he needs to embrace his anger without reservation. Cloud then becomes an unstoppable BEAST, brutally and efficiently cutting down all in his path.
Tifa is alarmed at this sudden change and approaches him. Sephiroth repeats his assertion that Tifa is dead and that this person is a Jenova cell-carrier. Cloud mumbles this as it’s relayed to him and Tifa is flabbergasted: she already showed Cloud her surgical scar, how could he still be on about this?
The Whispers in the sky disappear and Cloud attacks Tifa, who dodges his blade only to fall backwards into the reservoir. As she falls, extra-dimensional Sephiroth and the Whisper-conglomerate (worst band name ever) withdraw from Cloud and he realizes what he’s done.
Tifa, meanwhile, gets swallowed by the Weapon. This Weapon, by the way, has a Huge Materia socketed into its body. Rufus, earlier, told his cabinet that Weapons appear when the planet is in danger and contain their own Huge Materias. This, apparently, pertains to Weapons in general and not just this specific whale-like one.
Next, we are rooted in Tifa’s perspective, inside the Weapon. The environment has at least a passing resemblance to the Lifestream astral plane from the original- the one Tifa and Cloud end up in after a Lifestream swell erupts in Mideel, where she psychically helped Cloud separate his own memories from the cell-colony illusions.
Here, like Mideel in the original, Tifa concludes that she is within the Lifestream. On this plane, the Weapons are not just defenders of the planet: they are her avatars.
To everyone’s awestruck relief, the Weapon surfaces from the reservoir again, to return Tifa in a flash of green light.
Tifa later tells everyone (after a therapuetic debriefing with Cloud) that she saw the planet in conflict with an outside menace. This maps onto Tifa’s vision of the Corel-Gongaga Weapon fighting against the Whisper-conglomerate. For part of this, Tifa is looking outward at the Lifestream from within the Huge Materia in the Weapon’s belly. After going a few rounds with the Whispers, the conglomerate parts, revealing extra-dimensional Sephiroth, who lunges through the Lifestream and cuts open the Huge Materia, ending the vision.
Immediately before gouging the Huge Materia that Tifa is looking out from
Speaking of Cloud and Tifa’s Lifestream adventures…they still have a distinctly psychological structure, even with their significance beyond the individual. Weapons represent the will of the planet, much like Holy. The planet contains the Lifestream. Yet Weapons can interact with other continuities from within it, both inside and out like a Russian nesting doll. As if the Lifestream contains avatars from different timelines, like multiple personalities within the same mind.
If Sephiroth and the Whisper-conglomerate are going from timeline to timeline absorbing different Lifestreams, an avatar through which to travel to other timelines would be important. Also: if Jenova’s ultimate goal (perhaps her life cycle) depends on subjugating entire Lifestreams, that could be expressed as bending the planet to her will. The will of the planet would become her own, perhaps capturing the local Holy and the local Weapons.
Meanwhile, in a certain timeline, Sephiroth is suspended in the Northern Crater, directly over Sapphire. Just sayin’.
This is a rogue-like, such as Diablo. Also like Diablo, it appears to include a small community outside of an apparently unique ladder of progress- leading either up or down. This game also has a first-person perspective, which I don’t think I’ve encountered in an RPG outside of Shin Megami Tensei and Persona.
Subtitles indicate offscreen voices in the opening cutscene. These voices are talking about sedatives and simulations and whether or not someone is conscious. We are left with the impression that the span of time we keep groundhogging over and over again is what they mean by “simulation.”
About that last part-
Baroque has recognizable RPG mechanics. Level-and-EXP-based progression with stat-building, equipment collections, implied “role-play” what with the first-person POV (nineties versions) and our self-named protagonist.
Little of which has any bearing on the player progress data recorded by the game, other than the “suspend” function. Without “suspend” (quicksave) there is no way to maintain progress in the Nerve Tower between sittings. Which places all of the onus on a complete trip without a single death.
There is a separate category of save data called “arise”, which starts you at the beginning of your most recent pass through the loop.
That’s our rogue-ladder, by the way. Diablo has the pit below the cathedral, Azure Dreams has the Tower of Monsters and Baroque has the Nerve Tower.
One of your first acquaintances on the “ground floor” urges you to hurry to the Nerve Tower before saying anything else. A moments’ distraction or idleness is paid with by either HP or VT, so you might decide to hurry up on your own out of a vague sense that doing expected things has positive results.
No one ever says so, in so many words. But it’s an intuitive assumption.
With some effort, it bears out this time. Setting foot in the Nerve Tower, alone, does nothing. Relief is eventually offered by monsters called “grotesques.” Upon death, they turn into little white spheres, along with any other item drops. The spheres are what keep things somewhat comfortable, as killing grotesques for spheres regularly is the only way to keep VT topped off.
To start with the familiar-
HP is, of course, hit points. You want them as far above zero as possible and taking hits make the number go down.
So long as you don’t get poisoned, HP counts slowly toward its upward limit, based on leveling. This slow recovery happens as long as VT is above zero and VT ticks away, roughly, with the seconds. Running out of VT will cause your HP to drain rather than heal. Without a quick infusion of VT, this drain can kill you.
So the solution is killing grotesques whenever possible. While you’re grabbing the VT orbs and trying not to take hits, it also pays to make prompt use of any restoratives you come across. If either HP or VT is full, they usually bump up your upward limit.
Conservation is best saved for after you’ve KO’d a few times. By then, you should be a little more acclimated to how long-term play works.
Speaking of- levels and stats do not carry over between KOs. Neither does your personal inventory but items can be secured in a kind of dead-drop.
A bit of a grind, really. But people who play through the second quest of LoZ Outlands for their blogs don’t get to complain about difficulty.
With care and repetition, it becomes apparent that the tower is only so long. Or…I guess…its successive basements so deep, since that seems to be the direction we’re heading. If you have a few hours and are willing to roll with some trial-and-error, you could, conceivably, clear the whole basement in one sitting.
One must not count their chickens before they hatch. It pays to see through sticky situations. A recent favorite of mine is running low on both VT and HP surrounded by grotesques I couldn’t possibly kill in the time in takes to survive contact. Like many rogue-likes, Baroque has randomly generated floors. Strategizing must therefore happen in somewhat broad strokes.
It is possible to survive those situations but it is also possible to die because of HP/VT. The random level-generation accounts for a lot of stuff like item drops. A little bit of patience can be surprisingly rewarding.
So things get punishing. What’s actually going on, though?
Rather soon, you realize that you begin the same time loop over and over again, with each death. In some loops, there are unpredictable cues and statements about how the particular loop you’re in right now relates to the other loops. Clustering, usually, into A. it’s different this time or B. it’s never different.
My first death occurred in the Coffin Man’s “training ground”. This triggered a cut scene of a coffin-like suspension chamber. With the context of an earlier cut scene, it makes sense to assume that the player character is inside it.
If you managed to talk to the Archangel before that point, he says that, at “this time”, he exists where he stands and, simultaneously, somewhere else. He says that this “is because this is not the real world”. He goes on to say that, eventually, the player character will awaken to a reality where such “illusions do not exist”.
After dying during the training of the Coffin Man, the Archangel treats you as if there is nothing to say or explain. He appears surprised as he notes that you are, apparently, struggling to speak, and have lost your memory.
A background observation slips through before your muteness and memory loss are apparent. The Archangel says that, if that’s the only problem you have than you’ve been lucky. He realizes it is not the only problem when he observes your (somehow) apparent memory loss.
If, at that point, we are truly free of the simulation and have entered the real world for which the sim was a model…it would make sense if things happened suddenly that were not expected to those who appear to be in charge. Accidents happen in real life. It may or may not be relevant to note that this is the first time I’ve encountered one of his most well-known lines: “(t)here is significance in you using it”, as he hands off the Angelic Rifle.
(The Angelic Rifle will level any grotesque you encounter but it only has five shots and I have not seen any ammunition item drops)
At this point, I have a few questions. One of them is how many of these events happened because of something I did, immediately prior? Did I get the second suspension chamber cut scene because I died in the lair of the Coffin Man? That had also been my first death. Could the second suspension chamber cut scene simply be triggered by your first death?
Neck Thing, one of the NPCs clustered outside of the Nerve Tower, says that the Coffin Man makes him sick by profitting off of the catacombs. This tempts me to attribute the recent change of circumstances to dying under the roof of the Coffin Man. During the second suspension chamber cut scene, one of the off-screen voices asks if “he” just died. Two contrary opinions follow: “this one is garbage to” and “it’s off the charts!”, as if two people saw the same thing and had opposite reactions.
Less defensible but I can’t help but wonder: the suspension chamber cut scenes imply that the simulation is created in concert with your unconscious mind. If the oneiric projections are the basis for representations in the simulation, then consider this: there is a figure for whom you feel instinctive discomfort. You have no idea whether he is a human being or not or what his life and thoughts consist of. Regardless of his humanity or lack thereof, he is one of those whom the Archangel calls “distorted ones”.
Their lives and thoughts must consist of something, though: however incomprehensibly “distrorted” they may be, they are obviously sentient.
Yet for no reason that you are aware of, you give this person a wide berth. He carries a coffin on his back. He is both dangerous and duplicitous and appears to enjoy a kind of power. This I think is implicit in his ability to somehow profit from what happens in the catacombs.
One thing your subconscious might be wrestling with is what just happened, immediately before going under. Perhaps you were compelled to step into the suspension chamber yourself. Maybe you volunteered for it. It entailed a degree of risk, which your subconscious would also necessarily be aware of.
The whole notion of what just happened could make a menacing impression on an unconscious and suggestable mind. You may have thought, before losing consciousness, that this suspension chamber could well be your coffin. Something like the Coffin Man would make sense as a projection of your unconscious mind. If that happened, then such a projection might be something that the simulation drapes one of its NPCs in. Especially if this NPC has some sort of direct link to the life-support or a background program for the narcotic sleep control. Something not so different from the renegade programs portrayed in The Matrix: Reloaded and Revolutions.
An association between the second suspension chamber cut scene and the Coffin Man seems likely. A simulation-based one writes itself.
This is not the only possibility but it is easy to dwell on. At this point, you are aware that dying in the Nerve Tower and repeating the loop all over again is the most basic game play experience. Whatever else happens, whatever may be true about the context of your plight, that much has proved reliable. Being locked in a simulation would accomodate this.
As eternal as the time loop may be, though, the locals do not appear unanimous on it.
Repeated passes through the loop will also eventually draw your attention to a number in the lower right corner of the inventory screen, when hovering over the (so far) changeless presence of an item called “myself”. When you start off, the number next to your “self” is -1. With each death in the Nerve Tower or complete passes through it, the number increases to 0 and onward. The opening cutscene features a montage of images including a black screen with a large ‘-1’ in the lower right corner.
On the subject of whether every pass is unique or every pass is the same, this stands out. It is the only thing that is visibly changed with every pass through the loop. The dialogue of the distorted ones change as well but with each fresh loop it’s almost as if the prior loop might not have happened. Each floor below the Nerve Tower is randomly generated. The growing number of “selves” is the only clear evidence of consistent, long term progress on the “arise” memory card data (other than wherever the NPCs are in their dialogue trees).
There are other ways that long term progress can manifest, if one is bold, observant and persistant. With the ability to make multiple passes through the Nerve Tower with no relief but the “suspend” quicksave, you encounter things called Sense Spheres. On the original Sega Saturn version of Baroque, items tossed into Sense Spheres would appear around the last one on the sixteenth basement floor. I am, however, doing this on the PS1.
The PS1 features its own unqiue distorted one: Thing Thing. Thing Thing normally tells us about how he collects things that get spat out of a Sense Sphere just outside the Nerve Tower. Yes, it was always there- but nothing draws your attention to it early on, except its relative closeness to the Archangel (or his projection or bilocated presence). Anyway, deck Thing Thing in the face and he will offer to return up to five articles you previously threw into the lower Sense Spheres.
With a lot of care and maybe some luck, Thing Thing enables a way to add some cumulative progress to successive passes through the Nerve Tower. With adroit judgement of the things you send to the surface, you can leave yourself equipment to start your journey with or power-ups that buff said equipment or even level you up before setting foot in the Nerve Tower.
Final Fantasy XVI attempts something simple: a classic FF story- like one of the first five games -with cinematic realism.
With the creative direction Square Enix has been going in for the last few years, a turn-based game was never likely. FFXV and VIIR mainstreamed the action-RPG for Final Fantasy.
Meanwhile, in the gaming landscape in general, turn-based RPGs are thriving in niche communities. My favorite recent examples of this are the newer Persona games and a curveball from UbiSoftthat I want to review here sooner or later called Child of Light.
Classic turn-based RPGs still have their place, but Square hasn’t relied on them in awhile.
We knew that FFXVI was going to be an action-RPG. Which is not the Final Fantasy a lot of us grew up with. Final Fantasy has always been a blend of gaming and storytelling, though. This is where it gets classic.
The centrality of the storytelling makes FFXVI feel like a hyper-cinematic game like Life Is Strange.
Not the same genre at all but the focus on story is equivalent. The hyper-realistic cut scenes and the limiting of the scope to immediate relevance and plausibility has a cinematic effect. I would recommend this game more to a fan of Life Is Strange or Heavy Rain, so long as they also like action-RPGs.
So if you’ve heard there’s a ton of cut scenes and it’s linear, you heard right. This involves something else that the fan base appears split on: the lack of a party. The player controls Clive directly for most of the game, which limits the audience perspective to one character.
Square Enix obviously wanted to embrace the button-mashing freedom of solitary melee. This was likely the influence of Devil May Cry developer Ryota Suzuki who worked on FFXVI. The closest basis for comparison, for me, would be the Salt games from Ska Studios and Vigil: The Longest Night.
Lots of freedom with one character and no player-identification with any other can make a narrative-focused game feel isolated. At the same time, the other characters appear more autonomous and therefore more real. The boundary between Clive’s agency and everyone else is firm, which builds immersion.
This is especially evident when a looming catastrophy hasn’t happened yet and appears preventable. The clash with Garuda felt very reminiscent of the Eikons at Phoenix Gate.
Both Benedikta and Ifrit creep into danger. When Ifrit brutally pulverized Phoenix, I kept wondering if I did something wrong to make that happen. Benedikta is both in and out of control. She is the head of Waloed espionage and is capable of far-sighted manipulation. At the same time, she is caught in a crossfire. Her duty to keep the second fire Dominant captive is the only reason things escalate at Caer Norvent. She has a duty; but after her first battle with Clive, he instinctively saps her dominance over Garuda. The agony of this loss is visceral. At that point I wondered ‘Was any of this ever necessary?’
Of course it was. Benedikta was operating under a clandestine plan between herself and Barnabas to unite the Eikons and their Dominants, by force if need be. She is duty-bound and she is uncomfortably aware of it.
Before her first clash with Clive, Benedikta attempts to recruit him. She makes the same offer to her old flame, Cid. The player has already seen her emotionally and sexually manipulate both Hugo Kupka and Barnabas Tharmr. We know she’s a puppet mistress. After her dominance over Garuda is stolen, though, these repeated offers have the same effect as Clive’s ultimatum.
Benedikta never would have handed over the second fire Dominant and Clive never would have joined Waloed. After she noticed the absence inside of her, I wished one of those things had happened anyway. Her repeated offers tell us that she was aware of her lack of autonomy in all of this. She cannot do otherwise; her only hope is that someone else can.
In an earlier post during my blind play-through, I mentioned the dissonance between Clive’s conviction that he must have killed Joshua, as the Dominant of Ifrit, and the circumstantial evidence indicating that it’s not that simple. This tension is exacerbated by Clive’s prior thirteen years as a warrior-slave. For thirteen years, he had nothing but brutality and grief. As Clive’s only connection to the past, his grief became all-important. Living for one thing, and one thing only, is precarious. The highest hope is that the one all-important thing never changes.
Clive’s realization that he’s the Dominant of Ifrit changes the one all-important thing.
Without his place in his world, the full weight of all that trauma and grief comes crashing down and Clive starts to wrestle with suicidal ideation. When this happens, Cid does his best to reason with him but that only goes so far. To Clive, Cid is a reliable and good man, but still a stranger. Clive only attempts to think logically once he is able to talk to Jill. When Clive and Jill return to Rosalia, the suicidal ideation sits uncomfortably beside his growing emotional awareness. I wondered if he was really going to walk into his own death just as he’s beginning to understand his feelings.
That sense of teetering risk was magnified by Clive’s exclusive connection to the player. On one hand, it can’t happen; that would be an awkwardly short game with an awkward ending. But Square has conducted bizarre experiments before. At the same time, Clive’s feelings weigh strongly in that direction and he has only lately, tentatively, begun to think of alternatives.
This tension, for me, was more interesting than the quest for revenge was. After we learn that Clive will not imminently commit suicide-by-monster/other-Dominant/Echo, his commitment to the Hideaway is a breath of fresh air.
Maybe this is nothing more than my interpretation. What makes me think it might not be (or, at least, not just my interpretation) is that it sets important reference points for some of the most powerful scenes afterward.
The storytelling is absolutely central to this game. It’s not an even split that relies on visual and circumstantial storytelling, like Metroid or Bloodborne. Like I said, think Life Is Strange. Or, better yet, Vampyr with more action-RPG emphasis. The division with Final Fantasy XVI is closer to sixty-percent story and forty-percent game. That’s something that will either make or break it for a lot of people.
Plot isn’t everything but- if you want a story that carries its own weight -then plot has work to do. Like other Final Fantasy games, there are plot points that depend on the player’s inferences. The more important the plot point, the more important it is to express it. If an important plot point is communicated by implication, then the circumstances that imply it must succeed.
There are genre conventions that address this. A well-written detective story depends on the reader observing things while they happen and connecting dots before the mystery is solved. A number of Final Fantasy games have attempted this. Their biggest success was with the original FFVII. There are certain details in XVI, though, that are built up by understatement that can be easily missed. Many of them set up the story’s final act.
And the storytelling, like I said a million years ago, is where we find the deconstruction of classic Final Fantasy.
As far as I can tell, most of the lore precedents for XVI were established before VII. We got crystals, summon monsters, ancient founder civilizations, elemental magic, corrupt institutions and moral reversals. All of which were Final Fantasy touchstones before the jump to 3D. This short list of old standards are the main ingredients.
In the west, many gamers associate games with alternating mechanics with JRPGs. Many westerners likely encountered combat screens and birds-eye exploration screens for the first time with JRPGs.
Like I said at some length in an FFVII post, these divisions had a basic appeal to the imagination back then. The combat screen is not a literal depiction of a battle. Things like active time bars and experience points don’t have any diagetic existence within the fictional worlds. When I first got hooked by VII, I used to wonder if the Dorky Faces and Hellhouses are literally real or are representations for things like hauntings. At that point, we also know that summoning Bahamut in VII doesn’t literally lift the ground beneath your foes and vaporize the floating island in midair. Summoning Ifrit in X won’t leave regular craters in the ground behind you.
As the most cinematic Final Fantasy, XVI does not have this separation between representation and reality. Shifts in proportion are implimented as cinematic themes.
One of the most memorable cut-away cinematics focuses on the ongoing war between Sanbreque and Waloed and their respective Eikons: Bahamut and Odin. Sanbreque has just lost ground in a border war and Waloed is marching inward. Odin steps in and is met by Bahamut in a battle that probably would have been depicted a million different ways in older FF games, especially from the player’s perspective. With as much abandon as summoning Knights of The Round in VII or Ark in IX for sheer amusement. There were comparable moments like Phoenix Gate and Caer Norvent but our first look at Bahamut and Odin goes further. That was the first time I felt like I was watching a cinematic version of what battles between summon monsters would look like from an earlier game.
Other details of the event draw your attention to other differences of scale. These two Eikons are the totems of nations, with armies behind them. The entrance of a single Eikon into a military battle is a stretegic decision. As we saw earlier with Shiva and Titan, two Eikons is a gamble for both sides. After winning the strait of Aurtha, it was worth it for Odin to press the advantage on behalf of Waloed. Sanbreque can continue to fight with an army and get wiped out by the giant flying kaiju on a giant flying horse…or they could try to hold their ground the only way they can: with their own Eikon. So Bahamut manages to keep Odin at bay and shortly afterward receives word of civil unrest at home. Prince Dion won’t leave the field because- once he does -Barnabas can turn into Odin and destroy the Sanbrequoi army. Barnabas would never leave the field for the same reason. Meanwhile, riots at home have struck close to the Sanbrequoi capital.
Sir Terrence adds, with worry, that they will not be receiving any previously-requested reinforcements. Those forces are needed at home. Meanwhile, Sanbreque is playing defense with a dwindling army and an Eikon.
The haplessness of Prince Dion adds to the dramatic scale. So does the worldbuilding forces at work in this scene. Clive’s own battles reach greater proportions later with Titan and Bahamut. But the confrontation between Clive and Barnabas in Waloed is different. It made me feel that, for the first time in the story, Clive was approaching the level of Eikon mastery that Dion needed to hold his own against Odin. This is built up by a moment of dialogue that implies that there has never been a question of royal succession in Waloed: Barnabas is corporeally ageless and has ruled his country for eons. When Barnabas and his mother first landed on Waloed’s shores, there were cities and territory to conquer, so I hesitate to say that Waloed has only had one king…but it definitely looks like it.
In any case, Clive only rises to the level of a divine combatant once he is pitted against an ageless human who has lived with his Eikon for mutliple human lifetimes.
If it makes sense to talk about a Dominant, with an Eikon, literally becoming a god of their nation, then Barnabas has done it. In a ‘might is right’ paradigm, Barnabas is the most ‘right’ and epitomizes what Clive and Cid’s Hideaway are fighting against.
If the narrative use of graphics and proportion is a strange thing to dwell on, consider how rare it actually is in Final Fantasy. Even XV couldn’t have every explosive spell or Astral summon leave a permanent mark on the continuous map. Which is not a problem: it’s rational game design. We don’t need to see a literal, in-world consequence of every mechanic because we understand we’re playing a video game. All of which is why XVI is so different for not allowing the player to do anything that’s not directly explicable in-world. When exceptions materialize, they have exceptional consequences, such as Clive being the only Dominant to control more than one element.
In my own writing, I try to remain aware of something I think of as plot economy. Everything a storyteller introduces is something that an audience will notice. Every innovation has consequences that can either help or hinder the body of work. The uniqueness of Clive is a good example of this. The crux of its economic value is introduced almost immediately. Just before Lord Murdoch is killed by Ifrit, he says that there is only one Eikon for each element. Cid confirms this. Another Dominant, Benedikta, can create lesser emanations of her Eikon Garuda. The Eikons Shiva and Odin both are accompanied by semi-divine companions: Torgal and Sleipnir. Conversely, Ifrit and Phoenix can combine into a single Eikon.
The doubling, splitting and combining is introduced by Clive and it’s never far from him. This is introduced beside the pivotal use of visual storytelling: the uniting of the Eikons.
Bahamut is usually portrayed with multiple floating blades, but in FFXVI it’s reminiscent of Garuda’s doubling with the Chirada monsters
As the absence of open world exploration accommodates a set narrative, it’s worth talking about the gameplay that is present. This is, obviously, the most combat-oriented Final Fantasy ever made.
Other than the Dissidia games, of course. Among Square Enix RPGs, though, XVI is the most combat-oriented. Yet not without precedent: both Crisis Core and Type-o were heavily combat-focused with limited narrative freedom. What distinguishes XVI is the possibility for new combat builds with each Eikon absorbed by Clive.
Things hit a sweet spot once every Eikon is unlocked. Eventually, you can even ‘master’ the circle button moves which leaves the range of move-sets pretty wide open. My usual is a fast/aerial combat set based on Garuda with preference given to airborne Eikon abilities in the other two builds (up to three can be socketed). I made a range-fighting build using Ramuh and Bahamut abilities. I nicknamed it the Mega Man build but the combat is still more action-RPG than run-&-gun. Ramuh’s circle ability, Blind Justice, is a good slow-burn strategy against foes with high defense.
Blind Justice consists of launching electric projectiles that cling to the target and explode the next time you use an R2 Eikon ability with square or triangle. This delay means that you have a chance to launch as many as your patience will allow for maximum impact. This also brings the skill requirements back to my usual speed/rogue preference.
Shiva’s Cold Snap ability with its temporary paralysis might feel like a good fit but don’t do it. The amount of time needed to launch a few Blind Justices is better served by enemy cool down time and distance. And Cold Snap requires melee distance.
Cold Snap is a better neighbor for melee abilities that need a hot minute to charge. It’s a dash/leap variant that allows you to pass through enemies while briefly freezing them, which works great in conjunction with a “rogue”-styled move set. With Cold Snap mapped to the circle button, my two favorites for the square and triangle slots are Rook’s Gambit and Upheaval.
The best of the mixing and matching only opens up late in the main scenario, though, with most of the experimentation happening in ‘Final Fantasy mode’. Combat is the central game play mechanic and the tougher post-game battles with late-game enemies showing up earlier give the biggest incentive for experimentation. That being said…the trial and error experiments don’t usually take long to wrinkle out in the first half, before Clive takes over the Hideaway.
While combat may be the central mechanic, it’s not the only one. Even if a game play-centered review might not consider the cinematic cut scenes, story beats or lore text…it should be obvious that just as much effort was spent on these details as the game play. Even if not directly relevant to game play, those details were clearly intended as an equally significant part of the overall experience.
Case and point: side quests. Many of which are pretty common tropes in RPGs. In FFXVI, the game play in side quests will consist of interacting with NPCs, fetching, fighting and light exploration. A roster of bounties for boss-tier monsters ocassionally intersect with some of these jobs. With these familiar side quests, everything else has to do more work, such as gameplay, graphics and the exceptions to the rule.
The plot gets in on the action: after the death of Cidolphus at Drake’s Head, Clive becomes the leader of the Hideaway and the current bearer of the Cid moniker. He is at the heart of the community’s leadership, which makes him responsible for the people who depend on the Hideaway for protection. This gives the side quests something that they should have more often in other games: a point. It makes sense for him to be intervening in the matters of others and it makes sense for the people of the Hideaway to expect this.
There are also chapters of the mainline story that resemble side quest-like activity, such as travelling the world map and looking after material needs and political relationships of the Hideaway. These demands of infrastructure and problem-solving restore part of Clive’s birthright. He may not have the title but he definitely lives the life of a Duke with subjects.
There are side quests that flesh out the world of Valisthea. Most frequently: the lives of Bearers under the increasingly brutal crack downs. At the same time…there are far more random fetch quests, running stuff back and forth and hunting monsters. Many side quests just aren’t very rewarding, in terms of gameplay or worldbuilding. This seems like the kind of problem that could have been easily solved if Square Enix just spent a little more time developing Final Fantasy XVI. Many gamers complain about Square’s long development cycles but this is one instance where they should have taken longer.
This is the problem with XVI’s side quests: Clive, once he inherits the name Cid and assumes leadership of the Hideaway, has more of a reason to do “side quest stuff” than most RPG protagonists. Clive has an authortitative title and it comes with the messier responsibilities of leadership. In this way, the “side quest stuff” has direct relevance and it makes sense for Clive to address them whenever he can…and whenever you can is how side quests work. But the side quests needed more actual game design, which lets down the perfectly good ficitonal set-up.
Another concept that depends on the harmony of graphics, writing and gameplay is the dungeon experience. You’ll be moving the story a lot just from walking around between different regions. There are also smaller, more limited infiltration gigs that involve destoring the Mothercrystal in this or that country or rescue missions. The only time I really felt like I was entering a “dungeon” in a typical RPG sense was when the Ash continent and its ruling country of Waloed were finally unlocked.
Two continents with one being mostly dead reminded me of Final Fanasy XV. As the “open world” FF, XV missed an opportunity by putting Niflheim on rails. XVI is far more linear but it’s desolate “final dungeon” actually felt liberating. In XV, Noctis is connected to a wider world of context (at least as a young adult, before the flash-forward). When Noctis and his retinue show up in Niflheim, they have context from reliable, institutional sources. When they see how suspiciously empty Niflheim is, there are a few reasons the player could imagine based on the geopolitics experienced by the main characters.
In XVI, Clive embodies something of an institution himself: he leads the Hideaway. XVI is also set in a world without the (twentieth century) media infrastructure of XV. Waloed is also more comfortable with naked aggression than Niflheim. Niflheim, of course, had a long history of warring with Lucis. But in the continuity of XV, Niflheim is at a crossroads. There is a militaristic ploy hidden in their final act of diplomacy which sits uncomfortably beside knowledge that Niflheim is gambling with it’s very last diplomatic opportunity.
Waloed waved bye bye to all that a long time ago and are secure in the knowledge that they are no one’s friend. Monarchies in Valisthea are typically held by the bloodlines of the Dominants. Many Dominant-monarchs hesitate to take to the field of battle because, on one hand, the ability to transform into the giant, kaiju-like Eikons is a major military assett. On the other, the Dominants are hereditary rulers and it’s not easy to bet your monarch. The Dominant bloodlines and their control over the Eikons appears to serve a function similar to nukes in our world: a deterrent rather than a serious option. Barnabas Tharmr, the King of Waloed, regularly fights alongside his army as Odin. Dion, the prince of Sanbreque, is seen as uniquely brave for transforming into Bahamut and meeting Odin on his own terms every time. Waloed is clearly willing to cross lines of traditional conduct that other Valisthean nations are not.
Waloed openly buys up resources in other countries after exhausting their own and their espionage apparatus is relentless. In the present of the story, any connections Waloed has to other nations are secret, such as the collaborations with Dhalmekia and the Crystalline Orthodox. In polite society, Waloed is a pariah state. Benedikta, Cidolphus, Sleipnir and Barnabas gather a lot of intrigue simply by being from Waloed as well as the fact that none of them say anything about it. Benedikta or Barnabas wouldn’t talk because one’s a spy and the other is the head of state. Sleipnir is a supernatural being; a kind of familiar for the Dominant of Odin (Barnabas). Cidolphus is a defector, though, and presumably has no love for the homeland that made his life and his duty impossible. The only reason Cidolphus would keep quiet would be personal plans of his own and/or a visceral avoidance of the memories. Waloed therefore has more of a mystery to explore than Niflheim.
It may not have been the total exploration feast I wanted it to be but the Waloed segment also had the most satisfyingly complete ‘party formation.’ I know I know: that’s not what this game does. If it did, though, the most complete party would be when Clive, Joshua, Jill and Torgal all go together as a party toward the enemy’s home turf. This is also, like I said, when Clive’s mastery over all the Eikons is at its most satisfying during the vanilla play-through.
However familiar we become to Clive’s unique powers, though…it remains a mystery in the world he lives in. A mystery with consequences for the other more familiar worldbuilding details.
Like ancient technology and their metaphysics. Mothercrystals (at least some of them) are close to porous dimensional veils. Clive has a handy dandy game mechanic enabling fast-travel through the obelisks which, in-world, would have to be teleportation using old technology. The shortest distance between two points stops being a straight line with space-time warping.
This makes more sense when we see Dominants lose control near the Mothercrystals. It is also common for Dominants to lose control when the astral presence of Ultima is nearby. This happens with Clive, at sixteen years old, during the asualt on Phoenix Gate. His deranged rampage as Ifrit happens immediately after glimpsing Ultima. The astral presence of Ultima also appeared to be a factor during the Sanbrequoi frenzies of both Ifrit and Garuda. Ultima was physically present when Dion rampaged. There are none of the typical signs of Ultima when Hugo snaps but Hugo’s progressive madness is triggered by Clive and his growing power in the world. When Hugo truly loses it, he physically devours the Dhalmekian Mothercrystal to absorb its power and defeat Clive. Cid, the Dominant of Ramuh, dies when he attempts to shatter the Drake’s Head Mothercrystal while channeling his Eikon. Afterward, we get our first glimpse of Ultima’s true shape, like a sacrifice was offered to open a gateway.
The autonomy of NPCs become more believable when they are made to act before thinking. Slowly but surely, we learn that the madness of the Dominants is the sanity of Ultima: our antagonist. I hesititate to say ‘villain’ since that word is usually thought of as a more human force motivated by human reasons. Maybe that’s nothing more than an antagonist with a personality. Ultima, though, is closer to the monster in a monster movie.
Square Enix has done both kinds of antagonist before. Villains like Kefka and Sephiroth are some of the most beloved Final Fantasy characters. On the other end of the spectrum, there is Orphan and Barthandelus in XIII, who are non-human puppet masters. Ultima may be closer to Orphan than Kefka but he still has a few character beats.
Near the end, Ultima delivers a lot of explication about things that only he was around to see firsthand. Lots of things, such as the insanity of the Dominants around either Ultima or Clive, are explained in his words. Because there are so few other sources that contradict him, we are tempted to take Ultima’s words as authoritative.
Fair warning: the following includes my personal inferences and interpretations.
The meaning of Ultima’s words is so important to the plot that it can overshadow more subtle, adjacent details. Por exemplo- he only tells his side of it. He mentions events where he acted unilaterally but makes no comment on whether or not he was alone. And we’ve seen the Fallen ruins so many times throughout Valisthea that they might fade into the background. He says he was once part of a non-human, non-corporeal society that only found itself in Valisthea after the fall of their homeworld. He also says that the (apparently few) other immigrants he arrived with became the Mothercrystals, offering their magical bounty to the world of Valisthea to shape it into the place that will produce a being called Mythos. Known to us as Clive Rosfield.
Ultima sees Clive as his eventual physical vessel. Clive, meanwhile, destroys the Mothercrystals and absorbs the powers of the Dominant bloodlines. In the end, this is confirmed as a means of “releasing” Ultima’s peers. Only into one body, though, to be subsumed by one personality.
Either Ultima betrayed his own people…or his people were always a colony organism to begin with. What clarified this, for me, was the revelation that Ultima crafted the Eikons based on a common model: Ifrit. There were, apparently, eight original Ifrits which were chanelled, through the Mothercrystals, into the eight Eikons. This makes for a total of sixteen (ta-da!) different Ifrits.
If there’s something from Clive’s childhood that he never forgot, it was his mother’s rejection. Why did she reject him? Because he wasn’t the Dominant of Phoenix and his mother Anabella comes from a bloodline known to be able to create Dominants. Clive was her first child with the Rosalian Duke but, without the Eikon Phoenix, Clive could not inherit the throne. Joshua, instead, became the Dominant of Phoenix. Before the disaster at Phoenix Gate, no one had heard of Ifrit. Just like, in the normal course of things, no one ever sees a prototype. Humans might start out as fetuses but no one you know is a fetus.
The Ifrit mold, it seems, is derived from what Ultima originally was before the “fall” to Valisthea.
I’m tempted to stop here and just do a mythic dive into that but instead I’ll just remind you of a few things: Barnabas believes all human effort is doomed to failure and only through the grace of a higher power do we have any hope. Hugo Kupka is a manic alpha male who constantly bristles but won’t change his behavior to nurture the loneliness that makes him worship the ground Benedikta walks on. As far as Hugo is concerned, no one loved him but Benedikta and once she’s gone there is no one else. Benedikta herself is trapped between knowledge that her future depends on authorities that will never change and she believes that if she could just say the right thing at the right time someone might see reason. Cidolphus helped build a monster, lived to regret it and dedicated himself to a life of good works in a desperate attempt to make amends. Dion is trapped between holding the Sanqrequoi frontier against Barnabas and a father that could undermine his life’s work with bad judgment. Clive barely survives thirteen years of trauma.
The only Dominant that is absolutely, rigidly sane, almost every time we see her, is Jill, the channeller of Shiva. And Jill spent just as much time off camera as Clive did, during the thirteen year flash-forward at the beginning, doing much of the same thing. Clive knows this and even prolongs the raid on the Crystalline Orthodox’s Mothercrystal for Jill to reap her revenge against her former slavers. Clive’s self-image went through several black and white shifts before Jill’s empathy helped him even out. Clive knows this and is dedicated to supporting Jill better than he was supported.
If cracks in your worldview and self-image are how Ultima “wakes up” in the mind of a conflicted Dominant…Clive is committed to not letting that happen to Jill. Unfortunately this also gets into one of the few moments in the story when I truly did feel like calling bullshit: leaving Jill out of the final battle.
The more I think about it the more I think there are in-world occassions for this. Providence, the “space ship” that Ultima is bound to, is suspended in the air. A winged Eikon of some kind, like Phoenix, is necessary. Dion, capable of channeling the dragon Bahamut, also tags along. If Clive can ride on one of their backs, so could Jill. But it’s posible that no one survived the final battle.
Personally, I hope that the attack on Providence wasn’t necessarily a suicide run. Joshua and Dion appear to die while Clive clearly dies. You know what? This is the second part where I call bullshit.
The ambiguity of the ending made me cling to other possible interpretations (ending spoilers incoming). We spent a whole game getting to know someone who is learning to make peace with being alive. But he dies anyway. Clive’s whole arc is about the discovery that the world isn’t just a giant cesspool of evil after all and that it’s worth it to keep going. Ending the story with a noble self-sacrifice feels dead wrong.
The lore precedents are not kind about this, though. If Ultima and his people were a psychic colony organism then they were, in a way, one being. It’s why Ultima planned for Clive to destroy the Mothercrystals and absorb the Eikons. This implies that, in order for Ultima himself to die, any body that could channel him must die to (kinda like Jenova in VII).
This interpretation at least leaves room for a more mysterious fate for Jill. She consensually allowed Clive to sap her Dominance over Shiva because it was the only clear way to avoid the destructive fate of a Dominant. Is Jill a loose end for Ultima to reappear through or did Clive close that door when he absorbed Shiva?
Either way I don’t like it. Maybe lore consistency requires Clive’s death but it felt backwards to the overall thrust of the story.
There is some genuine ambiguity here, though. Before the ending, certain characters express the fear that Valisthea may be doomed no matter what. If the Mothercrystals were introduced by the ‘Ultima race’ specifically to cultivate Valisthea…then it’s possible that the Mothercrystals have become existentially necessary. A few characters even speculate whether or not killing Ultima alone would destroy the world.
Post-credits, we get our biggest flash-forward yet. A household of children are enamored with a book called Final Fantasy by someone named Joshua Rosfield.
Joshua’s death in the final battle appears certain. If Joshua survived it could not have been because of anything on-camera. Yet he was somehow able to write the story of his adventures. If the world ends and people you know are still doing things anyway then maybe the new world succeeded the old. If Joshua reincarnated, other characters may have as well.
I know everyone’s saying Dion and Terrence are the first LGBT Final Fantasy couple…but I remain convinced that the honor belongs to Fang and Vanille in XIII. Even in V, Faris refers to himself in a ways that imply that his male presentation is not /just/ a means of escaping life as a princess and becoming a pirate.
Dion falling in the final battle is also repugnant. LGBT characters are sacrificed for cheap pathos way too often. Like Clive, the lore appears to put Dion on the losing side of this equation. Out of all the Dominants to break down upon contact with Ultima, Dion’s encounter is the worst: he lives to see the consequences of his rampage. His aspiration toward redemption compells him to join Clive and Joshua. Dion wants forgiveness but he also understands that turning into a dragon and going on a killing spree in the middle of your own kingdom is not easily forgiven. The prospect isn’t good. After we’ve seen Clive turn away from suicide-by-duty, it stings to see it happen again so late in the story.
Every other Dominant driven mad by Ultima dies because they think they’re hopeless and then make themselves hopeless after a massacre. Dion stops just short of that. He experiences something none of the victims of Ultima do other than Clive: the struggle to go on, afterward. Dion may not expect much for himself but he does believe in the struggle. He sends his lover and his most trusted knight, Sir Terrence, to look after a mysterious child that nursed him back to health after his deadly rampage. From that moment afterward, he considers nothing but reparation and redemption.
Dion’s post-rampage arc is built by moments like his meeting with the “medicine girl” and his last meeting with Terrence. The hard truth and the duty it leaves him with are established. We know the depth of what Dion is experiencing because we’ve seen Clive go through it.
It’s not as reprehensible as the double-standard of Cecil and Golbez in IV. Cecil had a long and miserable journey toward expiation and all Golbez had to do was admit he was possessed. Maybe Cecil’s journey is supposed to soften us to Golbez but if so that needed to be better established. But the double-standard between Clive and Dion is still pretty bad. Obviously, the “succeeding world” interpreation with different incarnations for the same inhabitants is more attractive, if only because Joshua and (conceivably) Dion and Clive might still make it.
If the successive world is a world without Ultima, in which the whole epic is known only as a fictional novel, then it makes sense that Joshua (and whoever else) would be ordinary people. When the book and its author are revealed, it evokes the very beginning of the game with it’s mysterious narrator. My intuition tells me that narration was reading from the book and the voice was Joshua’s. The opening narration refers to in-world sources like Mors the Chronicler. To the people reading Final Fantasy by Joshua Rosfield, are these references just world-building or are they historical sources? It isn’t clear.
The problem with the succssive world theory is how to deal with the characters who do survive. If the post-credit scene takes place in another world then it follows that everyone in Valisthea died after the final battle and everyone reincarnated in the next world. Which would wash everyone’s hands anyway.
This successive world could furnish a lot of DLC possibilities, since Square Enix is considering DLC for XVI at this point. My preference for DLC would be something centered on Dion in which he gets his happy ending with Terrence. A story in the successive world about Clive would also be a good idea, if only to complete his “don’t kill yourself” arc.
XVI’s developers have also said that Clive and Dion were designed as thematic and aesthetic opposites. Dion spends much of the game keeping Waloed and Barnabas at bay. If Clive is Dion’s opposite equal and Barnabas is Dion’s enemy, it could be fun to imagine alternative timelines where the three serve different roles. Maybe in one of them Dion is Mythos, Rosaria is the seat of Ultima and Barnabas is the tragic Dominant living under an oppressive pall of remorse.
If the DLC is going to be a character-centered piece, like the first season of DLC for XV, I want that character to be Dion. If that one standard is met, I’ll probably be pretty happy with it. Beyond that…the fandom has ben uanimous on their desire to hear more about a mysterious Eikon called Leviathan the Lost. If they address that mystery from the ancient lore of Valisthea, it may be convenient to include other historical events…such as what exactly happened with Waloed to get it where it is.
Mid, with her combined Cid/Celes vibesNot a parallel situation at all but this shot of Benedikta reminded me of Celes, in the opera, in VILook at that FFVI-style Ultima spell
After Clive commits himself to the cause of the Hideaway, things move fast. The creeping, environmental menace of the Blight has been present since the beginning. Both the rising power of Sanbreque and her victims have been affected by it. Once Clive and Jill return from Rosaria, Cid offers the first actual speculation on the Blight.
As with Final Fantasy IV, V, and IX, the Mothercrystals seem to function a lot like weather control / energy devices left behind by an ancient, technologically sophisticated civilization. Since the crystals are like machines under human ownership, misuse is always just around the corner. The crystals in XVI interact with an ambient force called aether. In the long run, aether is naturally replenishing but in the short run it can be exhausted. When aether is running thin, the environment starts a downward spiral. This, in Cid’s estimation, is what the Blight is, and it is why the Mothercrystals must be destroyed.
The attack on the Drake’s Head Mothercrystal brings us back to the remnants of the Fallen, Final Fantasy XVI’s founder race. Along with adding the historically familiar (within FF) link between the crystals and ancient technology, we see more Bombs, Iron Giants and Liches. As established in Clive’s return to Phoenix Gate, these kinds of ruins follow a pattern like the Cloister of Trials and and the Aeons in Final Fantasy X.
Sure enough, the Drake’s Head Mothercrystal is protected by the Eikon Typhon. We then encounter a being that looks like they may be an Eikon themselves. They have fluid telepathy and interaction with both humans and Eikons. Joshua seems to have bound himself to this creature as a means of surveillance. This, of course, is Ultima.
This leads to a number of lore-matches. It’s not uncommon for Final Fantasy summon monsters to play a role similar to gods, bodhisttva-like spirits or magical totems. Summon monsters in one game may be summon-adjacent in another, like Omega, Chaos or Doom Train. Ultima is a frequent member of this gray area. Summon monsters are linked with the in-world mechanics more than almost any other game play mechanic, except (arguably) crystals. IV included diagetic functions for other game play mechanics, like combat spells. VII basically turned Holy and Meteor into titanic, cosmic forces. Like I was droning about in a prior post, the link between summon monsters and an ancient founder race goes back to Final Fantasy Adventure on the Game Boy, if not further (the first FF has similar insinuations).
That last one is closer to what is going on in Final Fantasy XVI, but I’ve not yet unraveled Ultima’s role. I’ve only just reached the point where Clive and Bernard are looking for Hugo Kupka (channeler of the summon monster Titan) after the Waloeders rescued him.
Speaking Kupka and related topics, I could not have been more wrong about Benedikta. I think. Since I’m doing a loosey-goosey play through to get a read on what’s on offer, some details may have escaped my attention. I could probably edit prior posts in accordance with discoveries but I just like doing these little multi-post play through thingies. The mistakes add to the cumulative discovery, including false predictions.
Said all that to say: I may have missed some stuff. I remember the hooded figure appeared immediately before the fight with the Garuda emanations containing parts of Benedikta’s soul. I don’t know if he had any sort of…last minute intervention like he did with Kupka. If it was understated, it may have slipped under my radar. I kinda wonder if the hooded figure rescued Benedikta like he did Kupka.
Which brings us to the hooded figure. At first glance, it looks as if the hooded figure is Joshua but he’s clearly not just Joshua. This subtle difference was insinuated in the beginning with the cuts between the more shadowy, non-corporeal hooded figure and the corporeal hooded Joshua. Then, at the end of the Drake’s Head raid, we see Ultima for the first time through Joshua.
This clash ends with Joshua saying that he knows better than to try to kill him. The implication is that Ultima is incorporeal. Joshua has another idea, though. Much later, a Joshua says in a cut-scene that he knows what Ultima is thinking, which gives the impression that Joshua somehow contained Ultima with his own soul. Joshua also makes it clear that this containment does not stop him altogether.
Joshua has no clear reason to rescue Hugo Kupka from Clive. We also know that Joshua is not the only one who constantly wears a hooded robe and that Joshua is bound to at least two non-corporeal beings (Phoenix and Ultima).
In a cut-scene in Sanbreque, Anabella’s young son Olivier is given credit for winning Hugo Kupka over. Let us not forget that Anabella is also the mother of Joshua and Clive. If Ultima is haunting Clive, is partially bound by Joshua and can be channeled by Olivier, it looks like there is a connection with the Rosfield bloodline.
If such a connection exists, it adds weight to the possibility that Ultima is scooping up Dominants that get rekt by Clive. And here we’ve returned to my suspicion that Benedikta may still be waiting in the wings, somehow. I’ve been extremely wrong about her before, though.
Concerning game play: the statements from Square regarding a job system seems to have been referring to the move sets that Clive gains whenever he saps the Eikon of another Dominant. The Phoenix and Ifrit move sets are comparable to something like a warrior or berserker play style. The fire Eikons are good for going in swinging. Garuda’s move set is speed-based melee with an emphasis in aerial combat and is my favorite so far. Ramuh has a range-fighter move set and Titan has a high-defense / high-damage move set, similar to a corsair from Final Fantasy XIV or Barret from VII.
Many of the Phoenix abilities are part of your ambient combat options, regardless of whichever Eikon Clive is attuned to. Many of those include classic adventure game melee, which- combined with Garuda -appeals to my preference for dex builds in Bloodborne.
The dev team were, for sure, not lying when they said that FFXVI had one playable character. One could make an argument for Torgal being the only genuine “party member”, but I have a lot of fun coordinating Torgal’s attack patterns with my own. It even adds something to the side quests, since Torgal is the only party member that always comes with you when you deviate from the mainline story. Maybe this is just a cheap shot for the animal lovers, but I appreciate it. Clive’s deep alienation at the beginning makes me…I guess…weirdly grateful for a fine hound that never leaves your side. If this makes me a sap, I can be okay with that.
Speaking of side quests, that’s another strong point. Not that this game is free from some typical, silly side quests. I’ve recently discovered the Viva La Dirt League YouTube channel with their Epic NPC Man skits. Greg, the garlic farmer of Honeywood, captures a lot of the silliness that have become normal in JRPGs. Greg is constantly offering a quest to round up his sheep, who have “run amok.”
Just like many JRPGs…FFXVI is not immune to “my sheep have run amok” NPCs. Not nearly as many as XV, though (XV had the worst case of “sheep run amok” NPCs in the history of Final Fantasy).
Other than that, though, this game adds something to side quests that I don’t see as often as I would like: a point.
After the destruction of the Drake’s Head Mothercrystal, Clive adopts the mantle of Cid and continues his mentor’s life’s work (our Cid wasn’t even the first one to use the name).
As the new Cid, Clive is now responsible for the Hideaway, a shelter for formerly enslaved magic users. As the de facto leader, it makes sense for Clive to be involved in the different levels of administration and providing. These aren’t a bunch of randos whose sheep ran amok; they’re desperate and Clive has accepted the responsibility of a provider. Clive himself was once enslaved and branded, with other Bearers.
Even before then, Clive’s branding is tied into side quests. Early in the game, while you’re away from the Hideaway, randos outside the Hideaway will recognize Clive’s facial brand and will make obnoxious, condescending demands, offering rewards which you are instructed to “pass on to your master.”
This stops happening after the attack on Drake’s Head, but it sets up the character significance for Clive adopting the role of Cid. He’s not just a provider; he’s a provider for his own people.
More to come. If you’re reading this on the main page, keep scrolling for my older FFXVI posts. If you’re reading this in a link, click the arrow at the lower left of the screen.
The facial rendering and body language is only top notch during the cut-scenes. During typical game play, they range from FFXV quality to just above VIIR. Just above VIIR is, admittedly, pretty good though.
Concerning the narrative-
Clive’s level of responsibility in the fatal clash between Joshua as the Phoenix Eikon and the Ifrit Eikon.
I’m still not finished with the game so there is still room for this to be solved. I’ve only just reached The Veil, during Clive’s attempt to locate Jill and Cid behind the Sanbreque border.
As things stand now, though, I am not altogether clear on why the apparition of Ifrit at the Phoenix Gate necessarily means that Clive killed Joshua. The implication seems to be that an Eikon can only manifest through their current, corporeal Dominant. If Ifrit manifests during the lifetime of Clive, it may follow that Ifrit must necessarily manifest through Clive. That’s my best effort at trying to deduce why Clive would feel that his guilt is unavoidable.
The battle between Phoenix and Ifrit is watched by Clive, as a teenager, immediately before he was enslaved by the Imperial military. If Clive simultaneously watched the fight while participating, that would be some pretty hardcore dissociation.
However…I don’t specifically remember Clive on the sidelines during the fight. During the fight, the player is rooted in Joshua’s perspective. It just sort of feels intuitive that Clive is watching. We also hear Clive’s screaming as Ifrit pounds Phoenix into a bloody pulp.
Then again, the two giant Eikons do a serious amount of dodging and flying. They probably moved a fair distance away, which would call the screams of Clive into question. If his screams can’t be heard from where he was originally standing, then we must be hearing them for another reason- such as Clive being rooted in Ifrit the way Joshua was rooted in Phoenix.
Yet the apparition of Ifrit is only triggered by the mysterious hooded figure. If Clive went apeshit because he was suddenly forced into an unfamiliar, primal, non-human perspective…it was clearly triggered by a third party. That’s why I don’t buy Clive’s guilt.
It’s also possible that the player is meant to feel this dissonance, and that Clive’s guilt is important only in his individual character arc. In that case, the dissonance would serve as a motivating instinct leading the player to the correct conclusion.
There’s a lot that can go wrong with that setup but there is also a lot that can go right. Worst case scenario, the player/viewer/reader feels alienated from the viewpoint characters. When a story’s point of empathy is abruptly shut down, it’s hard to bounce back. Best case scenario, you feel intimately connected with the viewpoint character.
In the context of the rest of Final Fantasy, a split or reversal in the arc of the main character is often associated with the two layers of crisis in my earlier post.
Put simply: the archetypal Final Fantasy story rests on two layers of crisis. The first one is often social or institutional. The second, deeper layer is more mysterious but often intertwined with the first one.
It is also normal for this shift between two layers of crises to occasion a shift in the main character, which usually changes their motives. Cloud’s altered memories in Final Fantasy VII is probably what most people think of first, in this regard. IV introduced a dramatic moral reversal in Cecil that goes further in the opposite direction when the second layer of crisis starts to emerge. Every single playable character in VI (other than Umaru and Gogo) has their motives changed or influenced in the World of Ruin.
This, I imagine, is what is happening with Clive in XVI when he begins to think that he killed his own brother in a magical altered state.
When he starts to believe this, Clive begins seeing visions of a hooded man in a cloak, like the figure he originally believed was the Dominant of Ifrit before realizing it was him.
The hooded man never appears to be truly, physically close, which implies that Clive might be the only one who can see him. Then Cid makes it clear that he sees the figure as well. In that moment, Cid is probably saying what the player is thinking. I, at least, felt like it was firmly established that the appearance of Ifrit is conjured by a third party, even if he does manifest through Clive.
Not everyone will carry this baggage going in, but the hooded figure has a vague resemblance to the updated version of the Sephiroth clones in FFVIIR. While this might be my own subjective problem, it still felt like the game was taking some risks, between resembling Cloud’s psychic torment a bit too much on one hand and the dissonance between Clive’s beliefs and the perspective of the player on the other. A dissonance that could either alienate the player from the viewpoint character or create an immersive sense of isolation beside the viewpoint character.
When the alternative possibility is not immediately accepted by the protagonist, or appears fake at first (if it turns out to be real), I find that it works better.
A protagonist who accepts the alternative possibility as soon as it’s presented to him is a greater risk. As a writer, I would almost always choose to have the protagonist wrestle with the possibility before judging it one way or another. It does not take long for Clive to decide, however, that he is responsible for the death of his brother Joshua.
This begs the question: are there any apparent reasons why Clive may make this judgment easily?
One of them is simple and quiet enough to be overlooked: Clive was a slave-soldier for thirteen years in the Imperial army. The conditioning of that experience is hinted at immediately after the thirteen-year flash forward. When he realizes that his unit is fighting with a company of Bearers that includes Jill, Clive’s immediate course of action is not at all obvious until he starts to act. His choices are absolutely binary: watch another loved one die and keep his future, or lose his future to save her life. In that moment, Clive seems to realize that a life with that guilt is not worth clinging to and tries his luck with a rescue.
His most decisive act, after thirteen years of slavery, probably happened through a self-destructive impulse. In conversation with Cid, he says that the hope of vengeance was the only thing that kept him going as an enslaved soldier.
This is where things start to get interesting. Jill recovers from her injuries and swaps stories with Clive of their suffering in the last thirteen years. When Clive mentions his discovery that he is himself the Dominant of Ifrit, he frankly states his belief that he killed Joshua in a frenzy. The concept of suicidal guilt is always just one little step away from being mentioned but is rarely addressed directly. Only one line from Cid appears to do that.
It’s possible that Clive’s suicidal ideation is a subconscious pressure behind his eagerness to classify himself as damned and deserving of punishment. One reason why I loved the scene where Cid accepts the help of Clive and Jill in Sanbreque is because it’s only then that Clive appears relatively free of the wish to die.
The walk between Cid’s Hideaway and The Veil actually feels cathartic- for the first time, the story is tinged with hope. At that point, I realized my feelings were involved. Not a bad place to be, in a story.
I also think I’m vibing with the combat system. It’s an adjustment after FFVIIR, but it’s just so fun after awhile. I’m actually enjoying the tougher enemies and the trial and error with the different Eikon abilities and strategies. I find myself thinking things like “I might not get out of this alive but let’s do it anyway.” That’s a good sign in my book.
I’ve never been particularly averse to the action RPG direction the series has been headed in since XV. It’s normal for each numbered Final Fantasy to add their own unique game play. Personally, I’ve always felt like story archetypes and world-building was what made Final Fantasy itself, anyway.
Which is something the fan base has been debating, lately, with regard to XVI. The only time I started to ask that question was with XV, since the ending in the base game goes for both tragic love and teenage wish fulfillment. Rather than developing outward, the main character curled inward. The canonical ending was originally planned to appear at the end of a second season of DLC. It got cancelled, so that canonical ending now exists only in the Jun Eishima novel The Dawn of the Future. It’s a decent little story collection, but the only ending that was ever offered in video game format was the one seen in the original FFXV, excluding possible insinuations in Episode Ignis or Episode Ardyn.
As FFXV exists now, it still has it’s first ending, which is the biggest deviation from the archetypal Final Fantasy story in a mainline title.
Another recurring idea in the Final Fantasy series: ancient magical founder races or ancient aliens. It’s interesting to me that Zelda is also getting into stories that involve advanced aliens interacting with a swords-and-sorcery world.
Rather like XV, many of the classic Final Fantasy monsters (Iron Giants, Bombs, etc.) appear exclusively in cave-adjacent ruins of an ancient, technologically sophisticated society. I therefore couldn’t help noticing that one of the mini-bosses in the ruins below Rosaria is called Lich, like the Four Fiends in the 8 bit games or IX. Even the ancient tower of the Vandole founder race in Final Fantasy Adventure on the Gameboy feels like an adjacent concept. Final Fantasy Adventure (later rebranded as Sword of Mana) even associated the summon monsters with the Vandole founders. The sword that permits Sumo to enter the tower is guarded by a firey being called Iflyte in the Gameboy original and Ifrit in subsequent remakes.
Finding our way back to the Four Fiends, a gateway to another plane of existence called Memoria in FFIX happens directly above the Iifa Tree, which is itself an ancient piece of technology. Creatures resembling the Four Fiends guard the means to activate some of this technology. Deep in Memoria, the party fights the Four Fiends repeatedly, as if the monsters in the outside world were physical “versions” of them. After those versions are no more, their backup data still remains in Memoria. Finding Lich inside of the Fallen ruin below Rosaria makes sense.
This association between the Fallen and the classic Final Fantasy monsters also makes me excited to get to FFXVI’s new game plus. It is, apparently, called ‘Final Fantasy mode’ and, along with a higher difficulty scaling, also includes monsters like Bombs and Iron Giants in different places and behaving differently.
Further posts to come. Hit the left arrow at the bottom of the screen navigate back to my first post on this play-through. Or keep scrolling, if you’re reading this on the main page.
The facial rendering is the best I’ve seen since Vampyr on the PS4. Not even Final Fantasy VII Remake or FFXV matched Vampyr’s facial rendering and body language. Similarly, this game has also got me to do something that no other recent game has- persuade me to go easy on the analogue stick because I felt like it.
I’ve played several games that require different kinds pressure on the analogue stick at different moments. Some of them convince you to do it strategically, usually survival horror (most recent one for me is The Callisto Protocol). But FFXVI was the first game for which it just feelsright, sometimes.
A part of it is just how beautiful and lifelike everything is. If you’re in the middle of a crowd or have someone following you, it actually feels more natural and courteous for the same reason it would in real life.
I wouldn’t say FFXV or VIIR failed at that, exactly, but it’s easy to forget sometimes. Which can lead to some interesting situations. Like when I get bored in XV and decide to wander off the beaten path. After choosing a random direction to wander off in, I would notice the body language of the main characters. At a normal clip with moderate pressure on the analogue stick, Noctis has this self-assured jog. You could imagine him saying something like “Just a little longer, guys!”
While you’re just randomly exploring. In the middle of the woods, at night. I used to giggle at that.
This level of immersion says something about how carefully the graphics are being used. As new as the action RPG format may feel for an old school Final Fantasy lover, Final Fantasy XVI is attempting something very simple and familiar.
The overall premise is not very different from the classic 8-16 bit Final Fantasy games. The main departure is hyper-realistic/cinematic proportions. In particular, the gap between the world-building and the non-diagetic game play has never been so close. Early on, we see magic-wielders use their powers for the kind of mundane, practical uses you would expect in a society with magic. People do things like conjure fireballs to light dark spaces and use conductive crystals to generate water for goblets.
This is emphasized by the early segment when the game places you in the perspective of Joshua, the Dominant of the first fire Eikon.
I’m aware that the developers have stated that you only control one character for most of the game. But the early Joshua segment felt a lot like the beginning of FFIV, in which the party was joined by overpowered class specialists who would usually die quickly or otherwise drop from the foreground. The point of this was to allow a comfortable range of exploration with the different class functions, to learn strategic footing by the time one of the permanent party members reaches the higher levels of specialization.
I’m still early in the game so there’s a lot I don’t know. I’ll probably do another post when I finish. But for now, it looks like the point of the Joshua segment was to give the player a frame of reference when abilities like his become more accessable later.
Then there’s the perspective shifts to Benedikta, acting against the player character Clive. It’s common for Final Fantasy games to confine the scope of the perspective to “party members.” Both VIII and XIII had continuity shifts to other characters who appeared to be outside of the direct plot, only to bring them in at the last minute. VIII did this with Edea and Laguna and XIII did it with Fang, which also illuminated the motivations of Vanille. There’s plenty of game left to prove me wrong on this, but if this were any other Final Fantasy…the presentation of Benedikta would signify that she’s going to be a party member.
Other than world-building and apparent story structure, Final Fantasy XVI has a few themes that are so specific that they’re almost references. When Clive, Torgal and Cid are en route to Lostwing, Clive’s overall motivation is made explicit. Clive witnessed the death of his younger brother, who was a child, while he himself was a teenager. After the murder, Clive was conscripted into an invading army of enslaved Bearers. Years passed which only compounded his grief and trauma with rage.
The unpacking of this loss in the forest surrounding Lostwing felt a lot like the introduction of Cyan in Final Fantasy VI, whose arc begins with a devastating loss and shortly transitions to the Phantom Forest. Granted the resemblance to the scene in XVI is thin, but the rays of light shining through the canopies over the streams felt a lot like the Phantom Forest.
Then there’s the X-factor character: the Dominant of the second fire Eikon. Final Fantasy games often begin with one layer of societal or institutional crisis. The pressure might come from a government, a religion, a corporation or anything else, so long as it’s institutional. The first layer is often subverted by a second crisis. To name a few examples of this, VII has Shinra for the first and Sephiroth for the second, VI has Gestahl and Kefka, X has Yevon and Jecht, XIII has Barthandelus and Orphan, XV has Niflheim and Ardyn, etc.
In XVI, the institution is Waloed combined with the influence of Benedikta. If Benedikta is the source of the first layer of crisis, then the second layer (at this early point in the story) looks like it’s going to come from the Dominant of the second Fire Eikon.
Click the right arrow at the bottom of the post for part 2.