
Kudos for dungeon design in level T. You instantly land in a sandpit with a patraquad that is far easier to kill with bombs, so no precious candle-wall cheesing. Just watch the thing and try to place a bomb somewhere it will move over and hopefully you’ll only use one or two of them. Up two screens is Zelda with the sword (thankfriggingNayru) and some more rooms that are either puzzles or require an item. Just past this point, we run into Zelda again who tells us that ‘twelve guards watch over the dungeon’s gate.’
Proceeding down from the patraquad sandpit instead of up, there are some familiar monster rooms with block switches. As per usual, they gotta be cleaned out before the switches can be pushed. One of them is filled with pols voice which die from a single strike but turn into peahats. In the peahat-filled side-scrolling staircases, it’s easy to get complacent. But the directional mechanics aren’t the same in the side-scroll basements which, combined with misplaced sense of sword security, can trick you into taking some hits. So don’t be too eager to stop relying on the boomerang.
So our vigilance is subtly tested during our immediate sense of relief after getting the sword. We also run into a blue lynel for the first time in the game which is a frustrating pain the ass and you had better hope you’re at full health for the sword beam. Compliments to GameMakr24 for creating a test of caution and vigilance reminiscent of Bloodborne.
It soon becomes apparent that, once embarking on the path south of the sandpit, doors lock behind you with no obvious floor switches. This happens as you move down, to the left and slightly upward, like a one-way spiral pattern. With persistence, you will be able to return to an apparently empty room at the beginning of the left turn.
Now…remember the invisible doorways from the first quest? That is the dungeon exit. And this is the first invisible doorway I’ve encountered in the second quest, so it felt like an understated blindside. It really does pay not to loose track of the possible ways of detecting hidden paths, even if one hasn’t worked in a while.

Since Outlands banks on crisscrossing between dungeons, I was tempted to do some back-tracking.
Upon our return to level U- there is a room with a staircase behind a cubic block. It is guarded by peahats, stalfos and yellow tektites, all of which need to be killed before the block switch will move.

A key hallmark of this rom hack is that some of the hit boxes are mixed and matched with other sprites. Peahats have passed their burden of annoyance on to the keese and are now the only monsters that can be killed with the boomerang. The stalfos could be dispatched by cornering them against the wall with a candle or bombs. The tektites, in Outlands, are invulnerable to the candle and the bombs.
Before I finally tracked down the sword, that screen was maddening. Two variety of monsters vulnerable to bombs and the candle and one that isn’t. So guess what I did as soon as I managed to escape from T?
The sword got the tektites out of the way but holy crap does it take some doing. Rather like the first quest…things tend to go smoother if you keep your sword beam as long as possible. As it is also clear that the second quest will play fair as harshly as possible, there is absolutely no reason not to cheese as much as you can. If a room is filled with monsters, hide in a doorway and step out every now and then to throw a sword beam into the fray. Gathered hundreds of rupees? Stop by a Goron shop whenever you can and buy keys whenever you have just over two hundred. As soon as you explore a little bit of level O, it becomes clear that moblin meat is frequently demanded and only occasionally available. So stockpile every resource you possibly can.

Back in U, there are successive rooms with cloaked, firey mages, the ones that turn into disembodied fire sprites when you kill one of their colony members. I know the digital version of the instruction manual has a name for them. They’re basically Subrosian mages that gather together into a colony organism. And there is one after another in a few successive rooms, until you get to one with just a fire sprite and no clear hit box locus. Time to put a feather in that and move on, for now.
Not so far from U is level D, which can be unveiled with the ocarina, which I’ve somehow overlooked this whole time.
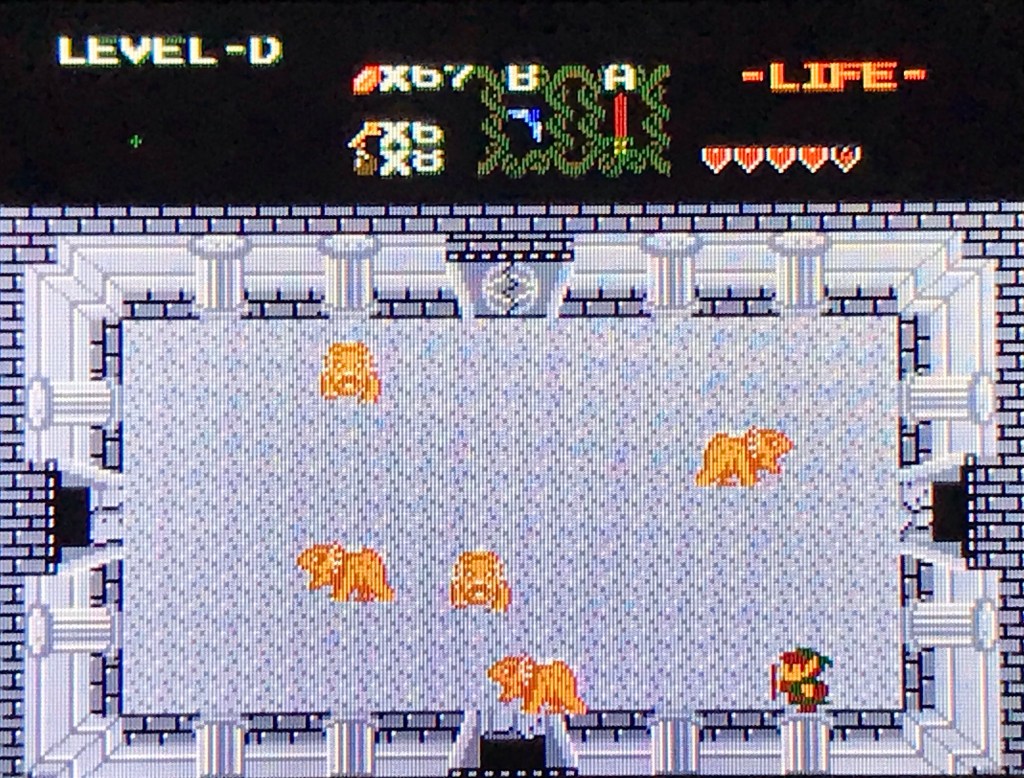
This, as implied by the dodongos, is a bomb-centric dungeon. It is also filled with a lot of monsters that have been bosses and mini bosses in the past. Like, in nearly every other room. This dungeon also has more meat which I promptly ran back to O with. Since D has its own hungry moblin…I was a little worried about…going down a path of no return. So far, I don’t think I have…but holy crap does O have a lot of hungry moblins.
Between O and D, Princess Zelda increases the bomb bag capacity by four in each of them. Once you figure out the reciprocal relationship between both dungeons, it’s pretty easy to release both of their Tetrarch Fairies…which seems to effect the ocarina.
Maybe? ‘Cause afterward, the ocarina can warp to different locations. My working hypothesis for now is that each Tetrarch Fairy unlocks a new location, with the lake near the respawn point as a kind of home base. It seems likely: I can’t remember an exact before and after point when the ocarina began warping during the first quest. Only that it was later in the game, which suggests that the number of fairies released has something to do with it. Not to mention, the flute in the original LoZ warped to each completed dungeon.
So. Because of the liberated Tetrarch Fairies or whatever the reason might be…we now have access to the landmass that was uncovered by the raft in the first quest. It’s only at this point that the second quest feels fully shod of the helplessness it begins with. While everything except the overworld is different, it now feels like the mobility of the first quest is largely regained.

With a little bit of digging, the Goron shop with the bow and arrow can be found, along with the Gerudo with Bagu’s letter. You’ll probably get robbed multiple times in other grottos you expose while looking for it…but it’s there. Now, then: I seem to remember a boss monster with one eye back in the U dungeon…
