Bloodborne PSX (light spoilers)

Bloodborne on the PS1 feels uncannily natural.

In particular, I was constantly reminded of the first two Tomb Raiders and the first Silent Hill. The use of shadows is reminiscent of how the fog in the first Silent Hill disguised the procedural rendering while building atmosphere.

A neat bridge between those early PlayStation franchises and the original PS4 Bloodborne was created with the design of indoor spaces…of which there are a lot.

If you have heard of Bloodborne PSX then you probably know that the biggest location that carries over from the original is Central Yharnam. Lilith Walther thoughtfully managed to spin a complete game in this specific location, though.

Just like last time, your player character is investigating Paleblood and is pointed, by Gilbert, in the direction of the Cathedral Ward.

The lore-fiend in me has long wondered if Gilbert was meant to be a canonical “mainline story” character, unlike some of the others that you could go the whole game without running into. I don’t think any other hint about reaching the Cathedral Ward through the sewers is offered.

Considering how I triggered the ending I got, I strongly suspect Lilith Walther has wondered that to.

Also like the base game, you will probably hear about the Great Bridge and think that it sounds more efficient than a giant wade through sewers. (I think he also mentioned aqueduct in the PS4 game? Or maybe he just said aqueduct and the fans all decided to call it a sewer?)

This, of course, does not work out and we gotta pursue Gilbert’s lead anyway. Which puts us directly in the path of a few of the new locations, both indoors and underground.

Within the first few minutes of gameplay, we find that Bloodborne PSX does not have the same continuous map as the original. Which is to be expected: this is a PS1 demake of a PS4 game. Many of those limitations are incorporated into the new design, though. The loading screens between different locations allow the different segments of the map to be more self-contained. Consequently, all of Central Yharnam is turned into an interconnected, “cumulative” dungeon, like the town of Silent Hill.

So far, I have found two buildings with unexpected depths and an awesome expansion to the aqueduct/sewer area. One reason why these discoveries are so satisfying is because- in the original -there are a ton of locked doors that are never meant to be opened. It’s also an intuitive direction for the design to go if you are effectively “trapped” in Central Yharnam. Another reason is that there are indoor areas that bear a superficial resemblance to other indoor areas in the base game, like the Upper Cathedral Ward and the Cainhurst library. To say nothing of the more creative things those spaces are used for.

Is it just me, or is this vaguely reminiscent of Mergo’s Loft? Doesn’t Mergo’s Loft also have dog-headed carrion crows, like this place does?

In Bloodborne PSX, the scrawled note about Paleblood is found in Iosefka’s clinic. Where an infiltrator of the Choir ends up in the base game after killing Iosefka. Lilith Walther used a few indoor areas to explore this influence of both the Choir and the School of Mensis.

This part made me hesitate. I expected it to end here but wanted to be proven wrong. Yarntown ended around this point. Even if it is just a slightly bigger and different PS1 rendering of Central Yharnam, it’s a beautiful lil thing. Well worth playing and vaguely reminiscent of the video game demo compilations some magazines used to carry.

If you’re leveled into the thirties…then Father Gascoigne can be beat. So long as you’re bold and quick enough to pull off some viscerals, which feel a lil different in Bloodborne PSX but still work like they do in the base game. The main difference here is that a beast will not necessarily pause after getting riposte’d (along with a big floating ‘L1’ signaling that a visceral attack is possible). Or you could just grind like a nut and brute-force your way.

If this turned out to be the end, it would be a perfectly admissible mini-game. After Yarntown, though, it would feel wanting.

A new time of the night sets in once we hit the same dead end we all remember from the Great Bridge. Just like in the base game, it is not clear how much actual time passes or what has happened in the interim. This looks like the beginning of a second half. Maybe I wasn’t even that far.

Other than getting darker, some previously opened pathways are no longer accessible. And we get our first glimpse of an old friend from the base game.

Who you will probably encounter in the sewers, since the bridge to the Tomb of Odeon is blocked. And while I’ve been putting most of my blood echoes into Skill and Endurance…I’ve also been making an effort to build up Arcane since nabbing the tonitrus off of the mad Hunter in the library. I think Arcane weapons like the tonitrus and A Call Beyond are pretty effective against Winter Lanterns? I also know that Frenzy hits harder as Arcane increases sooo crafting a magic user turns you into a glass cannon in some ways.

I have only played through Bloodborne PSX once- so there is probably a lot I still haven’t seen -but so far I have not encountered more than one Winter Lantern in one place. And maybe I just haven’t put enough echoes into Arcane but the tonitrus seems less useful against them here than in the original. My other weapons were hardly any better.

They weren’t that common in the base game either- only in the Nightmare and the Fishing Hamlet

The scarcity of the Winter Lanterns and their toughness make them feel like Walter Sullivan in Silent Hill 4 or Pyramid Head in Silent Hill 2. Meaning: run your ass off and don’t look back. Maybe it is possible to kill them, but I haven’t figured out how yet. A crazy powerful monster showing up after you find out that both entrances to the Cathedral Ward (The Great Bridge and the Tomb of Odeon) are blocked is just perfect.

I like this because of how it builds on the resemblance between the Winter Lanterns and the doll/Maria. The doll is a very unique character with few corollaries. There is a lifeless physical version of the doll in the Abandoned Hunter’s Workshop in the base game. The revelation of the doll’s human identity as Lady Maria is then played for maximum dramatic tension in the Old Hunter’s DLC. These three different characterizations underline the importance and uniqueness of Maria.

The Winter Lanterns, meanwhile, are all dressed like the doll under their tentacles. If Maria/the doll is unique, then making the monster that wears the doll clothing unique feels natural.

Come to think of it…creating a direct link between the key to the leveling mechanic and an unkillable monster that hunts you feels pretty spot-on for a horror action RPG. (That link also exists in the original, even if it’s less direct than the PSX Winter Lanterns)

I’m uncertain how much more of the game I should discuss after this point. I finished my first play-through on accident in a location that I also found on accident. Something about this makes me suspect that there is more than one way to “finish” game. This demake recreates the vibe of the original so perfectly that multiple endings seem possible. Maybe they’re not. Maybe you know differently. But the subtle implication of new story threads from Lilith Walther make me hesitant to “spoil” anything.

Fun with glitches

Download here from Lilith Walther’s itch.io

Zelda: Outlands +Q (part 3)

Blobby eyeball creature in Level U doesn’t unlock anything but rupees….X_X…

But now we can buy moblin meat and potions with Bagu’s letter, and the Goron shop with the Kokiri Sword and Goron Shield is unlocked with the ocarina. So at least rupees are worth more than they were.

Meanwhile, back in Level T, remember that you just received two expansions to your bomb bag. Take the hint. Both the raft and the dungeon’s Tetrarch Fairy are not far off.

With another fairy comes another ocarina warp location: directly across the stream from Level O. There’s some obvious goodies and a warp cave that returns you to the other side of the stream…but not much more than that so far.

With more progress comes more ocarina warp locations…which you can’t really control. Playing the ocarina can take you to any of them. Now and then I suspect that your location on the map has some sort of correlating, mirroring relationship with where you warp to, but I’m not sure.

What this means is that, with the expanded range, you can no longer count on the ocarina to take you across the central water body. At least, not with any predictability. So, while getting the raft from Level T might feel a bit redundant, it’s really just in time. From now on, it’s the only way you can cross the central water body until you find the Gerudo warp caves.

(Actually, I remember some water in the upper left corner of the map, near a waterfall. I think the raft had some sort of use there, during the first quest?)

Along with the Outlands signature crisscrossing between dungeons comes another reversal of traditional Zelda mechanics. Each dungeon will not necessarily give you something that you need to unlock the next, sequential path forward. A treasure from one dungeon, the ocarina, has unlocked two dungeon entrances so far. Two others were accessible from the very beginning, even without the sword.

Like acquiring the sword, the expectation that the next treasure should unlock the next dungeon is so ubiquitous across Zelda games that, without it, you can easily feel lost. With Level T behind us, the ocarina has gained more warp spots and, ironically, appears a little less useful for it. And receiving the raft feels almost disappointing, since we’ve been coming and going across the water for awhile now without it.

This made me assume, several times now, that there is no clear path forward ever and each time you have to do a ground-up systematic investigation of everything.

So I spun my wheels for awhile before remembering that there are suggestions of where to go next, even if the treasures are not always involved. Back in Level T, Zelda said there was a dungeon with twelve guards. Typically, numbered guards could only mean one thing. And they usually come in pairs of four or five so the uncommon pairs of six adding up to twelve are easy to track down and rule out.

Level T sets an interesting precedent for the next three dungeons: continuing the theme of the Subrosian warp caves, the secret staircases are often one-way passages. Level L particularly is arranged so these paths loop back on each other. The next two dungeons, N and A, also have tricky underground staircases, but at this point T and L still hold the record.

Ooh look another sprite from The Adventure of Link!

Level L also has the next item, after the ocarina, to unlock multiple dungeons: the Handy Glove. Level N is hard to miss if you do just a little bit of experimenting outside of L.

Next, it’s time to hit up the puzzle next to the cemetery in the lower left corner of the map, now that we can actually push rocks outside of dungeons. The hint-for-rupees Subrosian said it could be solved the same way it was in quest one, after all.

I knew, from the moment I saw this mushroom tree, that it would lead to a dungeon. In the second quest, if not the first

Interesting touch, saving this location for later in the game. The puzzle that lets you access this area felt significant in the first quest to- last time around, there was a heart container hidden in the area. It put me over the quota necessary for one of the Gerudos to hand over the Staff of Byrna. Speaking of, between L, A and a few other random holes in the ground, we’re at more than enough to get the staff in quest two.

If you remember Zelda’s hint about the “red tree path” from Level N you’ll probably find your way to Level C, right next to where the Thunderbird’s fortress was in the first quest. Just a few screens in, though, we naturally learn that we need all eight of the Tetrarch Fairies before venturing further.

So. Where to go from here. This actually got me pretty frustrated for awhile. The only other hint from Zelda was about searching “the dark maze of ice,” from Level A. But you need the Handy Glove to reach Level A in the first place and the Handy Glove dungeon is in the frozen area itself. So it kinda looks like you have to go back and look for a third level in the frozen maze. Which sounds a little obtuse for a Zelda game, what with the emphasis on exploration, but it was the most recent lead I had at the time.

Nonetheless…there was a lot going on up there that I just hadn’t covered yet in the second quest. The waterfall in the upper-right region of the frozen area seemed significant, somehow. I remembered that there was a way to reach it with the raft in the first quest.

Since there didn’t seem to be any way to trigger the raft up there, I started bombing walls and pushing rocks. Bupkiss. There’s no dock to launch from…but if I remember correctly, there wasn’t in the first quest either? My next “sure thing” theory was the small forested area with no snow, near Level L. I remember something being there last time around, but I guess there isn’t this time. Not even after bombing and throwing fire at everything and playing the ocarina.

Slowly, the weirdness of this sinks in. No other Zelda game I can think of has three dungeons in the same area. But wasn’t the hint about the “frozen maze” from Level A? You need the Handy Glove to get to A. The Handy Glove is in one of the two dungeons in the frozen maze. If I’m not supposed to go back to the frozen area, then what does that hint mean?

Another way of looking at it: how many hints refer to the frozen area and how many dungeons are there? Two, for sure. What about the hints? “Twelve guards” is one, “frozen maze” is the other. Is it possible that it’s simply two-for-two and that hints might be scattered randomly?

Strictly speaking…all you need to reach Level L is the ocarina and bombs. It’s entirely possible that someone might finish that dungeon (somehow, miraculously, without the sword, or maybe with the Kokiri sword) and then proceed to Level T. In which case, the “twelve guards” hint would have seemed a little pointless, just like the “frozen maze” hint now appears to be.

It’s annoying but at that point I felt forced to consider it. Also…all of the dungeons, so far, are in different locations than the first quest but none of them are far from their original placement. And I think there were only two dungeons located, roughly, within the frozen maze in the first quest.

There are two conspicuous areas that hid dungeons in the first quest which, so far, have yielded nothing. One of them is a rocky enclosure only accessible through the Gerudo warp caves.

This one, Level D, is just a few screens away from the area you need the Gerudo warp cave to access. Where else do the Gerudo caves lead? Just outside of the Graveyard of Serenity. If two of the warp caves are in the vicinity of Level D and T, maybe the third location is also close to a dungeon?

It’s interesting that sprites from the first LoZ are used for the concept of Dark Link from the second game

As expected, it’s near the Gerudo warp location across the water. This one hardly lasts any longer than N or A. The hardest thing about this dungeon is the search for it. Also interesting: I think Level S has more Dark Links than any other dungeon before it. Story significance, maybe?

With all eight Tetrarch Fairies liberated, we may now proceed to the Thunderbird’s fortress in the red territory of Subrosians.

Remember how I said L and T had the record for misdirection and difficulty? They don’t, anymore. N, A and S were kind of effortless, but C makes up for all that- with rather classic dungeon design. The circular, misleading staircases do make an appearance but they only really take the foreground near the end of the level. It pays to rely on both the HUD map and the map in the pause menu which shows what rooms connect to what others. This level is intimidating but it doesn’t throw anything at you outside of the context from the rest of the game. And there’s some pretty neat treasure scattered throughout, to. Only one of them-the Silver Arrows -is necessary to finish the game.

Just like the first time around, I’m hesitant to go into too much detail. A final dungeon is just…such an important part of a “puzzle box” game. And this one is so much more than a tribute from a fellow Zelda fan (although it’s definitely that as well). Zelda: Outlands actually feels surprisingly genuine- like a Zelda game from some alternate reality.

First quest review

Zelda: Outlands +Q (part 2)

…Lynels…X_X…

Kudos for dungeon design in level T. You instantly land in a sandpit with a patraquad that is far easier to kill with bombs, so no precious candle-wall cheesing. Just watch the thing and try to place a bomb somewhere it will move over and hopefully you’ll only use one or two of them. Up two screens is Zelda with the sword (thankfriggingNayru) and some more rooms that are either puzzles or require an item. Just past this point, we run into Zelda again who tells us that ‘twelve guards watch over the dungeon’s gate.’

Proceeding down from the patraquad sandpit instead of up, there are some familiar monster rooms with block switches. As per usual, they gotta be cleaned out before the switches can be pushed. One of them is filled with pols voice which die from a single strike but turn into peahats. In the peahat-filled side-scrolling staircases, it’s easy to get complacent. But the directional mechanics aren’t the same in the side-scroll basements which, combined with misplaced sense of sword security, can trick you into taking some hits. So don’t be too eager to stop relying on the boomerang.

So our vigilance is subtly tested during our immediate sense of relief after getting the sword. We also run into a blue lynel for the first time in the game which is a frustrating pain the ass and you had better hope you’re at full health for the sword beam. Compliments to GameMakr24 for creating a test of caution and vigilance reminiscent of Bloodborne.

It soon becomes apparent that, once embarking on the path south of the sandpit, doors lock behind you with no obvious floor switches. This happens as you move down, to the left and slightly upward, like a one-way spiral pattern. With persistence, you will be able to return to an apparently empty room at the beginning of the left turn.

Now…remember the invisible doorways from the first quest? That is the dungeon exit. And this is the first invisible doorway I’ve encountered in the second quest, so it felt like an understated blindside. It really does pay not to loose track of the possible ways of detecting hidden paths, even if one hasn’t worked in a while.

Since Outlands banks on crisscrossing between dungeons, I was tempted to do some back-tracking.

Upon our return to level U- there is a room with a staircase behind a cubic block. It is guarded by peahats, stalfos and yellow tektites, all of which need to be killed before the block switch will move.

A key hallmark of this rom hack is that some of the hit boxes are mixed and matched with other sprites. Peahats have passed their burden of annoyance on to the keese and are now the only monsters that can be killed with the boomerang. The stalfos could be dispatched by cornering them against the wall with a candle or bombs. The tektites, in Outlands, are invulnerable to the candle and the bombs.

Before I finally tracked down the sword, that screen was maddening. Two variety of monsters vulnerable to bombs and the candle and one that isn’t. So guess what I did as soon as I managed to escape from T?

The sword got the tektites out of the way but holy crap does it take some doing. Rather like the first quest…things tend to go smoother if you keep your sword beam as long as possible. As it is also clear that the second quest will play fair as harshly as possible, there is absolutely no reason not to cheese as much as you can. If a room is filled with monsters, hide in a doorway and step out every now and then to throw a sword beam into the fray. Gathered hundreds of rupees? Stop by a Goron shop whenever you can and buy keys whenever you have just over two hundred. As soon as you explore a little bit of level O, it becomes clear that moblin meat is frequently demanded and only occasionally available. So stockpile every resource you possibly can.

No fucks given ^^

Back in U, there are successive rooms with cloaked, firey mages, the ones that turn into disembodied fire sprites when you kill one of their colony members. I know the digital version of the instruction manual has a name for them. They’re basically Subrosian mages that gather together into a colony organism. And there is one after another in a few successive rooms, until you get to one with just a fire sprite and no clear hit box locus. Time to put a feather in that and move on, for now.

Not so far from U is level D, which can be unveiled with the ocarina, which I’ve somehow overlooked this whole time.

This, as implied by the dodongos, is a bomb-centric dungeon. It is also filled with a lot of monsters that have been bosses and mini bosses in the past. Like, in nearly every other room. This dungeon also has more meat which I promptly ran back to O with. Since D has its own hungry moblin…I was a little worried about…going down a path of no return. So far, I don’t think I have…but holy crap does O have a lot of hungry moblins.

Between O and D, Princess Zelda increases the bomb bag capacity by four in each of them. Once you figure out the reciprocal relationship between both dungeons, it’s pretty easy to release both of their Tetrarch Fairies…which seems to effect the ocarina.

Maybe? ‘Cause afterward, the ocarina can warp to different locations. My working hypothesis for now is that each Tetrarch Fairy unlocks a new location, with the lake near the respawn point as a kind of home base. It seems likely: I can’t remember an exact before and after point when the ocarina began warping during the first quest. Only that it was later in the game, which suggests that the number of fairies released has something to do with it. Not to mention, the flute in the original LoZ warped to each completed dungeon.

So. Because of the liberated Tetrarch Fairies or whatever the reason might be…we now have access to the landmass that was uncovered by the raft in the first quest. It’s only at this point that the second quest feels fully shod of the helplessness it begins with. While everything except the overworld is different, it now feels like the mobility of the first quest is largely regained.

With a little bit of digging, the Goron shop with the bow and arrow can be found, along with the Gerudo with Bagu’s letter. You’ll probably get robbed multiple times in other grottos you expose while looking for it…but it’s there. Now, then: I seem to remember a boss monster with one eye back in the U dungeon…

Part 3

This is my review of the first quest

Final Fantasy VII for the NES! (spoiler review)

After the example of the famous Chinese NES bootleg, this version was made to be a closer reflection of the PS1 original. These adaptations were made by Lugia2009 with patching and translation support from Lindblum, who also provided the English translation for the first Chinese version.

The 2005 Chinese “Famiclone” is widely credited to Shenzhen Nanjing Technology, which tempts me to assume that the game engine is original. There are however unmistakable resemblances to the first three Final Fantasy games, including reused assets. For the most part, it plays like an early FF as well. A notable improvement is that your party has armor, weapons and materia from the very beginning, which I’m happy with since I’ve recently dealt with FF1’s initial grinding slog.

Of course, when I say materia, what I mean is magic that works the same way as the spells you learn in shops in FF1. Each party member has a single piece of materia when they join you and each one will grow its own roster of spells as you accumulate AP. Each party member can only equip a single materia at a time. Perhaps that was the best way to reconcile the materia system with the early FF scaffolds- simply integrate it into the existing equipment mechanic. It also simplifies strategy- even streamlines it.

To an extent, anyway. It gives each party member a distinct function. This comes through in the mid to late stages of the game when more healing spells are likely to develop (excluding Aerith’s Light materia- the only one with healing magic enabled from the beginning). The majority of your strategic freedom concerns elemental affinities, which is accommodated by the ability to equip and unequip materia in your inventory mid-battle.

On the other hand…elemental affinities are infuriatingly difficult to keep track of. Especially since the whole range of random encounter monsters could potentially show up at any point. Like in the image above- you can run into Christopher and Tonberries and stuff as early as the bombing mission at the start of the game. Sometimes there are vague encounter patterns, but you could potentially run into any monster anywhere. Some reasonable consistency is still maintained by how tough they are, though, relative to location and progression route.

This rom-hack retains a few of the base game’s sudden difficulty spikes but, fortunately, not all of them. In an NES format it would be maddening.

After the unpredictability of the monster encounters, the next biggest combat annoyance is the scarcity of group healing magic. Even without Aerith, you’ll probably end up having one of your party members carrying her Light materia. Then again, you could simply cough up for a ton of group healing items, depending on whether you prefer to rely on magic points or money. The former can increase its max limit with usage and regular stops at “magic shops.”

Which brings us to another key mechanic change- materia and weapon enhancement. Your character builds will hinge on two point values: conventional “grinding” by winning battles and the frequency with which you use both weapon and magic.

EXP, of course, raises your level and therefore stats, etc. AP is accumulated every time you use a weapon or a materia-based spell. When you reach a given maximum limit, you’ll need to stop at either a weapon or materia enhancement station to move the ball forward. Neglecting this can make you feel extremely naked and challenged early on so luckily it doesn’t take long to put it together.

Stat + items are also dropped way more frequently than they were in the base game, which is interesting. 4-8Productions, on YouTube, has a video about the only non-finite source of stat+ items: using the morph materia on any monster in the crashed Gelnika. This is, naturally, a huge pain in the ass because that means whittling down a ton of really strong monsters to roughly below 10 HP so the morph ability can knock them below 0. However, if you’re patient and persistent enough, you can unlock a HUGE work-around the leveling system. (Yes I’ve done this and yes it’s every bit as grueling as it sounds)

This can either be good or bad. Good because it enables more character build freedom or bad because it makes a group of PCs that feel kinda same-y even less unique. As much of a fanatical Final Fantasy VII fan girl as I am, I still can’t help noticing that the combat system lurched between stilted and fluid to the point of emptiness. In order to notice and take interest in the subtleties of FFVII’s character build avenues, you would almost certainly need to like the story and the fictional world enough to pay close attention. While I’m one of those people, it’s still kinda sad that the character build experimentation was not more accessible.

Since this is an 8-bit, NES demake of Final Fantasy VII, it is necessarily shorter which means less time to stop and smell the mako. Which means the finer points of gameplay need to carry more weight. Perhaps the frequent stat+ item drops from monsters were meant to add an extra layer of build variability. This, like healing magic from non-Light materia, will likely be at its most noticeable near the end. Chiefly because you’ll have the ability to travel between the different land masses and observe which stat + items are dropped where.

Essentially, the progression route follows the original as closely as it can. Some of the music, early on, is a little tinny, but evens out once Cloud makes it to the Seventh Heaven. The chip-tuney version of Lurking In The Darkness was a pleasant and charming surprise, especially since it gets used in a few more dungeons. Those Who Fight Further was converted nicely which matters- in graphically simple turn-based RPGs, music carries a lot of weight.

As per the necessary shortening, certain musical cues are adjusted. During Cloud’s brief dream dialogue before waking up in Aerith’s flower bed, I was surprised to hear Listen to the Cries of the Planet (the music from the Forgotten Capital in the original game). Reunion is heard for the first time inside Gaia’s Cliff, which I appreciated. I realize that Reunion is basically Aerith’s Theme with a lower, mysterious-sounding key change. But I always thought it was unfairly overlooked.

One interesting consequence of the shortening was a new presentation of Cloud’s mental struggles. We simply hang out at the Inn room in Kalm as Cloud tells everyone. No actual flashback. Which means, when the party gets to Nibelheim, the player is seeing it for the first time. Unless you hang out nearby for the grinding, you won’t see it again until the illusion just outside of the Northern Crater. It’s a neat way to build tension; a series of small, gradual reveals that create questions about why Cloud told things the way he did.

Obviously there are far less side quests and stuff like Wall Market are pretty linear in comparison. I noticed some collision detection oddities on the world map (which, mechanically, functions no different from anywhere else) which made me wonder. I’ve been playing through the second quest on the Challenge Games Legend of Zelda rom hack, so I have been doing some compulsive wall-testing lately.

Maybe the Zelda hack is making me obsessive…but after I found a short length of mountain you can walk over in the Icicle area, I immediately doubled back and started testing other terrain barriers. Particularly around Wutai and the area between the Mythril Mines and the place where Fort Condor is in the original. You can see little entrances under mountain ranges and house sprites in inaccessible areas.

Like…you can see the entrance to the cave with the old miner who gives you Aerith’s Great Gospel limit break in the original. If you explore in the northern oceans, you can see a house that looks like it might be the home of the Chocobo Sage. On the southwestern continent, you can get a view of a circular pond collected from a waterfall that then feeds into a lake, like Lucrecia’s hideout.

Then again, the moogle construction site of Wutai was obviously there just to…pay tribute to the original and add a bit of cute, aesthetic consistency. Sort of a wink and a nod saying “Yeah, we get it, it should be there, but what do you expect? It ain’t like we got three discs!” Maybe the miner’s cave and the Chocobo Sage’s house are decorative, as well.

In an objective and qualitative assessment, this is equivalent to a streamlined NES-era Final Fantasy. Other than this one, I’ve played some of the very first FF and the very beginning of the second. This reimagining of FFVII has an intuitive and accessible combat system and some simple “high score” rewards that let you enhance your weapons and materia. The adaptation of the soundtrack from the original also adds to its stylistic distinction from other NES Final Fantasy games. But this second iteration of NES Final Fantasy VII doesn’t exactly “push boundaries.”

But for FFVII fans who also like retro gaming, this game is rather more than the sum of its 8 bits. Also like the original Final Fantasy VII, the storytelling is the main distinction here. The portrayal of Cloud’s background is significantly altered, as is the date with Aerith in the Gold Saucer. The location within the Northern Crater where Sephiroth’s original body is located, right next to Sapphire, Ultima and Diamond WEAPONs, is named “The Mako Tree” and the Prelude music is heard there, like the crystal chambers in FFIV and FFV. Since the original FFVII was such a huge tone shift from all others before it, I was both bemused and charmed to see this thematic tie-in with the older, “swords and sorcery” games.

The “tree” part is also an interesting touch. Especially given the shortening of Sephiroth’s name during combat. I know it’s an NES remake which means that menu commands, item names, monster names etc. get shortened sometimes, what with the limited information storage. But when you name the antechamber of Sephiroth’s stronghold “The Mako Tree” and you drop the “h” from the end of his name…it kinda puts the whole Tree of Life symbolism closer to the foreground. Maybe it’s not the biggest deal in the world, but I think it’s cool.

Zelda: Outlands +Q (part 1)

Meat outside of the floor compartment. What would Dracula say D:

Since I’m playing through the second quest, I’m gonna exercise zero restraint on spoilers.

The first moments of quest one can be a little intimidating. But a modest amount of exploration will reveal that your sword is sitting there for the taking in the first dungeon. After that, a little lateral thinking will set you straight on how this rom hack differs from the original Legend of Zelda: run back and forth between dungeons, the “One way!” teleportation caves, etc.

Second time around, though…after the “New Adventure Awaits!” notice when you bump off the Thunderbird…it’s, uh…pretty tough.

Before now I never really stopped to consider what a security blanket the sword actually is, in a Zelda game. Being without it is pretty damn inconvenient, but on top of having to rely on bombs, the candle and the boomerang to kill and stun monsters…you just feel naked without it.

So you find ways to compensate. I stumbled across a cave with a moblin giving away rupees, early on. From there, the question is what to buy with the most possible utility, since no sword means you won’t be milking enemies for item drops as frequently as the first time around. Like an idiot, I went with bombs instead of the candle. Both the candle and the bombs can harm enemies and unlock hidden paths, but they also have different strengths and weaknesses. The bombs do more damage and the candle is easily replenished between screens. Coming and going from the screen next door to renew the candle is less of a test of patience than spending twenty rupees every time you run out of bombs.

Get ready for lots of THIS shit

Luckily, one of the early dungeons offers a solution: like-likes, who probably have the best item drops out of any monster you’ll have access to in the very beginning. Lots of money and bombs. With persistence and luck, you’ll be able to farm enough rupees for both the first boomerang and whichever of the two initial purchases you didn’t go with the first time around.

After that point…you’ll probably notice that the dungeons have letters instead of numbers. Meaning that the progression route will be even less linear than last time, perhaps? Less linear than the first play through that was distinguished largely by it’s non-linearity?

Like linearity itself, this has it’s own set of possibilities and limitations. We know, from our first quest, that an item obtained in one dungeon may unlock an obstacle in another, or elsewhere in the Outlands. Therefore, finding yourself with bombs, the candle, one boomerang or another and some occasional meat with no path forward in the “first” two dungeons is not a death sentence. It just means you have to keep looking.

As per the original Legend of Zelda and our first quest in the Outlands, the typical methods of revealing hidden paths include: pushing rocks, bombing walls, burning bushes, crawling with the ladder, sailing on the raft and playing the ocarina. That last part is an addition from GameMakr24 that I’m really happy with. It contributes to the exploration of what the lore of Ocarina of Time would be like if it were present in the first game.

So we dart all over burning things, blowing stuff up, pushing rocks and playing the ocarina. This process is narrowed by my lack of a power bracelet: only the plain, cubic blocks and the headstones can be pushed right now. After several failed bombings (hehe…sorry, I couldn’t resist) I remembered a pattern from the first quest: lots of breakable walls and very few flammable bushes. Maybe the distribution is reversed in the second quest?

Maybe a little less of a reversal, as it turns out. While breakable walls are in hiding so far, flammable bushes are only slightly more numerous…and they usually only have moblins who pay you to keep the secrets of their woodsy little holes.

(I know they’re called Goriyas in the NES games…but it’s hard for me to shake the resemblance they have to moblins. Like how the Wizzrobes look like Subrosians from Oracle of Seasons or potion vendors from A Link to the Past. My mind just seems to…have it’s own preference. And it’s not like we don’t call the armored foes Darknuts even though Nintendo canonically named them Iron Knuckles)

Rupees are perfectly good but they don’t really help, if you already have some of the early equipment. Excluding keys for dungeons, of course. Still haven’t found any amazing Goron shops with bows and stuff yet, though, so rupees aren’t high on my list. Given how open LoZ: Outlands is, though, I wouldn’t be surprised if there is a way to access it even at this point.

I found the step ladder in dungeon O. This opens up the territory beyond streams, which shows promise at first. If you can scrape together the rupees, you can pay a Subrosian for a hint. The cute, robed sorcerer makes it sound like the cemetery puzzle in the lower lefthand corner of the map can be solved in the same way it was in quest one. Until I realize that I need the power bracelet to see that through…

…X_x…

The systematic method can be seriously frustrating if you overthink things. Especially if you haven’t played the original Legend of Zelda in a while like me. See, earlier, when you get the ocarina from Zelda, she tells you to look for a hidden path in the Graveyard of Serenity. And you happen to have the step ladder which lets you access the lower-left cemetery. So…it…it almost starts to feel like the game isn’t playing fair…

Then I took a break and realized two, blatantly obvious things I’ve overlooked: the Graveyard of Serenity refers to a specific graveyard and the first quest had three of them. We’ve ruled out one. The other is on the other side of some water. And in the last paragraph, where and when did I say Zelda gives you the hint?

Oh. Right. When she gives you the enchanted instrument that’s used for revealing paths and warping. Thing is…I sorta wrote that off for the same reason I did the flammable bushes: it only ever seemed to unlock rupee moblins and a heart container. And the cemeteries are flooded with ghostly floor masters that I just can’t kill yet.

Back when I was trying to set all the plant life I see on fire, I usually had to clear the screen of moblins and scrubs before I could start testing the bushes one by one. And I didn’t want to keep spending money on bombs so I would come and go from the screen to keep reusing the candle. That requires waiting for them to get close to a wall so the fire can continue to burn them after it knocks them backward. And, if you want to spare yourself as many screen to screen refreshes as you can, you should probably camp out near a wall with the boomerang so you could stun and burn a whole group.

The lady said it was the Graveyard of Serenity, though, so off we go. And that means the floor master ghosts. Which, presumably, means a whole lot of dodging. And the floor master ghosts spawn every time you touch a tombstone. It’s a risk…but not impossible.

This was almost too much for me. Guess what’s in there? A rupee moblin. Just a moblin with more money. *eye twitches*

But did Zelda say to push aside a tombstone? And as much of a bust as the ocarina had been so far…it has unlocked secret paths in places without water before.

So. Not only is the path to level T unveiled but…

Oh Zelda. My orange-headed savior. I’ve never been happier to see you. At long freaking last, my A button is no longer useless!

I mean, yeah, other stuff happened before I got the sword but I had to get it out of my system

Onward to part 2

Also, in case you wanna see my review of the first quest

Let’s play Charlie Murder! (part 1)

Heyyyy sooo I’ve been really busy lately AND I’ve been working on a longpost which will be up very soon. So I decided to take a brain break!

I had no idea how fun this game was going to be until I started it. Within seconds I was yelling and bouncing around just like I normally do when playing Bloodborne or Mortal Kombat X. My attitude toward beat’em ups is kind of like my attitude toward dungeon crawlers, RPGs, MUDs or MUSHs. There is something so irreducibly simple and appealing about the design that I usually like them at least a little bit, even if they’re not particularly good.

The mechanics are intuitive enough for you to get ahold of the punch / kick basics easily but even the more unique stuff is just a few button mashes away from figuring out. Even before getting that far, though, there’s something about the Ska Studios art style that just charms the pants off of me. The Ska Studios graphic design actually meshes really well with how fun and lighthearted this game feels at first. You’re in a punk band and you wake up in the middle of the zombie apocalypse. I only just played through the very beginning so there may be more to it than that, but I love the apparent simplicity at this point. In fact, simplicity on a few levels seems like one of the strengths of this game. The controls are simple enough to figure out on your own and you’ll probably figure out stuff like the character building mechanic on accident in the course of messing around.

C6FBEC17FF36FFF48B7B87AB103F65FD7A6DC7FC (1920×1080)

But the art style and the premise speak to something even more simple. The flying pieces of shrapnel and body parts and panicked bystanders and zombies and explosions make me think of certain cartoons I grew up watching. The original Powerpuff Girls, Courage The Corwardly Dog and Ed, Edd & Eddy all come to mind. I can even see a modern cartoon like the She-Ra reboot, Twelve Forever or even the creators of Over The Garden Wall or Gravity Falls attempting something like this if they wanted to go edgy. It would definitely be adult-oriented but…think of a creative team like the artists and writer(s) of Over The Garden Wall (my favorite recent cartoon). Based on that example, at least, they seem like they’re unafraid to go all the way with artistic ambition. Not afraid to be blunt while unafraid of going subtle…and with music. That kind of creative team could do something delicious with Charlie Murder.

Other than character building, there are other RPG-lite doodads like equipment and weapons. You also…seem to be able to rotate playable characters from the very beginning. Or, at least, a single save file contains your entire band. Each band member has a character class and I decided to go with the Mesmer first and then started again with the Berserker. So now my save file has a level 3 Berserker and a level 3 Mesmer but everyone else is still at level 1. When you decide to rotate your player character, you start at the beginning.

I know it might not sound like much on it’s face, but…it’s a fun work around for something that other games struggle with. At least the RPGs. Square went from each game having a million potentially playable characters to having mandatory small groups. I don’t know if I’ve played a game lately that simply has everyone available at the beginning like Charlie Murder, to be played and developed at the player’s discretion. Did I mention the simplicity, yet?

4CC5BDAE316FE1C9FBDDF8175EB6A3B260801911 (1920×1080)

Our story begins with a near-death experience. Whomever you choose to start the game with, you wake up in a big’ol hellscape surrounded by demons and then you are jerked back to your body as a paramedic is defribulating your heart. Next to the ambulance, some zombies and demons(?) quietly watch you for a moment. Just as quickly as you left the beatdown in the afterlife, you find yourself in a new one. After a small tutorial walk past some trashed storefronts, you make it to a bar.

D449DF66B0AC0562516482F2149A230EF39E5376 (1920×1080)
Over on the left: are those or are those not the same ninjas that board your ship at the beginning of Salt and Sanctuary?

This…feels kind of like a checkpoint? In Salt and Sanctuary (another gem from Ska Studios) the checkpoints look a lot like this. Except…in S&S, you only fight the inhabitants of another checkpoint if you’re claiming it for your creed or if you defect from your own creed. Here, the barflies simply start swarming you to begin with and the poor bartender only sticks his head back up once you’ve cleared them out.

4ED98BBAA2DCA8EDA8AC13AC3447D75152C55FEE (1920×1080)
Yep, Anar-Chi is one of your stats and the alcohol is a stat buff!

The beer taps that bestow stat buffs even feel a bit like the S&S checkpoints. In S&S, you can only distribute allocation points and alter your gear in checkpoints. The simplicity at the heart of the design may have either consolidated that aspect or…added another level of complication? See, in Charlie Murder, there is a traditional character building and allocation point system. When your character has gained a level, you’ll receive a smattering of allocation points you access with your phone.

(Oh about that- you know how many video games try to incoporate smartphones in ways that are supposed to be immersive? Like Silent Hill: Shattered Memories or The Legend of Zelda: Breath Of The Wild or a million others I’m just not thinking about? For some reason this grabs me more than any of those. You can even access the camera on your phone and the screen will just stay in side-scrolling mode while you angle around with your little phone screen. That presentation just adds to the overall charm, along with how you’re so often picking literal pocket change off of the street and throwing the arms of zombies back at them as projectiles)

53F6C1DE5BE877967B48DC3C87A0058287139A9A (1920×1080)

Soooo there’s at least a little bit of a normal character building but…your collection of money also seems to be a factor. As you beat the crap out of zombies and take their pocket change, you’ll probably notice that you’ll have about five to seven dollars with modest grinding. At the bar, money is exchanged for the stat-buff booze and for tattoos that convey special abilities. Seeing as Charlie Murder came first, I wonder if this was an early, experimental germ of the salt gathering in S&S. The tattoo mechanic even bears a resemblance to the magical brands in that game. Then again…I haven’t actually used any of the alcohol, I just bought a bunch of it to be used later. Maybe the alcohol only bestows temporary buffs…? We’ll follow up on it, eventually.

693479EFC9BC4DDC6CD91B923FC36D0BDCAABDE5 (1920×1080)

The checkpoints in Charlie Murder even have a little bit of the same…exploration value as S&S, even if less hidden shortcuts to other areas are involved. Poking around will usually reveal some renewable weapon resources or low-level enemies to grind against.

0B1542CD0EE2E71FF0CE3ECF96F669F107E4B7BF (1920×1080)
You just don’t get this from a game like Diablo ❤

After the first “real” boss fight in the back room of the bar, there is a brief cutscene of the band kicking it in happier times. Maybe even the founding moment of the band. Everyone’s chilling on the couch and some friends just happen to have instruments laying around. One random thought leads to another and the magic happens. There is a brief flash-forward to the band’s eventual success, combined with a simple rhythm mini-game. Then the cuscene returns to one particular band member for whom the good’ol days weren’t so good.

764A253B581488DCA5D485A44CAFF8133F583571 (1920×1080)

The play through continues here

Vigil: TLN end of blind play-through! Spoilers as usual

You could probably guess what my answer to the Doctor was. Before I got that far, though, there were some other odds and ends I wanted to explore.

First on the list was playing the Arctic ocarina in the Catacombs and seeing where the Porta Avernus takes us.

There are enemies in the Insidious Sewer that look like the statues on the sides, right? The same place where you find the boss that drops the Arctic ocarina?

Upon arriving in the Frozen Realm there is a stone structure that allows you to exit. Death’s Destination did not have a way out. I triggered the apparent “flash forward” after defeating the Ancient Guard there, though. So maybe it was designed to be a point of no return whereas the gateway conjured by the Arctic ocarina is not.

This turns out not to be the case. I later tried the Crimson ocarina again and Death’s Destination now has an exit. Maybe all ocarina gateways have an exit after the flash forward? Maybe after the flash forward they can no longer have immediate consequences? The fact that you can repeatedly challenge the bosses at the end of each during the current “era” would support that as well (including Death’s Destination).

The ruler of the Frozen Realm, Princess Downaly, drops the Frost Spear projectile spell and the Eternal Gaze. The latter I gave to Janis (after discovering her in the valley) in exchange for the Metallic Ocarina. While I was finishing what side quests I could, I managed to find all of the lost paintings. The painter in Maye rewards you with the Cerulean Ocarina, leaving us with two new places to go through the Porta Avernus.

When both of these are activated, Leila can warp to an area a few jumps away from the Uptancos boss encounter

The Cerulean ocarina takes us to the Shadow Disaster which I thought was a lot of fun. Both Death’s Destination and the Frozen Realm had nice platforming but the Shadow Disaster outdoes them. The Shadow Disaster also has a checkpoint of sorts since the platforming section lasts a little longer.

The resident boss, Uptancos, is a welcome change of pace. Maybe I was over-leveled because I took my sweet time with this game and did a lot of grinding, but the combat started to feel easy after awhile. The difficulty seemed to plateau around Bufonitte Lake so I was hungry for a challenge. I had to experiment with different strategies and spell combinations, which I had not done since Kelpie.

Speaking of the place where Kelpie resides, this is something I encountered while gathering paintings

For anyone who is interested, passive damage and fire damage work well, so you’ll want the Raging March spell equipped. You also need to carefully balance range combat and melee combat. I spent a lot of time dodging, so I found projectiles to be a good work-around (also on that note, use the Bouncing Fireball). It is likely possible to go through the entire battle with Uptancos without melee, but the fight speeds up when you take opportunities when they present themselves. Uptancos has an electric screen nuke that he needs to cool down from. That cool-down period, when Uptancos is just sitting on the ground, is a great time to lean in if you have a melee weapon with a fire buff. I had been using my enchantments on stealth “back attack” buffs though, so I just spammed with Bouncing Fireball.

Bumping off Uptancos wins you the mid-air dash. However, I’d like to mention something that I’d been noticing in all of the Porta Avernus worlds so far:

Shadow Disaster
Frozen Realm
Death’s Destination

Same jagged, stone ring in those three, all placed similarly. In the Frozen Realm and Death’s Destination, they appear before paths to the bosses open up. In the Shadow Disaster, it is inside the boss arena (check link below for more on this).

Moving on- only one more ocarina to try (not counting whatever I missed) and one more Porta Avernus journey. Upon playing the Metallic ocarina from Janis, the boss fight was almost instant:

To get right to the good part, this is what happens after defeating Dephil. Various item descriptions and lore snippets have referred to Dephil as a founding member of the Vigilant, or perhaps the founding member. And here she is talking about reading stories to Daisy in childhood. If you wanted to go further, you might notice that the names of the sisters borrow different phonemes from the name Dephil (Daisy + Leila).

Earlier, we experienced a jump forward in time that was at least a few generations. But we still do not know the exact length of the time that passed. When we hear about mythic-sounding events that contributed to the way things are now, we can’t help but wonder how close or distant to them Leila personally is. Dephil’s brief dialogue after defeating her makes it sound like she was a childhood caretaker of the sisters. Perhaps she was their mother.

This confusion over how near or far the sisters were to the distant past soon thickens. Remember the Doctor who wants us to hand over the Cubic Crystals? I of course told him to get bent and he revealed that what he really wants lies within the Giantwood. This does not combine well with the incident with him giving out placebos. And the explanation that he is doing it for the peace of mind of his patients was worn thin anyway.

Hilda agrees, so we then bee-line to the Giantwood, which opens a ton of lore in quick succession. Once inside, we find that there are notes and journal entries strewn about from various authors. They are Steve, York the Arch Priest, the Professor, Joseph (?) and a lay-priest educated by York.

These notes relate the discovery of a mysterious, destructive force that this cohort attempted to magically bind. They state that this seal is rooted in the souls or bodies of those that carried it out and depends on their shared participation. This procedure is modeled (with the guidance of York and the lay-priest) after an ancient religious event involving figures called the Holy Six. Five individuals are specified but there are suggestions of another, unnamed participant:

This guy keeps running off as soon as we find him and always leaves scribbly notes behind.

The dude clearly doesn’t like women and blames the Vigilants for something going wrong here. The author of the sloppily written notes says that women are weak and shrink before true power. We do not know of many ancient(?) female Vigilants but we do know of one. In the final sloppily written note, the names Daisy and Phil are mentioned close together but we don’t actually meet anyone named Phil. But the one bygone Vigilant we’ve met has the letters ‘phil‘ in her name.

So if Dephil was one of the six to seal the mystery danger in the Giantwood, she seems to have been blamed for not following through on something. The short, scrambling figure also said that the only remaining solution were “the sisters” and “one is dark” “one is light”.

So these six set out to the Giantwood to contain the mysterious threat. A magical ritual is implemented that explicitly calls for six participants. Running with the hypothesis that number six was Dephil, she evidently choked on her part.

In spite of that, the seal seems to have held. The notes within the Giantwood describe a long period of being trapped inside and the need to defend the exit from deserters. Since all participated in the ritual and any of them could then break it, a single deserter could ruin the whole thing. The entrance needed to be watched constantly. The seal wouldn’t be worth defending so bitterly if it hadn’t worked.

zillion Vigilant Swords stuck in this thing

The notes within the Giantwood also say that a “seige” of “heathens” was happening outside. Relics from other male Vigilants could be found within as well, like the sword of Wallace. It seems possible that Dephil bolted before the ritual was complete and then someone from the battle outside took her place.

This note is found near Bufonitte Lake. Bufonitte Lake is to the immediate right of the Giantwood. If Dephil deserted, maybe she wrote those words

Leaving the mystery of the deserting Vigilant aside for now, there is another mystery here we can solve more easily. The final sloppily written note says that the author found the “perfect ratio”, which makes him “supreme” and enables him to “surpass destiny”. Our only frame of reference for ratios of any kind are the mixtures of Crimson earlier in the game. The “pale red” mixtures concocted by the Professor come to mind. Other notes make indirect statements about the ultimate fate of the Professor and the communion he achieved with the Sacred Wood. Which brings us to the boss fight in the Giantwood:

I guess this debunks my earlier theory that the Professor and the asylum Doctor are the same person

This is not a strategically challenging battle. Remember Raging March and Bouncing Fireball and you’ll be fine. You might also want to wear the Plague Doctor mask, the Crimson armor set and the Raven gloves for maximum poison resistance.

So the Professor evidently pulled off some kind of “uber-containment” that’s not the same as the seal of the Holy Six. If the seal is rooted in the bodies or souls of the participants, maybe the Professor somehow found a way to shift the majority of the containment power to himself.

This appears to hold true after his death, since an even worse plague and monster scourge envelopes Maye after this. So it at least looks like the mystery threat escaped. Relying on implication, it seemed like Hilda wanted us to “get there first” before the Doctor at the asylum who wanted the Cubic Crystals. If the goal of Hilda and Leila was to “kill it with fire” before it falls into the wrong hands, then it might follow that the Doctor wanted to somehow control the mystery threat.

In any case, killing it with fire doesn’t seemed to have made things any better. Here the game appears to take a sharp turn toward linearity, since every NPC tells you to investigate the same place and it turns out to be what I felt was a neat dungeon. During the difficulty plateau after Kelpie, the three sweet spots during this blind play-through were the Shadow Disaster, the Giantwood and the final dungeon.

In addition to a fun dungeon crawl, we also get some big lore bombs.

These dovetail, roughly, with the lore dumps from the Giantwood. There was a final step to the ritual that Dephil (or someone) couldn’t go through with. Meanwhile, a supernatural prodigy child has fallen into the hands of the modern day asylum Doctor.

The seal magic relies on its human summoners for its’ embodiment. The transformation of the Professor, for example. If Dephil’s reluctance complicated things, it may result in some sort of magical embodiment/possession/flesh alchemy that may have created a new being. Way back during the Bruna search, we found a note from the Professor explaining that his experiment with Bruna and Gram was based on a mistranslation. An archaic word he took for “couple” in fact meant “sisters”.

Perhaps my assessment of the names Daisy and Leila being derived from Dephil confused the relationship. Maybe a second experiment happened on the correct subjects, the “sisters” rather than the “couple”. The Goddess, likewise, has a dark counterpart.

Maybe the two sisters were in the Giantwood company, with the necessary six working the spell (that is either summoning or trapping in a body) on number seven. So baby sister has the primordial chaos sealed within her while the holy texts specify a correlating other half. Big sister catches that part.

We started the game catching the aftermath of the failed experiment on Bruna and Gram. Meanwhile we still do not know what happened during the time gap. It may be possible that Leila was present for those years but experienced something she cannot remember, and that we would not see.

Whatever it is, we have two significant canonical statements here. One of them is the ritual at the Giantwood. The other is that Daisy was a vessel for some kind of magic. After killing the Scholar of the Sacred Wood, both the Doctor and Daisy are gone. Sure enough, at the bottom of the final dungeon, the Doctor has Daisy tucked behind a Porta Avernus-like gateway in a somewhat altered state.

On the other side of the gateway, we find ourselves on a large, stone platform with arched portals on two opposite sides. A possession of Daisy’s may be used before a series of pillars but I was missing one. Having biffed that part I instead went to the central pillar to see what would happen.

The last two boss fights were my favorite in the game so far. Both of them make delightful use of platforming within the boss arenas. Something about that, in a sidescroller, really adds both challenge and fun for me. Creative incorporation of boss lairs was one of the big sweet spots of Hollow Knight imo and it was a fun high note for this game to end on.

Vigil: The Longest Night has a new game plus mode which you are immediately offered after the credit’s roll. Interestingly, you are allowed to keep all of your added abilities like the double jump and mid-air dash, which for sure makes the beginning feel different.

I’m not that far into my second run but it already feels like the replay value is gonna be great. The lore contains a few apparent reversals that work better when experienced in retrospect. I am a little disappointed with the inability to sequence break, though. The Metroidvania typically uses unlockable abilities as ways of controlling progress. To retain those abilities and have them before you would normally make use of them seems like a golden opportunity for the development team to implement different progression sequencing.

Some final thoughts:

https://ailixchaerea.blog/2021/01/09/vigil-tnl-play-through-postscript/

Legend of Zelda Challenge: Outlands (spoilers)

The Legend of Zelda: Outlands is a rom hack of the original 1986 The Legend of Zelda by Challenge Games that dates back to May 15, 2001. Chronologically, this game is situated as a hypothetical “Zelda 3” that immediately follows Zelda II: The Adventure of Link. It also uses details from the Ninetendo 64 Zelda games, such as multiple ocarina songs, Gorons, the Gerudo and the Kokiri. GameMakr24, the author of this hack, also carefully preserved familiar sights like the black rooms with white dialogue and familiar enemy AI, spawning and spatial design. These familiar touches combined with the late nineties ideas add up to a cool “what if” scenario, as if the world of Ocarina of Time existed a decade earlier.

Immediately after the events of Zelda II, the Thunderbird has apparently survived and has discovered the location of the Triforce of Power in the Outlands beyond Hyrule. The Thunderbird imprisoned the Tetrarch Fairies that stand guard over this third of the Triforce and now must be released by Link in order to get it back.

Upon release, rare physical cartridges of this rom hack were produced, packaged like the original with a printed world map. While I would love to have one of these maps simply for its raw coolness, I instead played it the way so many of us played the original years ago: completely dependent on trial and error.

I WISH I actually had this

This being a rom hack of the 1986 Zelda, it naturally has the same overhead design and nearly all of the same textures and sprites along with some from Zelda II. Sometimes, basic movements, hit boxes and attacks used by a monster from the prior games will be dressed up in a new sprite. The AI and hit boxes of peahats and keese are swapped with each other. In an early dungeon there is a mini boss that moves back and forth and breathes three fireballs at a time, like the dragon from the first game, but is now a giant skeleton.

A lot about this game feels quite familiar, though, in spite of these differences. Like the first game, you start completely naked: the opening text crawl tells you nothing about where to go and only the vaguest hint of what to do. You don’t even have a sword, but at least the first Zelda put an old man in a cave directly in front of you to meet that need. This time, you won’t have a sword until you get to the first dungeon, and guess who gives it to you:

Princess Zelda herself is a constant companion, helping out in almost every dungeon

A key difference between this rom hack and many official Zelda games is the necessity of going back and forth between dungeons before and after releasing the Tetrarch Fairies. In level 2, there is a moblin that refuses to let you pass to the next room unless you feed him some meat (Kinda like in the first Zelda, remember? “Grumble, grumble…”?). This meat, however, is in an underground side-scrolling area in level 3, perpetuating Dracula’s tradition of storing meat in secret stone compartments.

Requires meat
One meat later

Having given the moblin the meat, you will go on to discover a raft that will carry you to a water-isolated place on the map where, for enough rupees, you can buy a Kokiri sword, a Goron shield, a bow and some arrows. The bow and arrows turn out to be extremely useful in dungeon 3- nothing else can kill the tektites efficiently that early in the game.

The bow is also necessary to kill the one-eyed blobby thing in dungeon 4. After that, the door to the left unlocks and Zelda will give you the ocarina. This is necessary to get the step ladder from dungeon one, which is guarded by a monster that resembles digdogger from the first game and, with the ocarina, can be done away with in a similar way. The door at the bottom of the screen will open up and the step ladder is all yours.

The step ladder, meanwhile, allows you to cross gaps that are roughly the size of a sprite which you need for multiple dungeons and overworld navigation.

Around the time you have secured 4-5 Tetrarch Fairies, you will probably notice that the Gerudos usually do one of two things- steal your money and hoard heart containers. On the continent accessible with the raft, there is a cave with a Gerudo who will give you The Staff Of Byrna once you have twelve heart containers. As she stands guard she says that she can only give the staff to “the hero”.

The staff itself, which deals damage, doesn’t expend rupees like the bow and doesn’t require full health like the sword beam, is an all-purpose reliable range weapon. So long as all you want to do is attack- the boomerang and the bow can collect objects for you and you will definitely want to gather stuff from a distance in this game. The Staff of Byrna also fires the slowest projectiles.

Since the staff doesn’t “cost” anything to fire, you may find yourself using it a lot against enemies that deal range damage and are too unapproachable for melee combat. And the enemies most likely to fit that description usually turn out to be the hostile Subrosians/wizards/whatever.

(after googling I learned that they are called Wizzrobes but I’ve been thinking of them as potion vendors from ALttP or Subrosians for too long already)

Little details like that can get you to speculate on the finer story details. Is there a reason why the Gerudos have the weapon that you are most likely to use against the wizards/Subrosians? You usually find the Subrosians/wizards close to the ninth dungeon that has the Spectacle Rock music from the original LoZ. What exactly is the nature of the relationship between the Gerudos and the Subrosian-thingie-people and how does it connect to what’s going on with the Thunderbird and the Tetrarch Fairies? What about the Gerudos gathering the objects (heart containers) that you need to collect for the staff? I like stuff like that, that’s organized enough to imply story threads.

Classic Zelda weirdness near the end

Rather like the original, the first play-through only gets you half of the content of the game and that’s where I’m at right now. This is basically a custom edit of the first Zelda game but it feels weirdly authentic. The final dungeon and final boss, in particular, really made me feel like I’m playing an actual “lost” Zelda game. In fact, more than once, it made me feel the same way I felt when I played Ocarina of Time as a preteen.

On to the second quest!

Approximations of filmmaking in other mediums

As a prose writer it’s easy for me to get attached to my sandbox mentality.  When you hit your stride with a story, you luxuriate in your solitary ownership of the process so much that it could potentially spoil you for anything that requires any diversification.  Just lately I’ve been skimming the RPG Maker website since I’m way too much of a wuss to actually get a real engine and attempt ground-up game design.

Not that it was ever a terribly good idea to go into game design completely on your own in the first place: in the eighties and nineties, a game we would consider simple by modern standards would be a neck-deep passion project of a small handful of developers.  The fact that the Mortal Kombat games were pioneered for 16-bit arcade cabinets by two people may have been uncommon for the time but by today’s standards it’s almost Herculean.  Being a total Final Fantasy fan girl, I’ve been following the development of the FFVII Remake and the FFVIII Remaster with bated breath and the developers have said repeatedly that video game development is rapidly reaching par with filmmaking as the most expensive and collaborative of art forms.

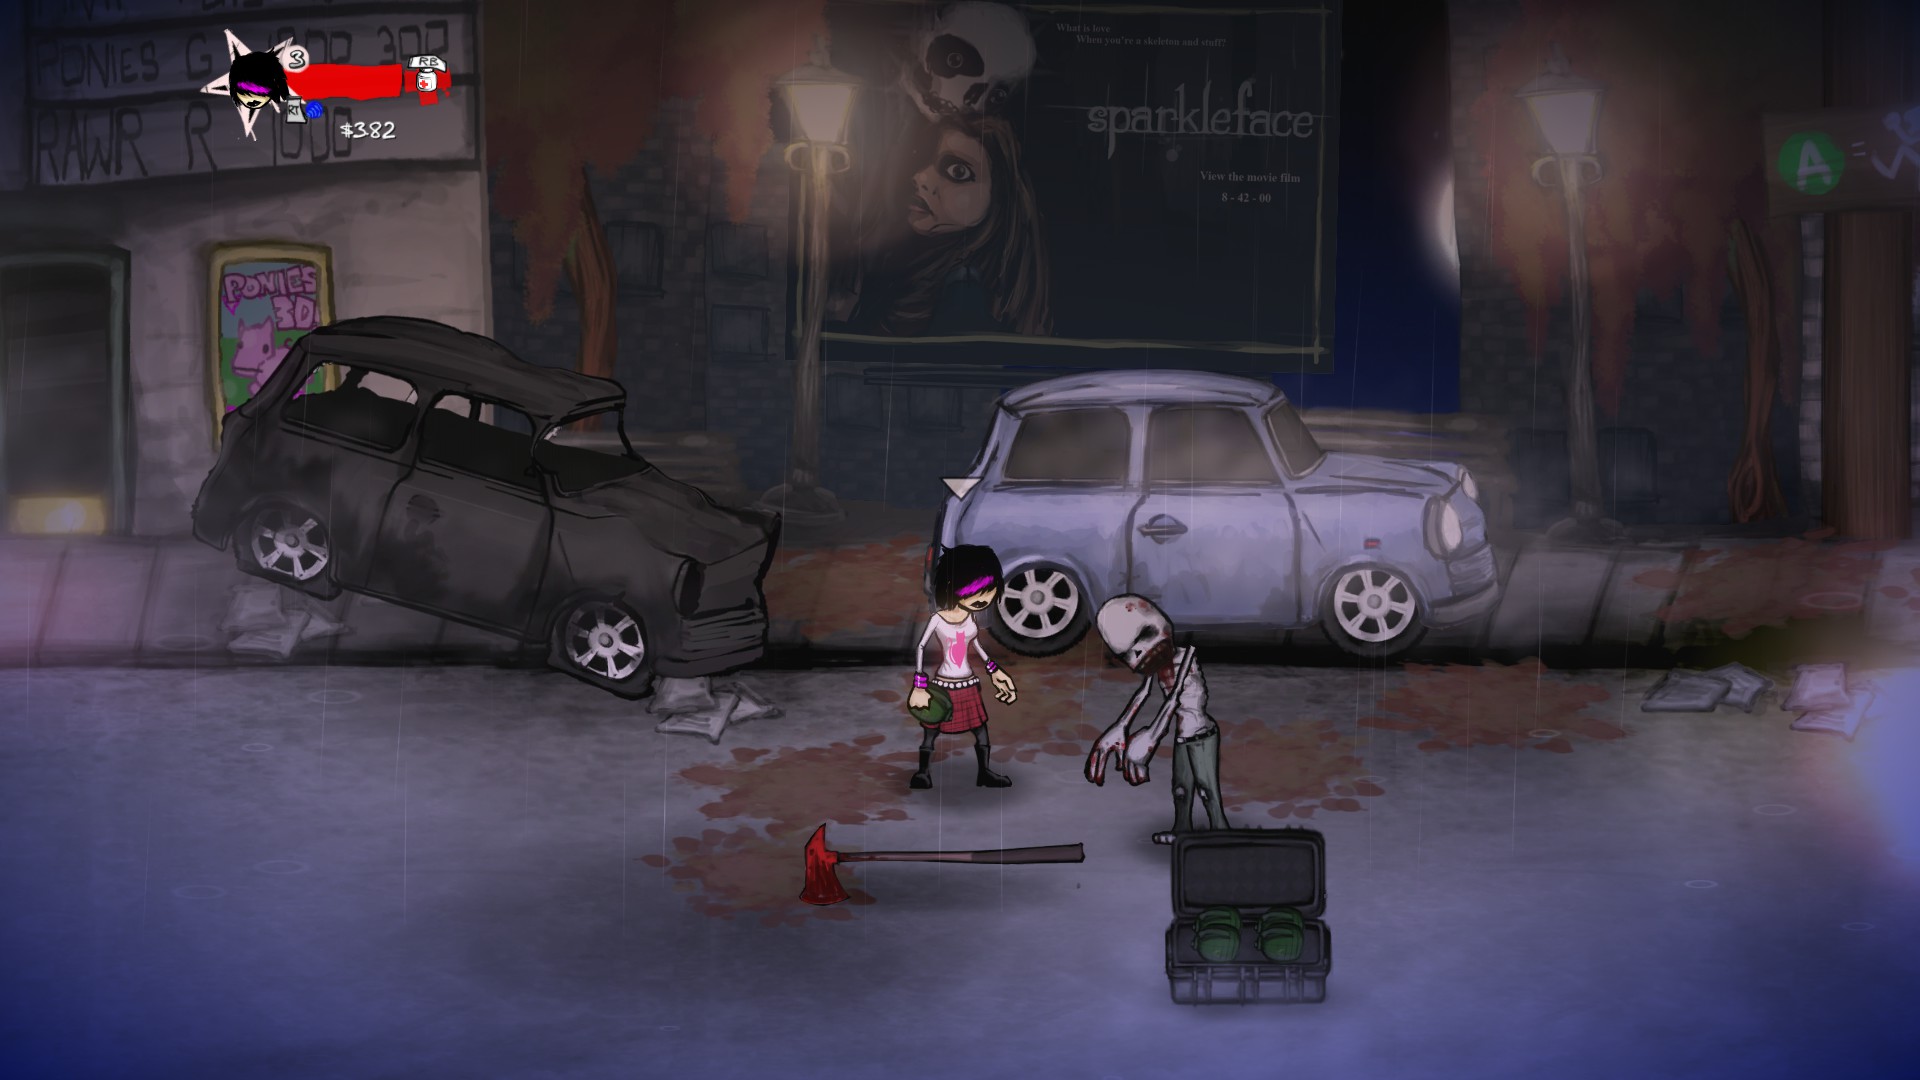
This specific comparison has been on my mind lately because I recently finished playing through a game called The Space Between that I first found out about through John Wolf’s YouTube channel.  Put simply, The Space Between is completely narrative driven; no puzzles, no combat, no normal video game mechanics of any kind.  Your job is simply to move through the linear story through exploration and dialogue.  In other words, it’s an interactive short film.

In the last few years (going on decades) this has hardly been unique: we’ve all heard of the TellTale Games along with Quantic Dream and Dontnod Entertainment: interactive video game “films” have pretty much blossomed into their own genre (to say nothing of visual novel games).  Most of them, though, typically rely on a combination of polished graphics (whether that’s attempted photo-realism or an emulation of hand-drawn art) and exploiting opportunities to work in more conventional gaming mechanics into the cinematic narrative.  Telltale Games produced two Batman games that use elements of stealth, puzzle-solving and beat’em up combat.  Life Is Strange relies on puzzles and Vampyr is an action-RPG.  These games also typically have ordinary and recognizable situational and narrative cues that give you a pretty clear idea about where things are going.

With films, there are definitely several precedents for auteurs forgoing these expedients:  something like Elias Merhige’s Begotten or David Lynch’s Inland Empire require you to take it in like a painting or a sculpture.  These films are almost purely visual with little to no use of narrative craft.  When I was in college I encountered a helpful way of describing this in an essay by Tania Modleski about cinematic excess.  According to Modleski, cinematic excess is when the visual content overwhelms or outpaces the narrative content.  According to this model of filmmaking as visual art and narrative craft, mainstream film is basically a hybrid medium: stories are largely what people are looking for from a mainstream film, making them a combination of literature and graphic art.  A “pure” film, with no emphasis on literature, would probably be something like Dali’s Andalusian Dog, since it’s a series of images that are held together by a thematic thread but has no frankly expressed story.  Begotten and the films of Kenneth Anger could also be classified as “pure” filmmaking with little to no reliance on literature.

Before I go on, I just want to bottom-line the fact that Modleski’s breakdown is meant to be descriptive and not judgemental: something that uses visual presentation along with a story is, in the most literal sense, a hybrid of literature and graphic art.  Even dramatic writing is a sort of hybrid since, along with its visual presentation, drama and theater often have their own academic and artistic partitions.  A novelist and a playwright are not interchangeable.

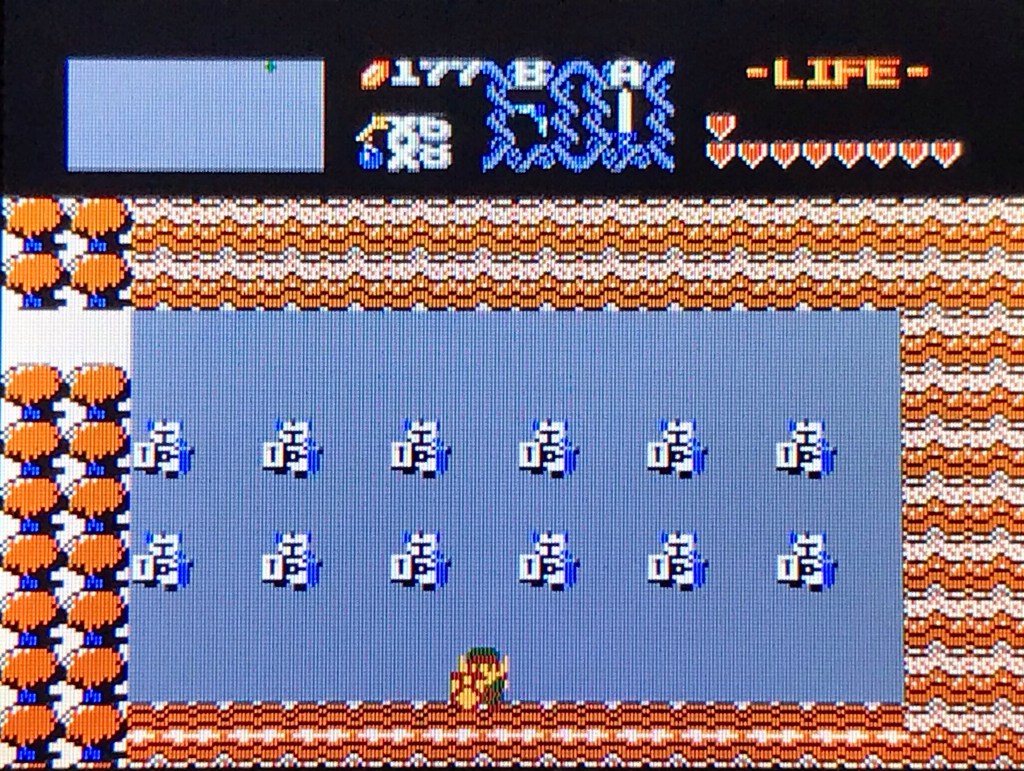
The application to video games should be pretty clear: something like Pong or the very first Mario or Donkey Kong games are good examples of “pure” video games.   They have virtually no reliance on story-telling of any kind- all of the content is in the gameplay.  No one who has ever enjoyed those games has ever required narrative context for them to make sense. 

When video games became more mainstream in the late eighties and early nineties, fictional scenarios were implemented more and more to make them conventionally compelling, since stories are something we all have some familiarity with.  It could be argued that this was where the expectation that video games be as “real” as possible emerged.  Since then, the majority of popular video games, like popular films, have been literary hybrids according to the Tania Modleski analysis.  Clearly, Telltale Games, Quantic Dream and Dontnod Entertainment have become specialists in this hybridization, making it even more frank with their cinematic influence (not that they were the first game developers to be seriously influenced by film, obviously).

I’m bringing all this up because it offers a more streamlined way to talk about the use of narrative devices in video games. Specifically where The Space Between is concerned.  If video games have widely adopted literary hybridization with the same success that filmmaking has, then the recent popularity of linear, cinematic video games is a useful point of comparison.  Life Is Strange is a hybrid game and The Space Between is definitely, obviously a hybrid game.  But even between hybrids (and especially between ones influenced by film) there are degrees of specialization and craft convention.

If, for the sake of argument, we designate subgenres like Metroidvania and Soulsborne as the middle of the spectrum (since they often employ a vast, single map, mostly visual storytelling and a narrative pace that hinges on puzzles, combat and other ordinary gaming mechanics) then The Space Between easily lies closer toward the cinematic end of the spectrum. 

Like I said, the story is firmly linear and, as the player, your participation is limited to putting one foot in front of another until the end.  What makes playing this game different from watcing someone else play it is that, from a first person perspective, you have a deeper sense of immersion and participation (although your interactions and relationships are dictated by the script).  You hear things happening around you based on your movements and locations which gives the impression that your actions matter, that you are tapping on one side and something on the other side is tapping back (very literally in some cases).  One of the cooler instances of this involves…snipping sounds.
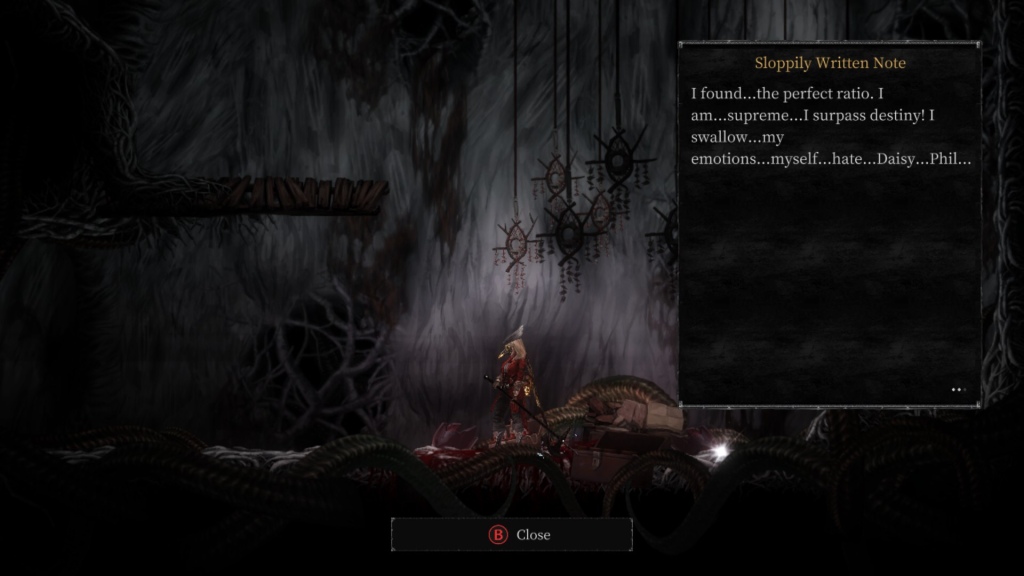
Lemme back up, and this where we’re gonna go into some spoilers (if you wanna close out of this and experience the game for yourself, I’ll include a download link at the bottom of the entry).  Your player character has had a lifelong relationship with someone named Daniel, apparently going back to childhood.  Potentially.  There are only so many ordinary ways where one ends up in a blanket fort with chairs, talking to someone on the outside.  I guess this doesn’t necessarily have to be in childhood.  It’s a flashback, at any rate.  So Martin (our player character) tells Daniel he doesn’t want him inside with him, but he doesn’t want him to leave either.  He asks him to put his hand on the blanket and Martin touches back.  Martin then asks if he feels his hand or the blanket.  This flashback establishes some basic thematic language and has a few parallel echoes later on.  It’s presented as fundamentally important for Martin but the specific nature of his relationship with Daniel is almost never frankly stated.  Almost.

During another scene that could potentially be a continuation of the flashback, Martin tells Daniel to get a pair of scissors and cut one hole above and another below.  When this flashback(?) ends and we’re back in the present, we’re standing in rows of sheets hung out to dry outside of an apartment building.  As you’re passing through the corridors of sheets you hear one snip.  A little while later, you hear another.  After that, you glimpse a sheet with one hole near the top and one near the bottom.  If there was any doubt that was what it sounds like, later on you see a curtain sucked around a human outline with a hole in its face and another between its legs.

Since many of the flashbacks seem to be dropped during conversations with another character named Clara, it’s probable that Martin is actually talking about these events as you, the player, are shown them.  This possibility is emphasized even more later on when the momentum near the end picks up, when he says “Clara don’t do this” when eerie events that resemble his connection to Daniel start happening.  If Clara is doing anything, the only potential reason the player is given is because of what Martin told her.  The fact that the player has been in Martin’s POV during the mid-conversation flashbacks that show his story adds to the sense of participation.  Even after the sections where you are basically forced to sit in Martin’s POV and watch him talk, you are put in very ambiguous and tense situations that will not progress until you go where you have to go to trigger the events.

Essentially, you are shown a visceral vulnerability of the player character that may or may not have been vocalized before, then, following this huge, personal surrender, the protagonist loses all sense of control and safety.  Fear was overcome to let another person in, and then the fear was justified in spades.  You’re not even sure of the exact threat and you will not learn how badly you fucked up until you walk yourself into the worst of it.

Think of the cut-scene in the second BioShock game where your awful ending will not happen until you press a button, and you will press the button because you can’t do anything else.  That’s kinda what’s going on.

If The Space Between was a short film, the ending and the momentum that’s built up by Martin’s trust and his subsequent betrayal is where we would get the real payoff of the literary and photographic hybridization.  There is even a word from early twentieth century German film that’s easily applicable to this: expressionism.  Put simply, an expressionist film is set in a vacuum, establishes its own “rules” in the course of its story and needs no context.  David Lynch has probably done more heavy lifting than anyone toward updating and localizing German expressionism for America with films like EreaserheadLost Highway and Mulholland Drive.  Those films are not set in a vacuum, but the real world locations that they are set in tend to not inform the internal rules of the “world” any more than a vacuum.  Usually, a psychological or emotional continuity takes priority over a literal one.  All of the visual cues and character decisions make sense, but only if you accept the subjective dominance of one specific character over all others, since the things that have emotional connotations for them will end up controlling everything else.

If The Space Between was a film, the ending is where Martin’s psychological continuity would start replacing the literal continuity in the foreground.  What makes this kind of narrative device different from, say, something like the Pink Floyd film The Wall which is strictly about a character’s internal life, is that The Space Between tries to draw your attention to an objective world that definitely exists but is still invisible.

The game begins with what appears to be a newspaper article about the body of Martin Melanson, a well-known architect, being found in a hollow within a wall.  So we have a definite statement of something happening, but everything else is totally subjective.  David Lynch has done similar things, such as in Lost Highway when Fred Madsen appears to magically change into Pete Dayton while he’s in prison.  Pete is released from prison and the story, through visual cues, seriously begins to look like a separate, parallel event to the Fred Madsen story.  What stops the viewer from firmly deciding that Pete Dayton is in a separate story is that he was followed out of prison and is being surveilled by two FBI agents from the Fred Madsen story.  The presence of the FBI agents are a constant reminder that, no matter how much this looks like a broken continuity, one thing is still chronologically following the other.  Like The Space Between, something is definitely happening in the real world, but the subjective continuity makes it totally invisible.

For film, this is an example of a well-established device that relies completely on the visual cues and the performances of the actors to overwhelm a frankly stated plot.  The plot is overwhelmed with a visual and dramatic continuity that still has a thematic relationship with the plot, even while leaving it behind.

As much as I enjoyed The Space Between, though, I couldn’t help but wonder: what makes this different from an interactive film?  Does its presentation as a video game actually bring any real hybridization, or is this simply a film via video game?

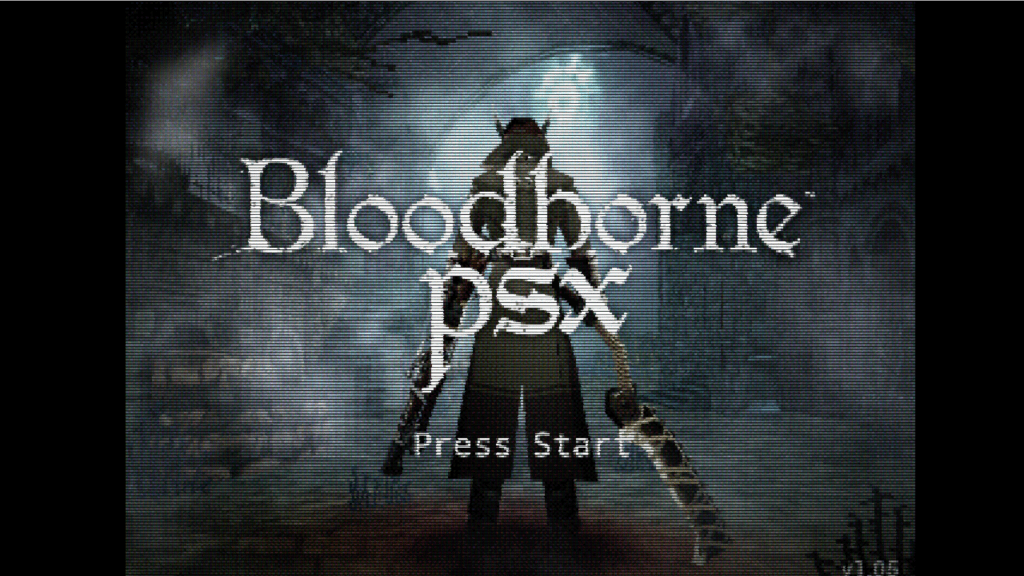
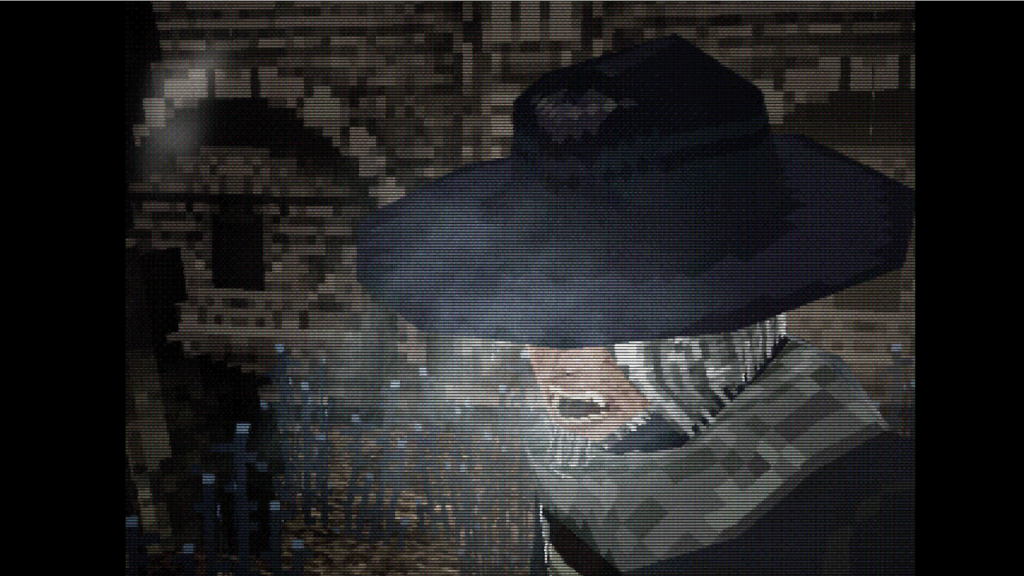
As previously stated, the orientation of the player in Martin’s first person point of view does much to differentiate the experience from that of watching a film.  Dialogue is used often but many of the essential stories told by Martin are shown directly to the player through flashbacks rather than through explication. The next difference may not be a substantial one but The Space Between utilizes the same graphics as early nineties PS1 games which has a few different consequences.

One of them, which is admittedly negotiable, is nostalgia-tinged uncanniness for those of us that grew up with the PS1. It creates the experience of finding something startlingly foreign within something familiar. It also uses some commonplace technological limitations from that era to good effect. Most early PlayStation games used text-based dialogue to save information space and, rather like those very games, The Space Between‘s text dialogue allows the communication between characters to share the foreground with the atmosphere created by the music.

Which is to say, the dialogue happens within a sonic atmosphere rather than interrupting or embodying it like voice acting would. This, both for this game and older games, is a huge gain for the immersion. It’s this immersion that enables the player to be directly in touch with the subjective continuity as it takes over the objective one, making it an effective blending of cinematic trope with classic video game presentation. The first person player experience plays into the success of the expressionist structure.

Now….as cool as I think this game is and as much as I’m enjoying reviewing it, this review was not originally the point of this entry. What I wanted to talk about in the first place were ideas from filmmaking seeping into other mediums. There are a few different reasons for this.

The more selfish ones are, as the opening paragraph states, that I am growing curious about other art forms than the one I’m most accustomed to. So I’m skimming the more, shall we say, vanilla edges of game development. I’ve also had ideas for screenplays that I’ve been seriously excited about in the past but, realistically, filmmaking can be very difficult to get into. Which hasn’t stopped me from roughing out screenplays, but genuine difficulties exist. So perhaps it’s prudent to be aware of other expedients.

Was this what Christoph Frey, the mind behind The Space Between was thinking when he made that game?

I can think of some reasons why it may not have been, such as a wish to simply make an uncanny and dreamlike work of art, but if he was thinking about an alternative to filmmaking, I could hardly blame him. Alejandro Jodorowsky, a renowned filmmaker by any standard, struggled for decades to make a sequel to his 1970 classic El Topo and, recently, has decided that his vision was too pressing to wait any further on the convenience of the film industry. He then turned to an artist he trusted deeply and elected to make the El Topo sequel, called The Sons Of El Topo, into comics. I have read the first hard back English language volume, Cain, and Abel is expected to get a hard back English release later this year.

Being the pragmatic and opportunistic magpie that I am, I always jump at the opportunity to learn more about how my own ideas may benefit from similar adjustments. My recent desire to throw myself into RPG Maker started with a conversation with a friend about making our own video game together. My mind took off but at the time I wasn’t aware how obtainable RPG Maker software is. As I plotted the story out I realized I cared too much about it to let go and so resolved myself to write it as a novel. And then I saw the bad-ass retro SNES and Gameboy-style assets and skins on RPG Maker and now I just don’t know. So the pros and cons of different kinds of artistic hybridization have been on my mind lately, how a story may change from one medium to another. Especially since this particular story of mine is connected to the same world-building project of two different novels I have in the works.

Why not do both the game and the book? Good question, why not indeed. Neil Gaiman did a few different retellings of Neverwhere for different mediums. Butttttt Iiii dunnnoooo…..I like the idea of a creative exchange between different mediums that are all involved in the same project. Such things have their flaws, as the expanded FFXV and Kingdom Hearts universes attest, but…I wanna 😡

And, at least, I think the multi-volume El Topo saga indicates that success might just be obtainable on that front. Several things that had a very specific function in the original film, that worked specifically as cinematic techniques, have been translated to intriguing effect in the comic book continuation.

For example, the cross dressing and the seemingly random fetish imagery. Film, like theater, can get so subjective at times that you wonder if there is meant to be any actual context (I.e. expressionism). El Topo exploited this potential well. The protagonists’ transformation has a lot to do with a female phantom-self, a kind of Jungian anima, that may or may not actually exist. This female reflection is portrayed by an actress but, when she speaks, she has a male voice. Later, in a separate setting, an apparently female character also has a male voice-over when she speaks. Does the female reflection of El Topo exist in the same way that the named characters do? What about the same phenomena appearing casually in a different place?

The comic continuation has made it clear that at least some of these things literally exist: male to female cross dressers do, in fact, seem to be common place. Particularly in the clergy. And that El Topo, post-martyrdom, is venerated by Christians, Jews, Hindus and Muslims. This could either mean that El Topo has literally synthesized all of these religions into one or that this is a non-literal way of indicating that El Topo is universally revered in the fictional world. It is also now clear that the honey-combs that appeared at El Topos grave were not an illusory symbol but literally appeared as his dying miracle.

Another smaller but cool wrinkle is that the ghost of El Topo and the appearance of his sons are all meticulously drawn to resemble Jodorowsky himself in his performance in the original movie. Cain is identical to the violent pre-apotheosis El Topo and Abel is identical to post-apotheosis El Topo. El Topo’s actual ghost looks simply the way he did at the moment of his death. In the beginning, when El Topo’s final massacre near the end of his life is retold, the artist is very precise is recreating Jodorowsky’s specific facial expressions and it’s freaking beautiful.

The precise nuts and bolts there remain to be seen for English speakers, and my French is a little rusty right now so I don’t know if I’d be up to tackling the older digital versions of the French run. Another thing that has yet to be seen is whether or not the female version of El Topo will be revealed to have a literal existence after El Topo is dead- she was an essential character in the film and I would love to see her again in the comic.

So yeah. I find some of Jodorowsky’s words rather applicable to my current predicament: “There is no failure, only a change of direction”. Closed doors can definitely lead to successes of their own with the right mindset as he himself has made clear.

Link to the Ichio page where Christoph Frey’s The Space Between can be purchased-

https://chrstphfr.itch.io/the-space-between