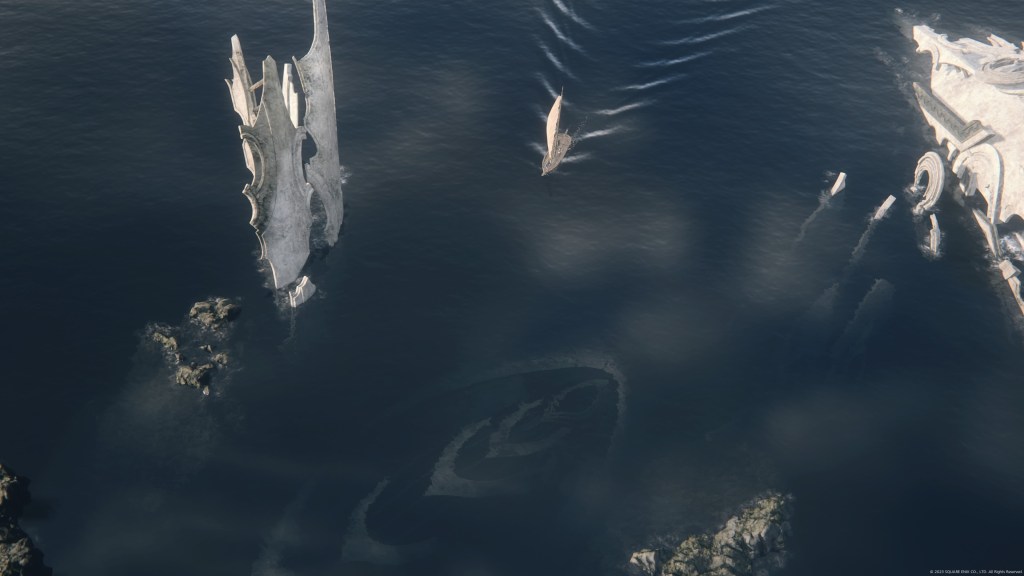
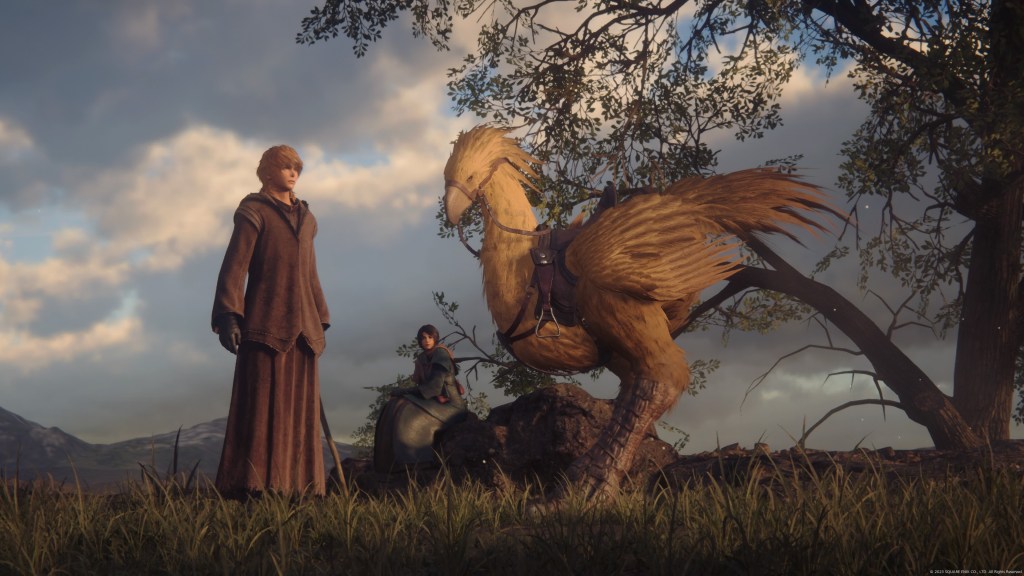
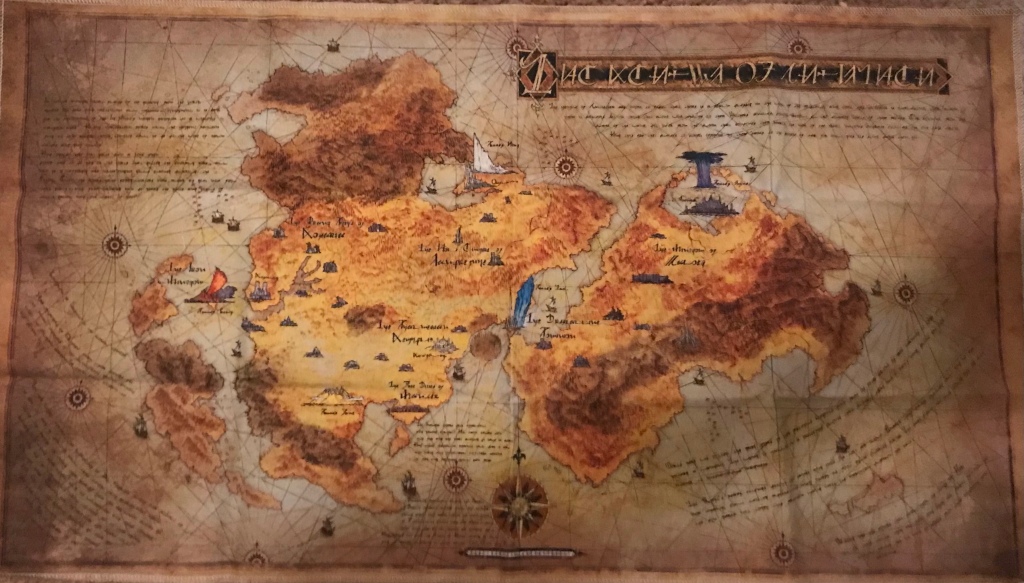
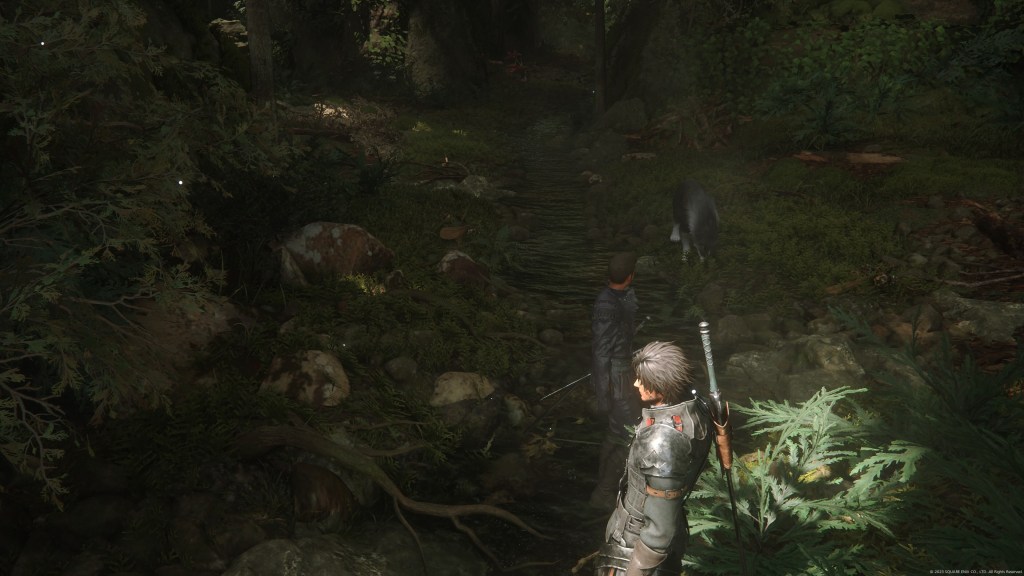
After Clive commits himself to the cause of the Hideaway, things move fast. The creeping, environmental menace of the Blight has been present since the beginning. Both the rising power of Sanbreque and her victims have been affected by it. Once Clive and Jill return from Rosaria, Cid offers the first actual speculation on the Blight.
As with Final Fantasy IV, V, and IX, the Mothercrystals seem to function a lot like weather control / energy devices left behind by an ancient, technologically sophisticated civilization. Since the crystals are like machines under human ownership, misuse is always just around the corner. The crystals in XVI interact with an ambient force called aether. In the long run, aether is naturally replenishing but in the short run it can be exhausted. When aether is running thin, the environment starts a downward spiral. This, in Cid’s estimation, is what the Blight is, and it is why the Mothercrystals must be destroyed.
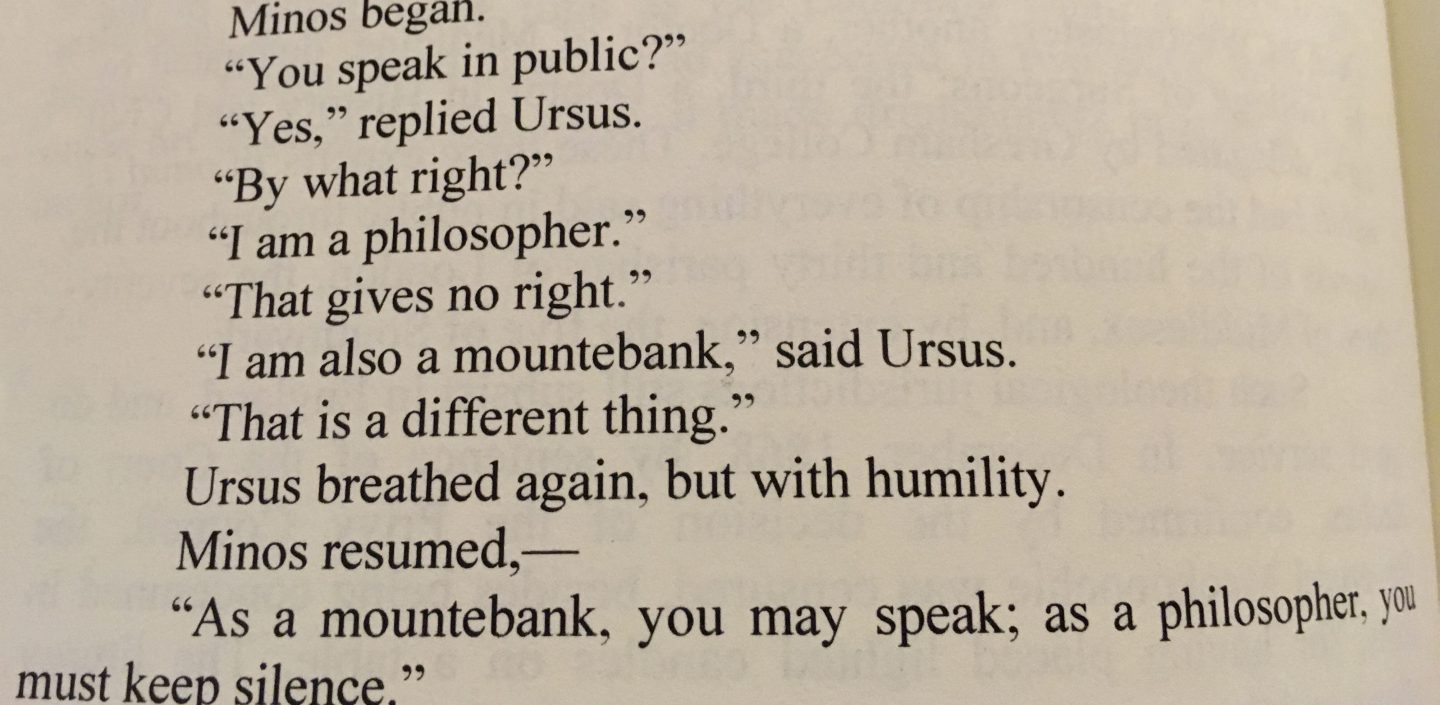
The attack on the Drake’s Head Mothercrystal brings us back to the remnants of the Fallen, Final Fantasy XVI’s founder race. Along with adding the historically familiar (within FF) link between the crystals and ancient technology, we see more Bombs, Iron Giants and Liches. As established in Clive’s return to Phoenix Gate, these kinds of ruins follow a pattern like the Cloister of Trials and and the Aeons in Final Fantasy X.
Sure enough, the Drake’s Head Mothercrystal is protected by the Eikon Typhon. We then encounter a being that looks like they may be an Eikon themselves. They have fluid telepathy and interaction with both humans and Eikons. Joshua seems to have bound himself to this creature as a means of surveillance. This, of course, is Ultima.
This leads to a number of lore-matches. It’s not uncommon for Final Fantasy summon monsters to play a role similar to gods, bodhisttva-like spirits or magical totems. Summon monsters in one game may be summon-adjacent in another, like Omega, Chaos or Doom Train. Ultima is a frequent member of this gray area. Summon monsters are linked with the in-world mechanics more than almost any other game play mechanic, except (arguably) crystals. IV included diagetic functions for other game play mechanics, like combat spells. VII basically turned Holy and Meteor into titanic, cosmic forces. Like I was droning about in a prior post, the link between summon monsters and an ancient founder race goes back to Final Fantasy Adventure on the Game Boy, if not further (the first FF has similar insinuations).
That last one is closer to what is going on in Final Fantasy XVI, but I’ve not yet unraveled Ultima’s role. I’ve only just reached the point where Clive and Bernard are looking for Hugo Kupka (channeler of the summon monster Titan) after the Waloeders rescued him.
Speaking Kupka and related topics, I could not have been more wrong about Benedikta. I think. Since I’m doing a loosey-goosey play through to get a read on what’s on offer, some details may have escaped my attention. I could probably edit prior posts in accordance with discoveries but I just like doing these little multi-post play through thingies. The mistakes add to the cumulative discovery, including false predictions.
Said all that to say: I may have missed some stuff. I remember the hooded figure appeared immediately before the fight with the Garuda emanations containing parts of Benedikta’s soul. I don’t know if he had any sort of…last minute intervention like he did with Kupka. If it was understated, it may have slipped under my radar. I kinda wonder if the hooded figure rescued Benedikta like he did Kupka.
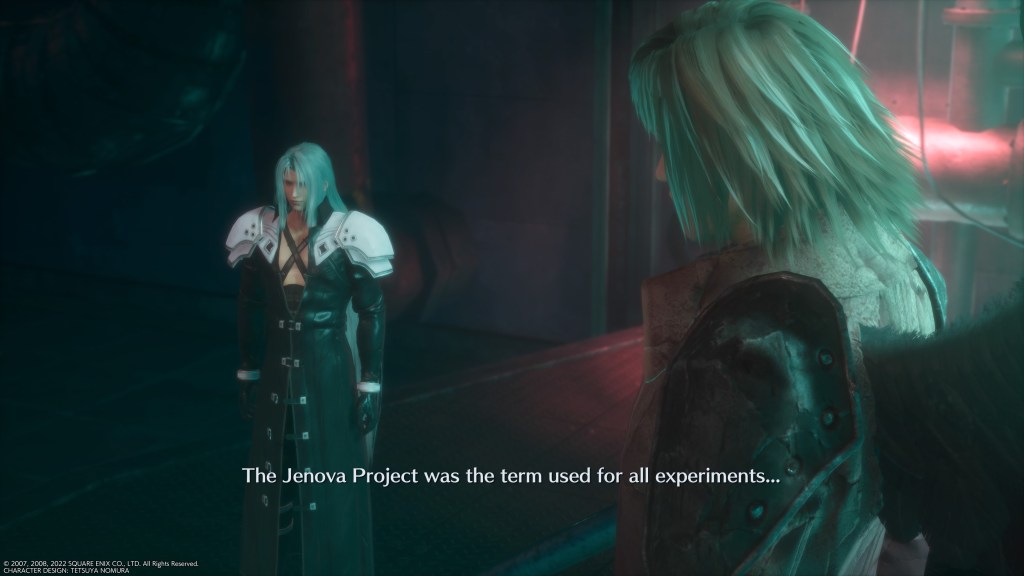
Which brings us to the hooded figure. At first glance, it looks as if the hooded figure is Joshua but he’s clearly not just Joshua. This subtle difference was insinuated in the beginning with the cuts between the more shadowy, non-corporeal hooded figure and the corporeal hooded Joshua. Then, at the end of the Drake’s Head raid, we see Ultima for the first time through Joshua.
This clash ends with Joshua saying that he knows better than to try to kill him. The implication is that Ultima is incorporeal. Joshua has another idea, though. Much later, a Joshua says in a cut-scene that he knows what Ultima is thinking, which gives the impression that Joshua somehow contained Ultima with his own soul. Joshua also makes it clear that this containment does not stop him altogether.
Joshua has no clear reason to rescue Hugo Kupka from Clive. We also know that Joshua is not the only one who constantly wears a hooded robe and that Joshua is bound to at least two non-corporeal beings (Phoenix and Ultima).
In a cut-scene in Sanbreque, Anabella’s young son Olivier is given credit for winning Hugo Kupka over. Let us not forget that Anabella is also the mother of Joshua and Clive. If Ultima is haunting Clive, is partially bound by Joshua and can be channeled by Olivier, it looks like there is a connection with the Rosfield bloodline.
If such a connection exists, it adds weight to the possibility that Ultima is scooping up Dominants that get rekt by Clive. And here we’ve returned to my suspicion that Benedikta may still be waiting in the wings, somehow. I’ve been extremely wrong about her before, though.
Concerning game play: the statements from Square regarding a job system seems to have been referring to the move sets that Clive gains whenever he saps the Eikon of another Dominant. The Phoenix and Ifrit move sets are comparable to something like a warrior or berserker play style. The fire Eikons are good for going in swinging. Garuda’s move set is speed-based melee with an emphasis in aerial combat and is my favorite so far. Ramuh has a range-fighter move set and Titan has a high-defense / high-damage move set, similar to a corsair from Final Fantasy XIV or Barret from VII.
Many of the Phoenix abilities are part of your ambient combat options, regardless of whichever Eikon Clive is attuned to. Many of those include classic adventure game melee, which- combined with Garuda -appeals to my preference for dex builds in Bloodborne.
The dev team were, for sure, not lying when they said that FFXVI had one playable character. One could make an argument for Torgal being the only genuine “party member”, but I have a lot of fun coordinating Torgal’s attack patterns with my own. It even adds something to the side quests, since Torgal is the only party member that always comes with you when you deviate from the mainline story. Maybe this is just a cheap shot for the animal lovers, but I appreciate it. Clive’s deep alienation at the beginning makes me…I guess…weirdly grateful for a fine hound that never leaves your side. If this makes me a sap, I can be okay with that.
Speaking of side quests, that’s another strong point. Not that this game is free from some typical, silly side quests. I’ve recently discovered the Viva La Dirt League YouTube channel with their Epic NPC Man skits. Greg, the garlic farmer of Honeywood, captures a lot of the silliness that have become normal in JRPGs. Greg is constantly offering a quest to round up his sheep, who have “run amok.”
Just like many JRPGs…FFXVI is not immune to “my sheep have run amok” NPCs. Not nearly as many as XV, though (XV had the worst case of “sheep run amok” NPCs in the history of Final Fantasy).
Other than that, though, this game adds something to side quests that I don’t see as often as I would like: a point.
After the destruction of the Drake’s Head Mothercrystal, Clive adopts the mantle of Cid and continues his mentor’s life’s work (our Cid wasn’t even the first one to use the name).
As the new Cid, Clive is now responsible for the Hideaway, a shelter for formerly enslaved magic users. As the de facto leader, it makes sense for Clive to be involved in the different levels of administration and providing. These aren’t a bunch of randos whose sheep ran amok; they’re desperate and Clive has accepted the responsibility of a provider. Clive himself was once enslaved and branded, with other Bearers.
Even before then, Clive’s branding is tied into side quests. Early in the game, while you’re away from the Hideaway, randos outside the Hideaway will recognize Clive’s facial brand and will make obnoxious, condescending demands, offering rewards which you are instructed to “pass on to your master.”
This stops happening after the attack on Drake’s Head, but it sets up the character significance for Clive adopting the role of Cid. He’s not just a provider; he’s a provider for his own people.
More to come. If you’re reading this on the main page, keep scrolling for my older FFXVI posts. If you’re reading this in a link, click the arrow at the lower left of the screen.
The facial rendering and body language is only top notch during the cut-scenes. During typical game play, they range from FFXV quality to just above VIIR. Just above VIIR is, admittedly, pretty good though.
Concerning the narrative-
Clive’s level of responsibility in the fatal clash between Joshua as the Phoenix Eikon and the Ifrit Eikon.
I’m still not finished with the game so there is still room for this to be solved. I’ve only just reached The Veil, during Clive’s attempt to locate Jill and Cid behind the Sanbreque border.
As things stand now, though, I am not altogether clear on why the apparition of Ifrit at the Phoenix Gate necessarily means that Clive killed Joshua. The implication seems to be that an Eikon can only manifest through their current, corporeal Dominant. If Ifrit manifests during the lifetime of Clive, it may follow that Ifrit must necessarily manifest through Clive. That’s my best effort at trying to deduce why Clive would feel that his guilt is unavoidable.
The battle between Phoenix and Ifrit is watched by Clive, as a teenager, immediately before he was enslaved by the Imperial military. If Clive simultaneously watched the fight while participating, that would be some pretty hardcore dissociation.
However…I don’t specifically remember Clive on the sidelines during the fight. During the fight, the player is rooted in Joshua’s perspective. It just sort of feels intuitive that Clive is watching. We also hear Clive’s screaming as Ifrit pounds Phoenix into a bloody pulp.
Then again, the two giant Eikons do a serious amount of dodging and flying. They probably moved a fair distance away, which would call the screams of Clive into question. If his screams can’t be heard from where he was originally standing, then we must be hearing them for another reason- such as Clive being rooted in Ifrit the way Joshua was rooted in Phoenix.
Yet the apparition of Ifrit is only triggered by the mysterious hooded figure. If Clive went apeshit because he was suddenly forced into an unfamiliar, primal, non-human perspective…it was clearly triggered by a third party. That’s why I don’t buy Clive’s guilt.
It’s also possible that the player is meant to feel this dissonance, and that Clive’s guilt is important only in his individual character arc. In that case, the dissonance would serve as a motivating instinct leading the player to the correct conclusion.
There’s a lot that can go wrong with that setup but there is also a lot that can go right. Worst case scenario, the player/viewer/reader feels alienated from the viewpoint characters. When a story’s point of empathy is abruptly shut down, it’s hard to bounce back. Best case scenario, you feel intimately connected with the viewpoint character.
In the context of the rest of Final Fantasy, a split or reversal in the arc of the main character is often associated with the two layers of crisis in my earlier post.
Put simply: the archetypal Final Fantasy story rests on two layers of crisis. The first one is often social or institutional. The second, deeper layer is more mysterious but often intertwined with the first one.
It is also normal for this shift between two layers of crises to occasion a shift in the main character, which usually changes their motives. Cloud’s altered memories in Final Fantasy VII is probably what most people think of first, in this regard. IV introduced a dramatic moral reversal in Cecil that goes further in the opposite direction when the second layer of crisis starts to emerge. Every single playable character in VI (other than Umaru and Gogo) has their motives changed or influenced in the World of Ruin.
This, I imagine, is what is happening with Clive in XVI when he begins to think that he killed his own brother in a magical altered state.
When he starts to believe this, Clive begins seeing visions of a hooded man in a cloak, like the figure he originally believed was the Dominant of Ifrit before realizing it was him.
The hooded man never appears to be truly, physically close, which implies that Clive might be the only one who can see him. Then Cid makes it clear that he sees the figure as well. In that moment, Cid is probably saying what the player is thinking. I, at least, felt like it was firmly established that the appearance of Ifrit is conjured by a third party, even if he does manifest through Clive.
Not everyone will carry this baggage going in, but the hooded figure has a vague resemblance to the updated version of the Sephiroth clones in FFVIIR. While this might be my own subjective problem, it still felt like the game was taking some risks, between resembling Cloud’s psychic torment a bit too much on one hand and the dissonance between Clive’s beliefs and the perspective of the player on the other. A dissonance that could either alienate the player from the viewpoint character or create an immersive sense of isolation beside the viewpoint character.
When the alternative possibility is not immediately accepted by the protagonist, or appears fake at first (if it turns out to be real), I find that it works better.
A protagonist who accepts the alternative possibility as soon as it’s presented to him is a greater risk. As a writer, I would almost always choose to have the protagonist wrestle with the possibility before judging it one way or another. It does not take long for Clive to decide, however, that he is responsible for the death of his brother Joshua.
This begs the question: are there any apparent reasons why Clive may make this judgment easily?
One of them is simple and quiet enough to be overlooked: Clive was a slave-soldier for thirteen years in the Imperial army. The conditioning of that experience is hinted at immediately after the thirteen-year flash forward. When he realizes that his unit is fighting with a company of Bearers that includes Jill, Clive’s immediate course of action is not at all obvious until he starts to act. His choices are absolutely binary: watch another loved one die and keep his future, or lose his future to save her life. In that moment, Clive seems to realize that a life with that guilt is not worth clinging to and tries his luck with a rescue.
His most decisive act, after thirteen years of slavery, probably happened through a self-destructive impulse. In conversation with Cid, he says that the hope of vengeance was the only thing that kept him going as an enslaved soldier.
This is where things start to get interesting. Jill recovers from her injuries and swaps stories with Clive of their suffering in the last thirteen years. When Clive mentions his discovery that he is himself the Dominant of Ifrit, he frankly states his belief that he killed Joshua in a frenzy. The concept of suicidal guilt is always just one little step away from being mentioned but is rarely addressed directly. Only one line from Cid appears to do that.
It’s possible that Clive’s suicidal ideation is a subconscious pressure behind his eagerness to classify himself as damned and deserving of punishment. One reason why I loved the scene where Cid accepts the help of Clive and Jill in Sanbreque is because it’s only then that Clive appears relatively free of the wish to die.
The walk between Cid’s Hideaway and The Veil actually feels cathartic- for the first time, the story is tinged with hope. At that point, I realized my feelings were involved. Not a bad place to be, in a story.
I also think I’m vibing with the combat system. It’s an adjustment after FFVIIR, but it’s just so fun after awhile. I’m actually enjoying the tougher enemies and the trial and error with the different Eikon abilities and strategies. I find myself thinking things like “I might not get out of this alive but let’s do it anyway.” That’s a good sign in my book.
I’ve never been particularly averse to the action RPG direction the series has been headed in since XV. It’s normal for each numbered Final Fantasy to add their own unique game play. Personally, I’ve always felt like story archetypes and world-building was what made Final Fantasy itself, anyway.
Which is something the fan base has been debating, lately, with regard to XVI. The only time I started to ask that question was with XV, since the ending in the base game goes for both tragic love and teenage wish fulfillment. Rather than developing outward, the main character curled inward. The canonical ending was originally planned to appear at the end of a second season of DLC. It got cancelled, so that canonical ending now exists only in the Jun Eishima novel The Dawn of the Future. It’s a decent little story collection, but the only ending that was ever offered in video game format was the one seen in the original FFXV, excluding possible insinuations in Episode Ignis or Episode Ardyn.
As FFXV exists now, it still has it’s first ending, which is the biggest deviation from the archetypal Final Fantasy story in a mainline title.
Another recurring idea in the Final Fantasy series: ancient magical founder races or ancient aliens. It’s interesting to me that Zelda is also getting into stories that involve advanced aliens interacting with a swords-and-sorcery world.
Rather like XV, many of the classic Final Fantasy monsters (Iron Giants, Bombs, etc.) appear exclusively in cave-adjacent ruins of an ancient, technologically sophisticated society. I therefore couldn’t help noticing that one of the mini-bosses in the ruins below Rosaria is called Lich, like the Four Fiends in the 8 bit games or IX. Even the ancient tower of the Vandole founder race in Final Fantasy Adventure on the Gameboy feels like an adjacent concept. Final Fantasy Adventure (later rebranded as Sword of Mana) even associated the summon monsters with the Vandole founders. The sword that permits Sumo to enter the tower is guarded by a firey being called Iflyte in the Gameboy original and Ifrit in subsequent remakes.
Finding our way back to the Four Fiends, a gateway to another plane of existence called Memoria in FFIX happens directly above the Iifa Tree, which is itself an ancient piece of technology. Creatures resembling the Four Fiends guard the means to activate some of this technology. Deep in Memoria, the party fights the Four Fiends repeatedly, as if the monsters in the outside world were physical “versions” of them. After those versions are no more, their backup data still remains in Memoria. Finding Lich inside of the Fallen ruin below Rosaria makes sense.
This association between the Fallen and the classic Final Fantasy monsters also makes me excited to get to FFXVI’s new game plus. It is, apparently, called ‘Final Fantasy mode’ and, along with a higher difficulty scaling, also includes monsters like Bombs and Iron Giants in different places and behaving differently.
Further posts to come. Hit the left arrow at the bottom of the screen navigate back to my first post on this play-through. Or keep scrolling, if you’re reading this on the main page.
The facial rendering is the best I’ve seen since Vampyr on the PS4. Not even Final Fantasy VII Remake or FFXV matched Vampyr’s facial rendering and body language. Similarly, this game has also got me to do something that no other recent game has- persuade me to go easy on the analogue stick because I felt like it.
I’ve played several games that require different kinds pressure on the analogue stick at different moments. Some of them convince you to do it strategically, usually survival horror (most recent one for me is The Callisto Protocol). But FFXVI was the first game for which it just feelsright, sometimes.
A part of it is just how beautiful and lifelike everything is. If you’re in the middle of a crowd or have someone following you, it actually feels more natural and courteous for the same reason it would in real life.
I wouldn’t say FFXV or VIIR failed at that, exactly, but it’s easy to forget sometimes. Which can lead to some interesting situations. Like when I get bored in XV and decide to wander off the beaten path. After choosing a random direction to wander off in, I would notice the body language of the main characters. At a normal clip with moderate pressure on the analogue stick, Noctis has this self-assured jog. You could imagine him saying something like “Just a little longer, guys!”
While you’re just randomly exploring. In the middle of the woods, at night. I used to giggle at that.
This level of immersion says something about how carefully the graphics are being used. As new as the action RPG format may feel for an old school Final Fantasy lover, Final Fantasy XVI is attempting something very simple and familiar.
The overall premise is not very different from the classic 8-16 bit Final Fantasy games. The main departure is hyper-realistic/cinematic proportions. In particular, the gap between the world-building and the non-diagetic game play has never been so close. Early on, we see magic-wielders use their powers for the kind of mundane, practical uses you would expect in a society with magic. People do things like conjure fireballs to light dark spaces and use conductive crystals to generate water for goblets.
This is emphasized by the early segment when the game places you in the perspective of Joshua, the Dominant of the first fire Eikon.
I’m aware that the developers have stated that you only control one character for most of the game. But the early Joshua segment felt a lot like the beginning of FFIV, in which the party was joined by overpowered class specialists who would usually die quickly or otherwise drop from the foreground. The point of this was to allow a comfortable range of exploration with the different class functions, to learn strategic footing by the time one of the permanent party members reaches the higher levels of specialization.
I’m still early in the game so there’s a lot I don’t know. I’ll probably do another post when I finish. But for now, it looks like the point of the Joshua segment was to give the player a frame of reference when abilities like his become more accessable later.
Then there’s the perspective shifts to Benedikta, acting against the player character Clive. It’s common for Final Fantasy games to confine the scope of the perspective to “party members.” Both VIII and XIII had continuity shifts to other characters who appeared to be outside of the direct plot, only to bring them in at the last minute. VIII did this with Edea and Laguna and XIII did it with Fang, which also illuminated the motivations of Vanille. There’s plenty of game left to prove me wrong on this, but if this were any other Final Fantasy…the presentation of Benedikta would signify that she’s going to be a party member.
Other than world-building and apparent story structure, Final Fantasy XVI has a few themes that are so specific that they’re almost references. When Clive, Torgal and Cid are en route to Lostwing, Clive’s overall motivation is made explicit. Clive witnessed the death of his younger brother, who was a child, while he himself was a teenager. After the murder, Clive was conscripted into an invading army of enslaved Bearers. Years passed which only compounded his grief and trauma with rage.
The unpacking of this loss in the forest surrounding Lostwing felt a lot like the introduction of Cyan in Final Fantasy VI, whose arc begins with a devastating loss and shortly transitions to the Phantom Forest. Granted the resemblance to the scene in XVI is thin, but the rays of light shining through the canopies over the streams felt a lot like the Phantom Forest.
Then there’s the X-factor character: the Dominant of the second fire Eikon. Final Fantasy games often begin with one layer of societal or institutional crisis. The pressure might come from a government, a religion, a corporation or anything else, so long as it’s institutional. The first layer is often subverted by a second crisis. To name a few examples of this, VII has Shinra for the first and Sephiroth for the second, VI has Gestahl and Kefka, X has Yevon and Jecht, XIII has Barthandelus and Orphan, XV has Niflheim and Ardyn, etc.
In XVI, the institution is Waloed combined with the influence of Benedikta. If Benedikta is the source of the first layer of crisis, then the second layer (at this early point in the story) looks like it’s going to come from the Dominant of the second Fire Eikon.
Click the right arrow at the bottom of the post for part 2.
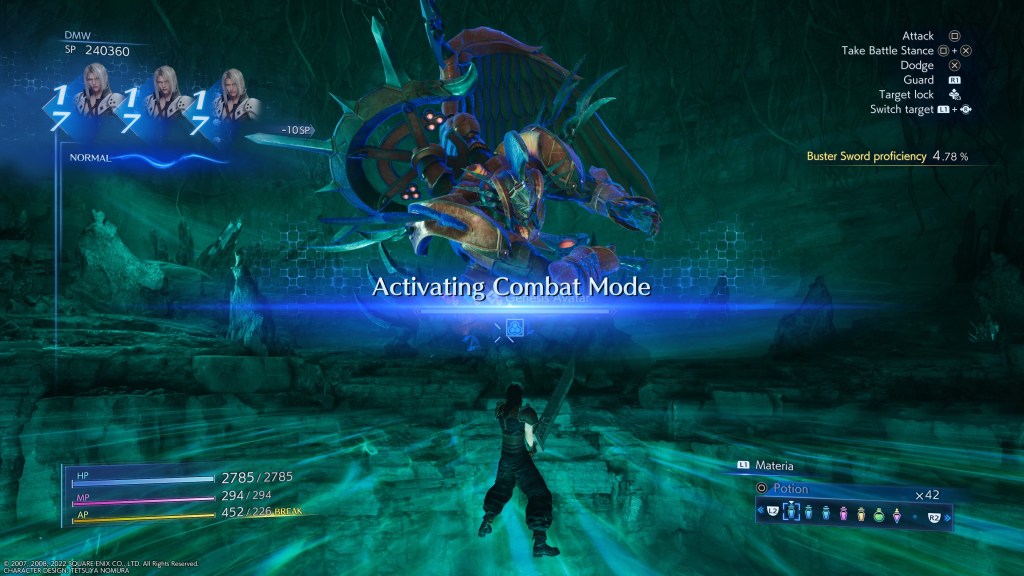
Upon this, my second total play-through since playing the original back in 2020, the WEAPON motifs in Genesis’s design during the final boss fight stood out more. It lends potential relevance to the theory that the summon monsters are a kind of emanation that expresses itself throughout all of the FF worlds.
That’s close to the definition of the word used for summon monsters in FFIX & XIII: eidolons (also my favorite name for them since it’s possibly the most descriptive). In FFX, summon monsters are called aeons, a word with ties to Gnosticism which describes an emanation of a spiritual being in a separate, physical plane. Like an eidolon, an aeon is one thing with multiple representations in different places.
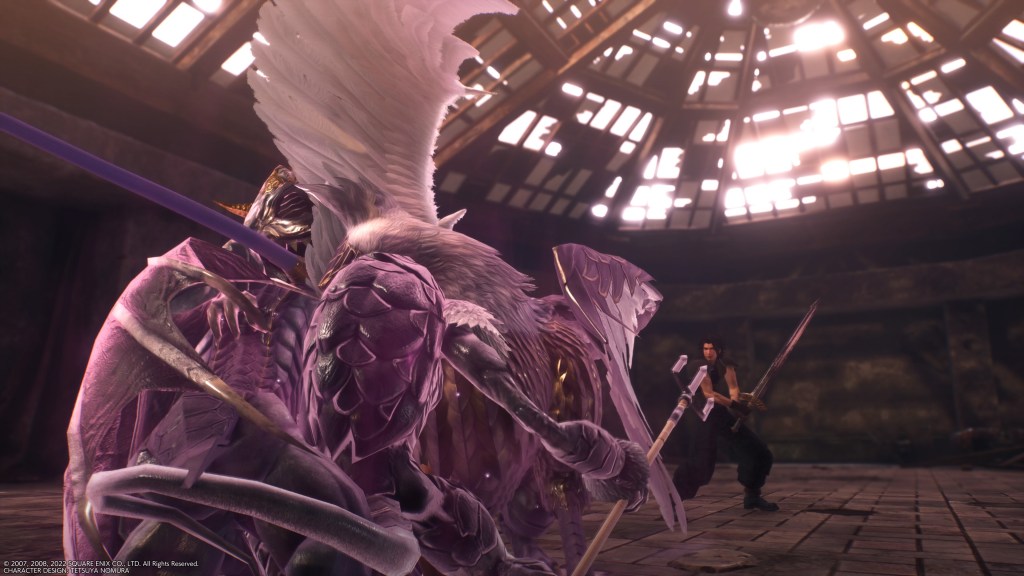
In particular, there were two design choices deriving from a WEAPON and an eidolon: Ultima and Bahamut. The bladed halos positioned above the wings is a reoccurring trait of Bahamut in Final Fantasy. The Flare attacks and beam sword attacks are another similarity…to say nothing of Genesis summoning Bahamut repeatedly through the game.
Still less overwhelming than Golbez in the Dwarven castle in the FFIV remake for the DS
Ultima Weapon, in FFVIII and FFXIV has a mouth (or even a face) on their belly, where their human torso emerges from a quadroped body type, like a centaur. FFVII has a little of both. FFVII’s version of Ultima has a round aperture in their chest where beam attacks come from. Similar to Omega in FFX. In the original FFVII, Sephiroth’s first form in his boss fight (Bizarro Sephiroth) has the centaur “transition mouth” between the torso and the equine trunk. Bizarro Sephiroth’s resemblance to Ultima implies something about Genesis’s own Ultima/Bahamut transformation.
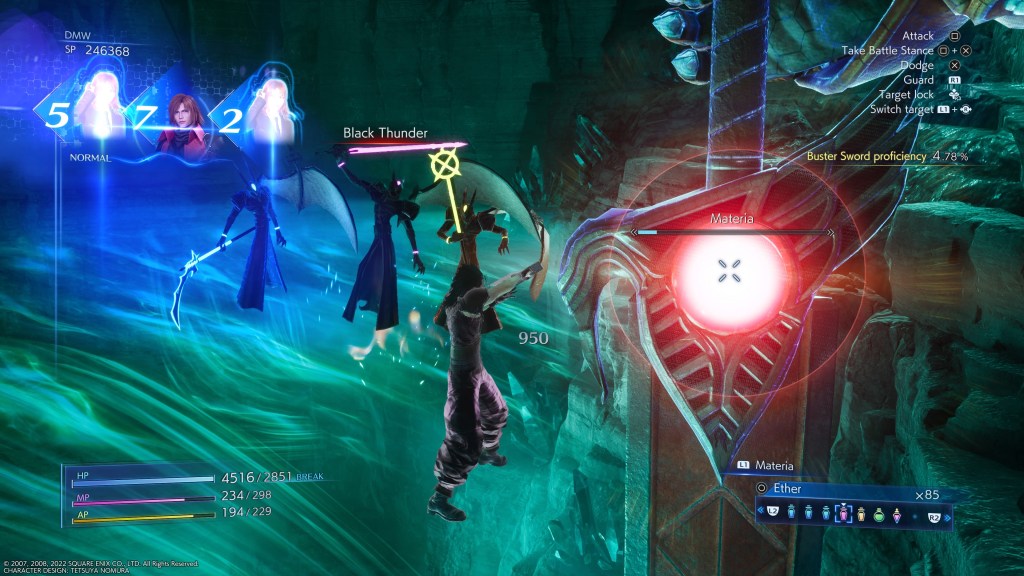
Might be a bit of a reach, but the materia in the hilt of the sword reminds me of Ultima’s beam aperture in the original FFVII. Also note how the lower body merges into the rocks
The definition of eidolon is a separate simultaneous presence of something elsewhere, or something that represents something else. If you keep having bad dreams about something (let’s say dreams that scare you) over and over again, that something meets the definition of a scary eidolon. Or if you want to be pretentious about it, an eidolon of fear, or whatever it’s subjective relevance is for you, separate from the literal truth of the thing itself.
Each Final Fantasy game is set in it’s own world but with repeating patterns in each of them. The eidolon summon monsters are some of the few things that remain mostly constant. Since the semi-Greek Weapon names (Omega, Ultima…) and the monsters with the gemstone names (Sapphire, Ruby, Diamond, Emerald, etc) also re-occur…those also appear to exist in the same category as the summon monster eidolons.
So. Remember how the main change to the plot in FFVIIRemake was introducing divergent timelines influencing each other?
In the Final Fantasy universe, the difference between one world and another may be comparable to the difference to one timeline and another. Fan theories fly thick and heavy over that possibility. Since both FFVIIR and FFXV include diverging timelines, those theories now appear to be on to something.
Especially considering the appearance of the three clone avatars that Genesis summons during the final boss fight:
The correspondence isn’t one-to-one, but I think there is a distinct resemblance between these clone avatars and the three Whispers summoned by the Whisper Harbinger in FFVIIR. A developer interview in FFVIIR’s Ultimania guide briefly touches on the possibility that the three minions of the Whisper Harbinger are Kadaj, Loz and Yazoo from Advent Children. I wrote another big long post about the possible consequences of that (link below).
But even without getting into all of my thoughts on that…the Advent Children connection also complicates the possible reasons behind Genesis’ boss transformation.
Does this seem like a weird thing to hyperfocus on? Sorry, can’t help it. Square’s been saying things to the press about Crisis Core: Final Fantasy VII Reunion now serving a complimentary function within the developing “remake trilogy.” As a prequel, the original Crisis Core had numerous references to the original FFVII. If Crisis Core: Final Fantasy VII Reunion now represents the prequel to the first remake game, those original reference points take on new meaning.
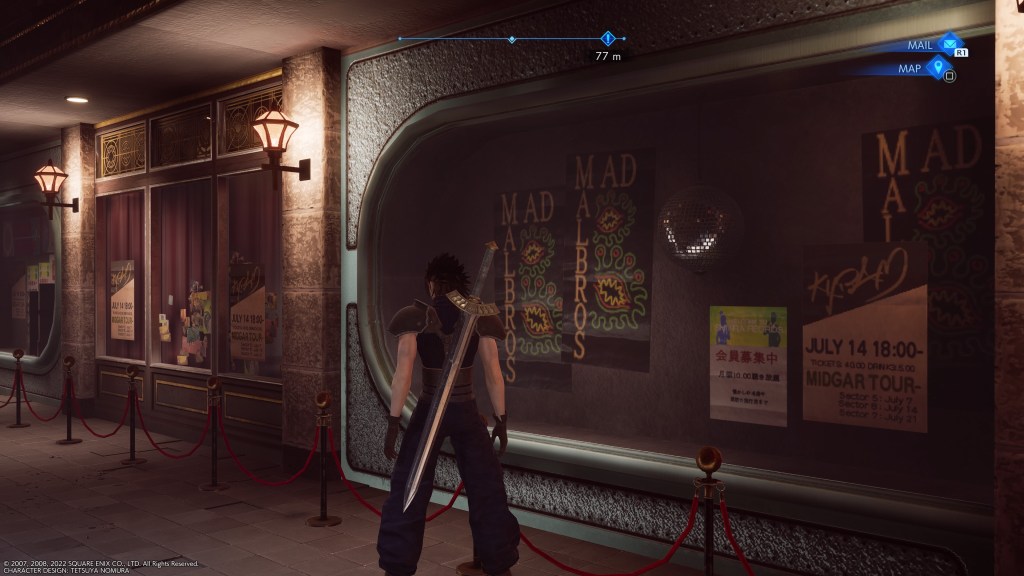
Is it bad that I wonder what these plays and musicals are actually like?
When the release of this game was first announced, Square used the words ‘more than just a remaster’ in a few different advertisements. At the same time, there is virtually no change in the overall content. Obviously, there’s the graphical upgrade and the streamlined combat system. The DMW slot-machine display no longer takes up the whole screen and pauses combat but rather is constantly going in a smaller section of your HUD. Personally, this made the role of the DMW less apparent this time around. In the original, the full-screen DMW made it easier to notice when, say, there was a number combination that levels up your materia.
At the same time, the quieter DMW in Reunion could reinforce it’s function by fading closer to the background.
A clever dimension to the DMW is how it deconstructs a lot of typical RPG mechanics. It even clarifies a basic effort-to-reward metric at work in most video games. In RPGs, it’s most recognizable in grinding.
To clarify: grinding is repetitively wandering around trying to accumulate the rewards of combat. In Pokemon, you’re doing it when you’re searching one section of tall grass for a particular Pokemon. In most RPGs, grinding is getting in random battle after random battle to hoard experience points. Usually when you’ve hit a difficult place where you just want to brute force your way through because no strategy seems to be working. The whole principle is based on an effort-to-reward system. If you spend twelve hours grinding, you will necessarily do at least some character-building.
The DMW mechanic streamlines this by making the rewards for combat almost perfectly proportionate to the amount of time you spent fighting. The DMW slot combinations happen at regular intervals and the slot combinations are how you level up or grow your materia. An easy battle ends quickly, which means little to no opportunity for the DMW to level up Zack or his materia. A longer (and presumably harder) battle means more time for the DMW to churn out a reward other than a limit break.
As cool as the upgrades to the combat system and the graphics are, though…everything else is the same. Every story beat is the same. Does that mean there are no story changes?
Arguably. It is definitely true that there are no story threads in Crisis Core: Final Fantasy VII Reunion that are not present in the PSP original. I am still slow to believe that means there is literally nothing to see.
(Except when Cloud and Sephiroth stab each other in the Nibelheim reactor: at the entrance and exit wounds, there is dark gray vapor, like when Sephiroth skewered Barret in FFVIIR and the Whispers brought him back to life. Obviously we never see a Whisper in this game. Maybe it’s a random detail nobody thought about. But it definitely looks like the dark gray vapor in FFVIIR)
Especially since the first PSP version was released closely to the Advent Children film. Advent Children was released in 2005 and Crisis Core: Final Fantasy VII originally came out in 2007. After finishing this last play-though, though…I wonder about the connections from back then that I failed to notice because I saw that movie and played that game at very different times.
Big’ol spoilers incoming
I wonder if the helicopter landing outside of Banora happened the same way in both the original and in Reunion. I only played through the PSP version once but I don’t recall any differences from what I just saw in Reunion. I wonder, though. Because what I just saw was kind of shocking.
If there was a difference…the fandom would probably be discussing it right now. If they are, I haven’t noticed yet.
Soo…if the helicopter landing outside of Banora is the same in both versions…then this now ties directly into Kadaj, Loz and Yazoo.
What happens, exactly?
Helicopter lands. Two figures emerge, scoop up Genesis’ unconscious body and leave. One of them says that he will “(b)ecome our brother” and muses about whether or not Genesis will accept this fate willingly.
If that happened in the original…I feel like I would have remembered. But maybe I didn’t. Maybe I ignored it because I chalked it up to a future story wrinkle which might not have manifested. I still haven’t played Dirge of Cerberus, and various online sources agree that this scene relates directly to that game.
Excluding things like an abandoned story line (like the cancelled FFXV DLC) or a connection to a game I haven’t played…it seriously looks like they’re insinuating that Genesis becomes one of the three Advent Children villains. Meaning that Genesis might be Kadaj, Loz or Yazoo. And all that entails. In that event, they probably wiped Genesis’ prior identity and replaced it with one-third of Sephrioth’s mind.
We never see the faces of the two figures from the helicopter. We see that they are wearing SOLDIER uniforms and that they have slightly longer white hair. Kadaj, Loz and Yazoo all have white hair, which I had long assumed was because they were Sephiroth clones summoned for the Reunion at the Northern Crater. Sephiroth killed as many as he could to lend the power of their souls to Jenova’s manifestation. But if he sent out a generalized psychic beacon, summoning every carrier of Jenova cells to the Northern Crater…he would have to make damn sure that he killed them all. Cloud and co. had better hope so, since- if even one was left alive -then that’s a body that Sephiroth or Jenova could transmigrate into. So if Sephiroth “cast a wide net” with his psychic broadcast, there’s always the possibility that one or two cell carriers fell through the cracks.
I always assumed that Kadaj, Loz and Yazoo were three of those unaccounted-for Sephiroth clones. Each one embodies a different quality of Sephiroth and all of them have small, superficial resemblances to him. All three have white hair. At the end of Advent Children, Sephiroth appears to “emerge” from Kadaj the same way that the will of Sephiroth or Jenova could manifest within any cell carrier. Kadaj only transforms into Sephiroth once Yazoo and Loz appear to be killed by the Turks, which even adds a bit of the Reunion metaphysics. When Loz and Yazoo show up again later, they could just as easily be channeling their souls into some other Sephiroth clones that never made it to the Northern Crater.
If there were that many clones, there’s no reason why Yazoo, Loz, Kadaj, Sephiroth and Jenova couldn’t just keep popping up like a whack-a-mole game.
That I took such a scenario for granted leads to one reason why I avoided the original Crisis Core for so long. If each culture of Jenova cells binds to a specific carrier who received them while they were in the womb (like Genesis, Angeal or Sephiroth) then…the plot for the original FFVII would depend on every Angeal clone and every Genesis clone being dead. Other wise, the psychic dominance over the cell carriers wouldn’t be limited to just Jenova and Sephiroth.
Perhaps Sephiroth’s soul could be uniquely empowered since his original body is held by Jenova within the Northern Crater, which is exposed to a Lifestream vein that runs to the center of the planet. Basically, Jenova and Sephiroth are empowered by being immersed in the transmigration nexus for all souls on that planet. That could explain why that pair is so exceptionally represented. For that reason, the clone problem is not world-breaking. But it is still a loose thread.
To return to the relevance of the helicopter scene to the “remake” continuity, though: If Genesis was somehow “absorbed” into the body of a Sephiroth clone, later to become one of the three Advent Children villains…how does that impact the timeline dynamics?
If we trust the Ultimania text, then one of the three Whispers summoned by the Harbinger, Rubrum, represents Kadaj. If, hypothetically, Genesis was later “turned into” Kadaj, that means that the Rubrum Whisper also represents Genesis. It would mean that Genesis is present in the timeline manipulation at work in Final Fantasy VII Remake.
Maybe I’m only freaking out over the helicopter scene because I forgot about it and was blindsided. Maybe it’s only a tie-in with Dirge of Cerberus and nothing more. Only included in Crisis Core: Final Fantasy VII Reunion because it was in the original and the devs wanted to be faithful. As I type this, I realize this is almost certainly true.
But this new version is, somehow, supposed to a prequel to Final Fantasy VII Remake. The big deviation in FFVIIR are the Whispers pushing over from the timeline next door. The invasion from the neighboring timeline doesn’t rise to the foreground until the very end, with the Whisper Harbinger, the three lesser Whispers (Kadaj, Loz and Yazoo) and Sephiroth.
If Kadaj, Loz and Yazoo were embodied in the three Whisper minions, then little details that resemble that moment in Crisis Core: Final Fantasy VII Reunion become more interesting. Like the clone avatars that Genesis uses during the final boss fight and their resemblance to the Whisper minions. A small, visual reference to the FFVIIR Whispers becomes harder to miss in conjunction with the helicopter scene.
I’m not saying that this is what it means, but to me it looked like the Genesis clones in the boss fight were a visual reference to the fate of the three clone brothers (Yazoo, Loz, Kadaj) immediately before the clone brothers come together by transforming Genesis. It has an ending-to-beginning symmetry to it.
If Genesis goes on to become a clone brother, then that means that Genesis was always present in Advent Children, was involved in the FFVIIR final boss fight and might even be in Final Fantasy VII Rebirth, the next game in the remake continuity. This would be a hell of a way to create a unique prequel-to-main-story relationship with the remake continuity.
Then again, the story of Crisis Core is fundamentally intertwined with the story of the original FFVII anyway. They don’t have to add extra lore to the PS5 edition for that. It’s possible that Square is saying that Crisis Core: Final Fantasy VII Reunion takes place in the remake continuity just to drum up hype for Final Fantasy VII Rebirth.
But if Reunion has a specific relationship with the remake games…then it makes sense to re-evaluate the references to FFVII in light of the new continuity. Like how Sephiroth’s function in the original FFVII plot was reflected in both Angeal and Genesis.
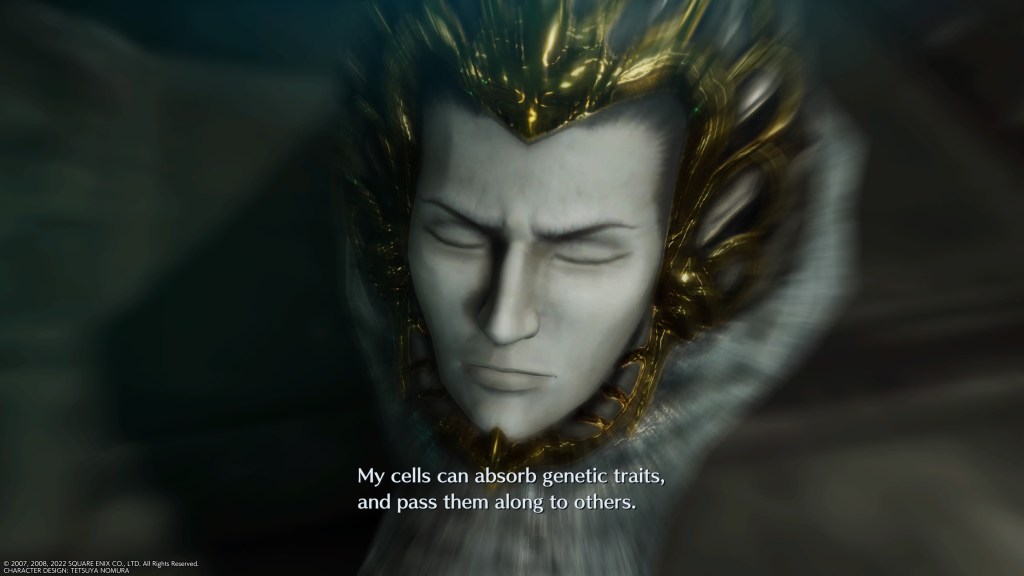
All three of them were infused with Jenova cells in the womb. This began with placing them in the body of a woman named Gillian. Angeal receives his dose from Gillian’s body after she was impregnated with him. Separately, Professor Gast took a DNA sample from Gillian and surgically mapped it onto Genesis while he was a fetus. Angeal can use his Jenova cells as a two-way conduit. He can send and receive both information and genetic traits.
Angeal carriers include different species of animals along with different humans. Lazard and Hollander are latter-day Angeal carriers. Before Angeal attacks, he summons several monsters with his cells to combine into. This resembles the Jenova Reunion from the original FFVII without death being necessary to distribute lifeforce between the collective (even if being physically absorbed is as good as death). Genesis can send and not receive.
Sephiroth, who was gestating in his mother’s womb already when she was infused with Jenova cells, can do neither. But Sephiroth’s cells can heal the eventual degradation in both Angeal and Genesis carriers.
After the Nibelheim event, Hojo circumvented Sephiroth’s mind-cell limitation by surgically adding them to both Zack and Cloud. Sephiroth himself is missing, so Zack and Cloud become targeted by the Genesis clones since their bodies are housing the only cultures of Jenova cells in accessible, living bodies. After the fight with Genesis at the end of the game, Zack, Lazard and Cloud all eat Banoran apples together. Ones that look like the apple that Genesis is always carrying around and gesturing with like frigging Hamlet with Yorik’s skull.
I mean I know the reference is probably meant to be Biblical but he’s just so hammy with it
The apples have other meanings in the lore. Genesis’ family used to farm them. But the cell decay of Lazard and the mako poisoning in Cloud seem to get better after they all eat the apples. We also know that Genesis carriers can send but can’t receive and Sephiroth carriers can heal but can’t telepathically interact outside of their bodies at all.
Angeal carriers, meanwhile, can send and receive. Lazard is present with the cells of Angeal. Presumably, he has a two-way conduit with all other Angeal carriers. If the apples carried by Genesis are basically a cell culture prepared for consumption, which would open a presumably one-way conduit with Genesis…the apples shared by the three could enable the two-way exchange to happen with Genesis carriers. All three eat them, including one with the two-way conduit. This unlocks the two-way conduit between Zack, Cloud and Lazard.
Cloud and Zack, meanwhile, are Sephiroth carriers. Meaning they can heal, and they have just received the two-way conduit from Lazard through the apples. So the healing trait circulates between the three of them. This would also explain how Sephiroth carriers can both send and receive in the original FFVII. In the original FFVII, carriers of Sephiroth’s cell culture can even telepathically induce hallucinations in each other’s minds.
Can you believe, just a few paragrpahs ago…I said that I avoided the original Crisis Core because I was afraid it would needlessly complicate the plot of the overall story? Obviously I had no clue what the future held X_X
I know it’s a lot of circular-sounding jargin. But I wouldn’t have cared enough to pay attention if I wasn’t actually hooked by it.
Also, if the cell-exchange between the Genesis, Angeal and Sephiroth carriers enabled the totally uninhibited psychic and biological colony organism that exists in FFVII…that would be kind of cool. Maybe that explanation was intended in the original Crisis Core. But if we’re getting some completely insane curve-ball with Genesis being the former identity of one of the clone brothers…then the subplot about the Sephiroth, Genesis and Angeal cell carriers united through the cell doses in the apples becomes much more important.
(I also don’t see how we wouldn’t end up exploring the potential link between Cloud’s memory issues and the suppression of Genesis’ identity to make him a Sephiroth carrier. If Cloud’s mental problems enabled Jenova to subvert his sense of self then it makes sense to wonder if something similar happened with the destruction and recreation of Genesis’ personality)
In the original FFVII, the Weapons (Diamond, Ultima, Ruby, Emerald, Sapphire) are guardian totems that the planet summons when threatened. If the vitality of a planet in this cosmology is manifested in the Lifestream, then that means the life of a planet comes from its transmigration nexus. If the planet has a will, it’s an emergent will from every soul on its way to its next life.
When characters like Aerith use phrases like “the cries of the planet” or the “the voice of the planet”, they are talking about a kind of collective subconscious shared by all sentient life on a given planet.
This would make the Weapons magically incarnate archetypes. Another word for an archetype is an eidolon.
Sometimes, when Jenova cell carriers are forced to change shape by Sephiroth or Jenova or whatever dominant personality, they might express traits of eidolons. Mythic beings that exist in a collective subconscious. This pattern had already been established in the original FFVII, what with Bizarro Sephiroth’s Ultima-ish shape with two faces (the upper, dominant head representing Jenova and the face closer to the four-legged body representing Sephiroth).
The Ultima association in particular seems meaningful since Cloud’s best weapon in the original game is made from part of Ultima’s dead body. There was a guide published back in the nineties that riffed on that: “Cloud’s ultimate weapon, the Ultima Weapon, is obtained after defeating the Ultima Weapon.”
As goofy as the naming scheme is, even that is echoed in Crisis Core, with the Buster sword playing a role in the arcs of Angeal, Zack and Cloud.
I was wondering what this one would look like on a modern consoleAlso: all the locations we’ll probably get to see again in Final Fantasy VII Rebirth!
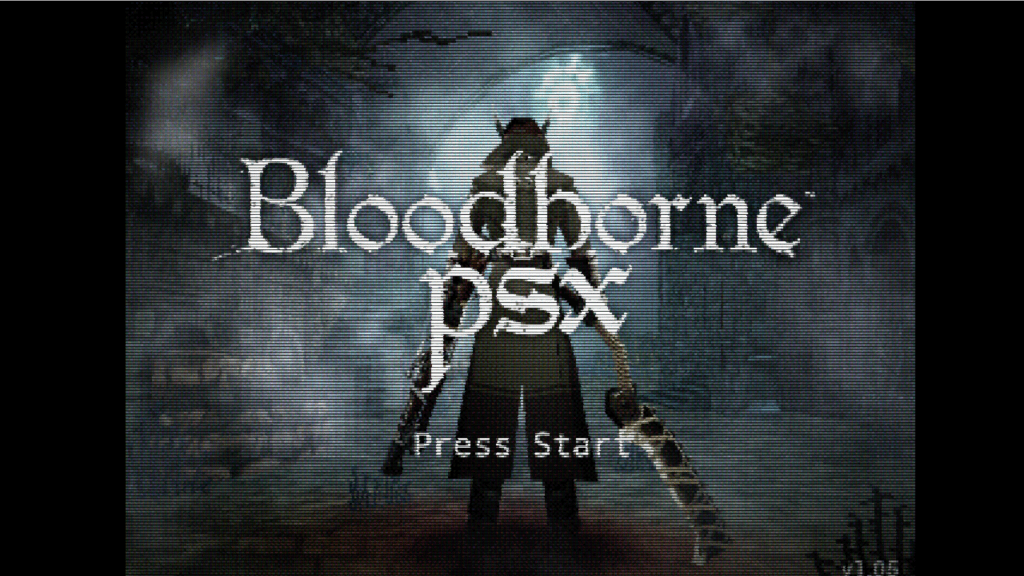
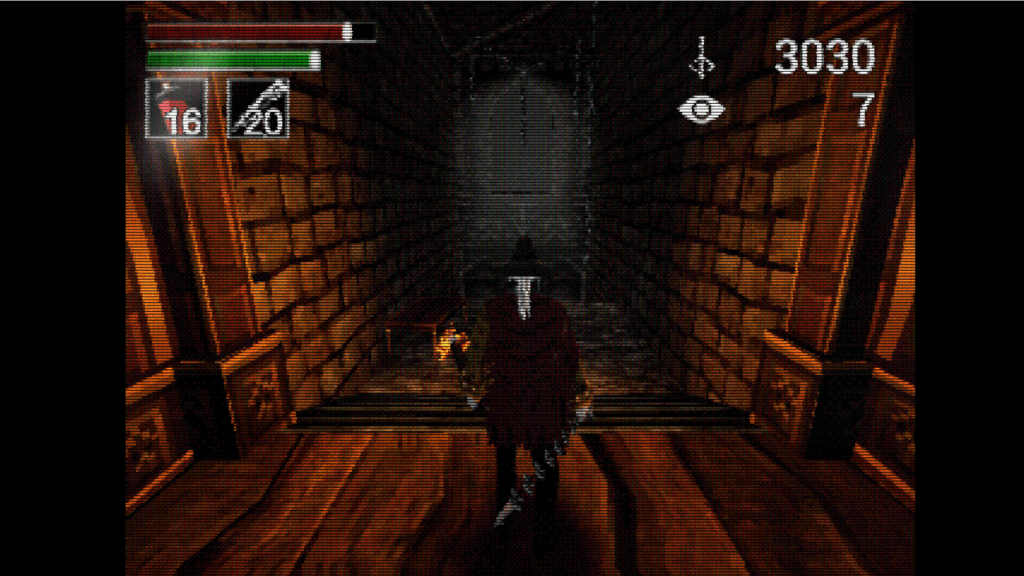
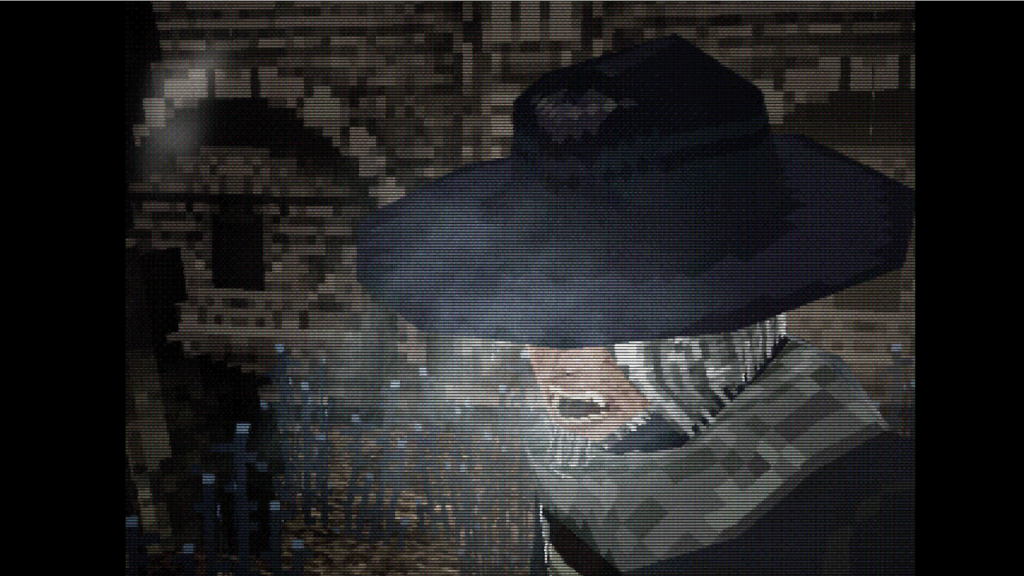
In particular, I was constantly reminded of the first two Tomb Raiders and the first Silent Hill. The use of shadows is reminiscent of how the fog in the first Silent Hill disguised the procedural rendering while building atmosphere.
A neat bridge between those early PlayStation franchises and the original PS4 Bloodborne was created with the design of indoor spaces…of which there are a lot.
If you have heard of BloodbornePSX then you probably know that the biggest location that carries over from the original is Central Yharnam. Lilith Walther thoughtfully managed to spin a complete game in this specific location, though.
Just like last time, your player character is investigating Paleblood and is pointed, by Gilbert, in the direction of the Cathedral Ward.
The lore-fiend in me has long wondered if Gilbert was meant to be a canonical “mainline story” character, unlike some of the others that you could go the whole game without running into. I don’t think any other hint about reaching the Cathedral Ward through the sewers is offered.
Considering how I triggered the ending I got, I strongly suspect Lilith Walther has wondered that to.
Also like the base game, you will probably hear about the Great Bridge and think that it sounds more efficient than a giant wade through sewers. (I think he also mentioned an aqueduct in the PS4 game? Or maybe he just said aqueduct and the fans all decided to call it a sewer?)
This, of course, does not work out and we gotta pursue Gilbert’s lead anyway. Which puts us directly in the path of a few of the new locations, both indoors and underground.
Within the first few minutes of gameplay, we find that Bloodborne PSX does not have the same continuous map as the original. Which is to be expected: this is a PS1 demake of a PS4 game. Many of those limitations are incorporated into the new design, though. The loading screens between different locations allow the different segments of the map to be more self-contained. Consequently, all of Central Yharnam is turned into an interconnected, “cumulative” dungeon, like the town of Silent Hill.
So far, I have found two buildings with unexpected depths and an awesome expansion to the aqueduct/sewer area. One reason why these discoveries are so satisfying is because- in the original -there are a ton of locked doors that are never meant to be opened. It’s also an intuitive direction for the design to go if you are effectively “trapped” in Central Yharnam. Another reason is that there are indoor areas that bear a superficial resemblance to other indoor areas in the base game, like the Upper Cathedral Ward and the Cainhurst library. To say nothing of the more creative things those spaces are used for.
Is it just me, or is this vaguely reminiscent of Mergo’s Loft? Doesn’t Mergo’s Loft also have dog-headed carrion crows, like this place does?
In Bloodborne PSX, the scrawled note about Paleblood is found in Iosefka’s clinic. Where an infiltrator of the Choir ends up in the base game after killing Iosefka. Lilith Walther used a few indoor areas to explore this influence of both the Choir and the School of Mensis.
This part made me hesitate. I expected it to end here but wanted to be proven wrong. Yarntown ended around this point. Even if it is just a slightly bigger and different PS1 rendering of Central Yharnam, it’s a beautiful lil thing. Well worth playing and vaguely reminiscent of the video game demo compilations some magazines used to carry.
If you’re leveled into the thirties…then Father Gascoigne can be beat. So long as you’re bold and quick enough to pull off some viscerals, which feel a lil different in Bloodborne PSX but still work like they do in the base game. The main difference here is that a beast will not necessarily pause after getting riposte’d (along with a big floating ‘L1’ signaling that a visceral attack is possible). Or you could just grind like a nut and brute-force your way.
If this turned out to be the end, it would be a perfectly admissible mini-game. After Yarntown, though, it would feel wanting.
A new time of the night sets in once we hit the same dead end we all remember from the Great Bridge. Just like in the base game, it is not clear how much actual time passes or what has happened in the interim. This looks like the beginning of a second half. Maybe I wasn’t even that far.
Other than getting darker, some previously opened pathways are no longer accessible. And we get our first glimpse of an old friend from the base game.
Who you will probably encounter in the sewers, since the bridge to the Tomb of Oedon is blocked. And while I’ve been putting most of my blood echoes into Skill and Endurance…I’ve also been making an effort to build up Arcane since nabbing the tonitrus off of the mad Hunter in the library. I think Arcane weapons like the tonitrus and A Call Beyond are pretty effective against Winter Lanterns? I also know that Frenzy hits harder as Arcane increases sooo crafting a magic user turns you into a glass cannon in some ways.
I have only played through Bloodborne PSX once- so there is probably a lot I still haven’t seen -but so far I have not encountered more than one Winter Lantern in one place. And maybe I just haven’t put enough echoes into Arcane but the tonitrus seems less useful against them here than in the original. My other weapons were hardly any better.
They weren’t that common in the base game either- only in the Nightmare and the Fishing Hamlet
The scarcity of the Winter Lanterns and their toughness make them feel like Walter Sullivan in Silent Hill 4 or Pyramid Head in Silent Hill 2. Meaning: run your ass off and don’t look back. Maybe it is possible to kill them, but I haven’t figured out how yet. A crazy powerful monster showing up after you find out that both entrances to the Cathedral Ward (The Great Bridge and the Tomb of Oedon) are blocked is just perfect.
I like this because of how it builds on the resemblance between the Winter Lanterns and the doll/Maria. The doll is a very unique character with few corollaries. There is a lifeless physical version of the doll in the Abandoned Hunter’s Workshop in the base game. The revelation of the doll’s human identity as Lady Maria is then played for maximum dramatic tension in the Old Hunter’s DLC. These three different characterizations underline the importance and uniqueness of Maria.
The Winter Lanterns, meanwhile, are all dressed like the doll under their tentacles. If Maria/the doll is unique, then making the monster that wears the doll clothing unique feels natural.
Come to think of it…creating a direct link between the key to the leveling mechanic and an unkillable monster that hunts you feels pretty spot-on for a horror action RPG. (That link also exists in the original, even if it’s less direct than the PSX Winter Lanterns)
I’m uncertain how much more of the game I should discuss after this point. I finished my first play-through on accident in a location that I also found on accident. Something about this makes me suspect that there is more than one way to “finish” game. This demake recreates the vibe of the original so perfectly that multiple endings seem possible. Maybe they’re not. Maybe you know differently. But the subtle implication of new story threads from Lilith Walther make me hesitant to “spoil” anything.
Blobby eyeball creature in Level U doesn’t unlock anything but rupees….X_X…
But now we can buy moblin meat and potions with Bagu’s letter, and the Goron shop with the Kokiri Sword and Goron Shield is unlocked with the ocarina. So at least rupees are worth more than they were.
Meanwhile, back in Level T, remember that you just received two expansions to your bomb bag. Take the hint. Both the raft and the dungeon’s Tetrarch Fairy are not far off.
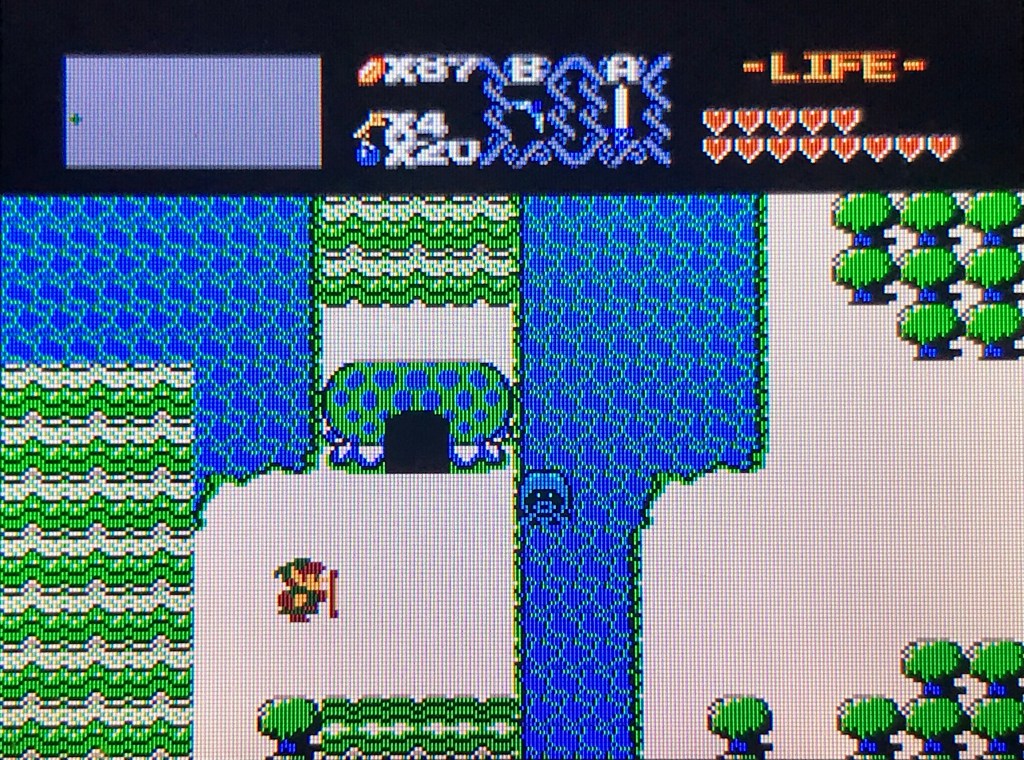
With another fairy comes another ocarina warp location: directly across the stream from Level O. There’s some obvious goodies and a warp cave that returns you to the other side of the stream…but not much more than that so far.
With more progress comes more ocarina warp locations…which you can’t really control. Playing the ocarina can take you to any of them. Now and then I suspect that your location on the map has some sort of correlating, mirroring relationship with where you warp to, but I’m not sure.
What this means is that, with the expanded range, you can no longer count on the ocarina to take you across the central water body. At least, not with any predictability. So, while getting the raft from Level T might feel a bit redundant, it’s really just in time. From now on, it’s the only way you can cross the central water body until you find the Gerudo warp caves.
(Actually, I remember some water in the upper left corner of the map, near a waterfall. I think the raft had some sort of use there, during the first quest?)
Along with the Outlands signature crisscrossing between dungeons comes another reversal of traditional Zelda mechanics. Each dungeon will not necessarily give you something that you need to unlock the next, sequential path forward. A treasure from one dungeon, the ocarina, has unlocked two dungeon entrances so far. Two others were accessible from the very beginning, even without the sword.
Like acquiring the sword, the expectation that the next treasure should unlock the next dungeon is so ubiquitous across Zelda games that, without it, you can easily feel lost. With Level T behind us, the ocarina has gained more warp spots and, ironically, appears a little less useful for it. And receiving the raft feels almost disappointing, since we’ve been coming and going across the water for awhile now without it.
This made me assume, several times now, that there is no clear path forward ever and each time you have to do a ground-up systematic investigation of everything.
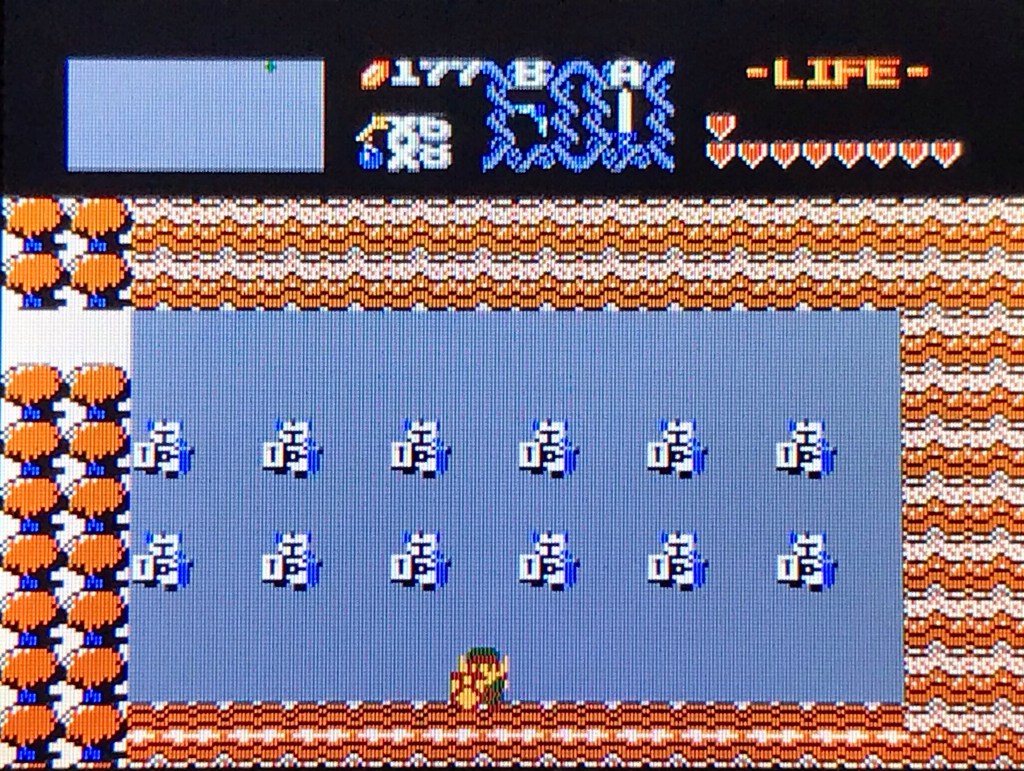
So I spun my wheels for awhile before remembering that there are suggestions of where to go next, even if the treasures are not always involved. Back in Level T, Zelda said there was a dungeon with twelve guards. Typically, numbered guards could only mean one thing. And they usually come in pairs of four or five so the uncommon pairs of six adding up to twelve are easy to track down and rule out.
Level T sets an interesting precedent for the next three dungeons: continuing the theme of the Subrosian warp caves, the secret staircases are often one-way passages. Level L particularly is arranged so these paths loop back on each other. The next two dungeons, N and A, also have tricky underground staircases, but at this point T and L still hold the record.
Ooh look another sprite from The Adventure of Link!
Level L also has the next item, after the ocarina, to unlock multiple dungeons: the Handy Glove. Level N is hard to miss if you do just a little bit of experimenting outside of L.
Next, it’s time to hit up the puzzle by the cemetery in the lower left corner of the map, now that we can actually push rocks outside of dungeons. The hint-for-rupees Subrosian said it could be solved the same way it was in quest one, after all.
I knew, from the moment I saw this mushroom tree, that it would lead to a dungeon. In the second quest, if not the first
Interesting touch, saving this location for later in the game. The puzzle that lets you access this area felt significant in the first quest to- last time around, there was a heart container hidden in the area. It put me over the quota necessary for one of the Gerudos to hand over the Staff of Byrna. Speaking of, between L, A and a few other random holes in the ground, we’re at more than enough to get the staff in quest two.
If you remember Zelda’s hint about the “red tree path” from Level N you’ll probably find your way to Level C, right next to where the Thunderbird’s fortress was in the first quest. Just a few screens in, though, we naturally learn that we need all eight of the Tetrarch Fairies before venturing further.
So. Where to go from here. This actually got me pretty frustrated for awhile. The only other hint from Zelda was about searching “the dark maze of ice,” from Level A. But you need the Handy Glove to reach Level A in the first place and the Handy Glove dungeon is in the frozen area itself. So it kinda looks like you have to go back and look for a third level in the frozen maze. Which sounds a little obtuse for a Zelda game, what with the emphasis on exploration, but it was the most recent lead I had at the time.
Nonetheless…there was a lot going on up there that I just hadn’t covered yet in the second quest. The waterfall in the upper-right region of the frozen area seemed significant, somehow. I remembered that there was a way to reach it with the raft in the first quest.
Since there didn’t seem to be any way to trigger the raft up there, I started bombing walls and pushing rocks. Bupkiss. There’s no dock to launch from…but if I remember correctly, there wasn’t in the first quest either? My next “sure thing” theory was the small forested area with no snow, near Level L. I remember something being there last time around, but I guess there isn’t this time. Not even after bombing and throwing fire at everything and playing the ocarina.
Slowly, the weirdness of this sinks in. No other Zelda game I can think of has three dungeons in the same area. But wasn’t the hint about the “frozen maze” from Level A? You need the Handy Glove to get to A. The Handy Glove is in one of the two dungeons in the frozen maze. If I’m not supposed to go back to the frozen area, then what does that hint mean?
Another way of looking at it: how many hints refer to the frozen area and how many dungeons are there? Two, for sure. What about the hints? “Twelve guards” is one, “frozen maze” is the other. Is it possible that it’s simply two-for-two and that hints might be scattered randomly?
Strictly speaking…all you need to reach Level L is the ocarina and bombs. It’s entirely possible that someone might finish that dungeon (somehow, miraculously, without the sword, or maybe with the Kokiri sword) and then proceed to Level T. In which case, the “twelve guards” hint would have seemed a little pointless, just like the “frozen maze” hint now appears to be.
It’s annoying but at that point I felt forced to consider it. Also…all of the dungeons, so far, are in different locations than the first quest but none of them are far from their original placement. And I think there were only two dungeons located, roughly, within the frozen maze in the first quest.
There are two conspicuous areas that hid dungeons in the first quest which, so far, have yielded nothing. One of them is a rocky enclosure only accessible through the Gerudo warp caves.
This one, Level D, is just a few screens away from the area you need the Gerudo warp cave to access. Where else do the Gerudo caves lead? Just outside of the Graveyard of Serenity. If two of the warp caves are in the vicinity of Level D and T, maybe the third location is also close to a dungeon?
It’s interesting that sprites from the first LoZ are used for the concept of Dark Link from the second game
As expected, it’s near the Gerudo warp location across the water. This one hardly lasts any longer than N or A. The hardest thing about this dungeon is the search for it. Also interesting: I think Level S has more Dark Links than any other dungeon before it. Story significance, maybe?
With all eight Tetrarch Fairies liberated, we may now proceed to the Thunderbird’s fortress in the red territory of Subrosians.
Remember how I said L and T had the record for misdirection and difficulty? They don’t, anymore. N, A and S were kind of effortless, but C makes up for all that- with rather classic dungeon design. The circular, misleading staircases do make an appearance but they only really take the foreground near the end of the level. It pays to rely on both the HUD map and the map in the pause menu which shows what rooms connect to what others. This level is intimidating but it doesn’t throw anything at you outside of the context from the rest of the game. And there’s some pretty neat treasure scattered throughout, to. Only one of them-the Silver Arrows -is necessary to finish the game.
Just like the first time around, I’m hesitant to go into too much detail. A final dungeon is just…such an important part of a “puzzle box” game. And this one is so much more than a tribute from a fellow Zelda fan (although it’s definitely that as well). Zelda: Outlands actually feels surprisingly genuine- like a Zelda game from some alternate reality.
Kudos for dungeon design in level T. You instantly land in a sandpit with a patraquad that is far easier to kill with bombs, so no precious candle-wall cheesing. Just watch the thing and try to place a bomb somewhere it will move over and hopefully you’ll only use one or two of them. Up two screens is Zelda with the sword (thankfriggingNayru) and some more rooms that are either puzzles or require an item. Just past this point, we run into Zelda again who tells us that ‘twelve guards watch over the dungeon’s gate.’
Proceeding down from the patraquad sandpit instead of up, there are some familiar monster rooms with block switches. As per usual, they gotta be cleaned out before the switches can be pushed. One of them is filled with pols voice which die from a single strike but turn into peahats. In the peahat-filled side-scrolling staircases, it’s easy to get complacent. But the directional mechanics aren’t the same in the side-scroll basements which, combined with misplaced sense of sword security, can trick you into taking some hits. So don’t be too eager to stop relying on the boomerang.
So our vigilance is subtly tested during our immediate sense of relief after getting the sword. We also run into a blue lynel for the first time in the game which is a frustrating pain the ass and you had better hope you’re at full health for the sword beam. Compliments to GameMakr24 for creating a test of caution and vigilance reminiscent of Bloodborne.
It soon becomes apparent that, once embarking on the path south of the sandpit, doors lock behind you with no obvious floor switches. This happens as you move down, to the left and slightly upward, like a one-way spiral pattern. With persistence, you will be able to return to an apparently empty room at the beginning of the left turn.
Now…remember the invisible doorways from the first quest? That is the dungeon exit. And this is the first invisible doorway I’ve encountered in the second quest, so it felt like an understated blindside. It really does pay not to loose track of the possible ways of detecting hidden paths, even if one hasn’t worked in a while.
Since Outlands banks on crisscrossing between dungeons, I was tempted to do some back-tracking.
Upon our return to level U- there is a room with a staircase behind a cubic block. It is guarded by peahats, stalfos and yellow tektites, all of which need to be killed before the block switch will move.
A key hallmark of this rom hack is that some of the hit boxes are mixed and matched with other sprites. Peahats have passed their burden of annoyance on to the keese and are now the only monsters that can be killed with the boomerang. The stalfos could be dispatched by cornering them against the wall with a candle or bombs. The tektites, in Outlands, are invulnerable to the candle and the bombs.
Before I finally tracked down the sword, that screen was maddening. Two variety of monsters vulnerable to bombs and the candle and one that isn’t. So guess what I did as soon as I managed to escape from T?
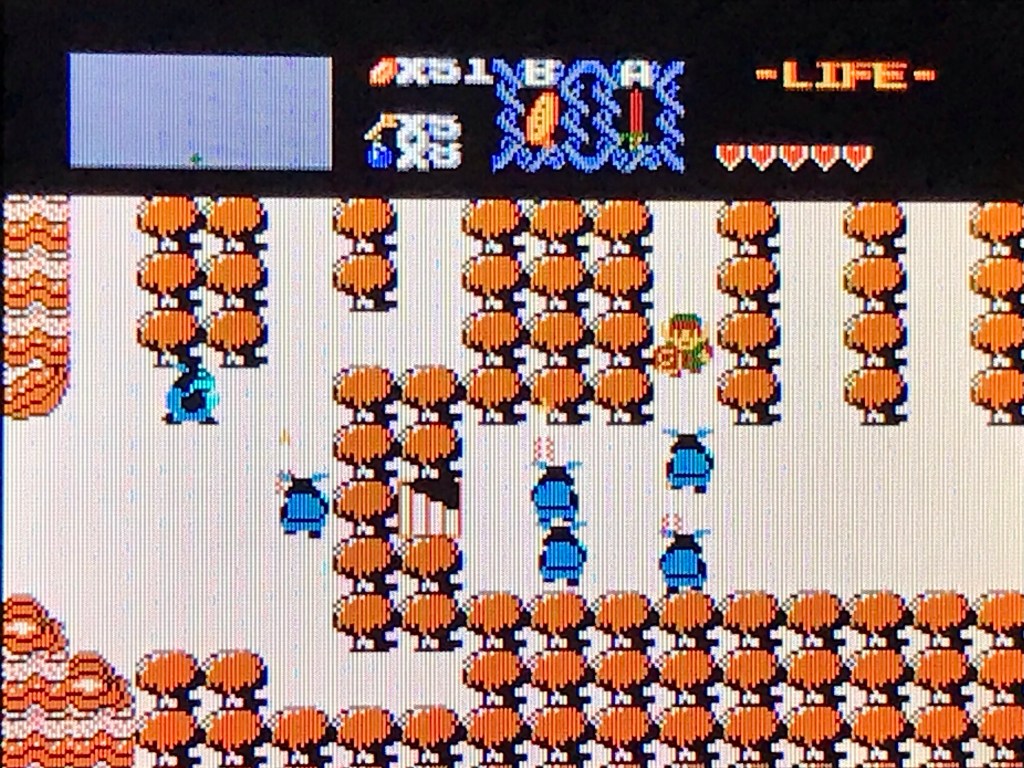
The sword got the tektites out of the way but holy crap does it take some doing. Rather like the first quest…things tend to go smoother if you keep your sword beam as long as possible. As it is also clear that the second quest will play fair as harshly as possible, there is absolutely no reason not to cheese as much as you can. If a room is filled with monsters, hide in a doorway and step out every now and then to throw a sword beam into the fray. Gathered hundreds of rupees? Stop by a Goron shop whenever you can and buy keys whenever you have just over two hundred. As soon as you explore a little bit of level O, it becomes clear that moblin meat is frequently demanded and only occasionally available. So stockpile every resource you possibly can.
No fucks given ^^
Back in U, there are successive rooms with cloaked, firey mages, the ones that turn into disembodied fire sprites when you kill one of their colony members. I know the digital version of the instruction manual has a name for them. They’re basically Subrosian mages that gather together into a colony organism. And there is one after another in a few successive rooms, until you get to one with just a fire sprite and no clear hit box locus. Time to put a feather in that and move on, for now.
Not so far from U is level D, which can be unveiled with the ocarina, which I’ve somehow overlooked this whole time.
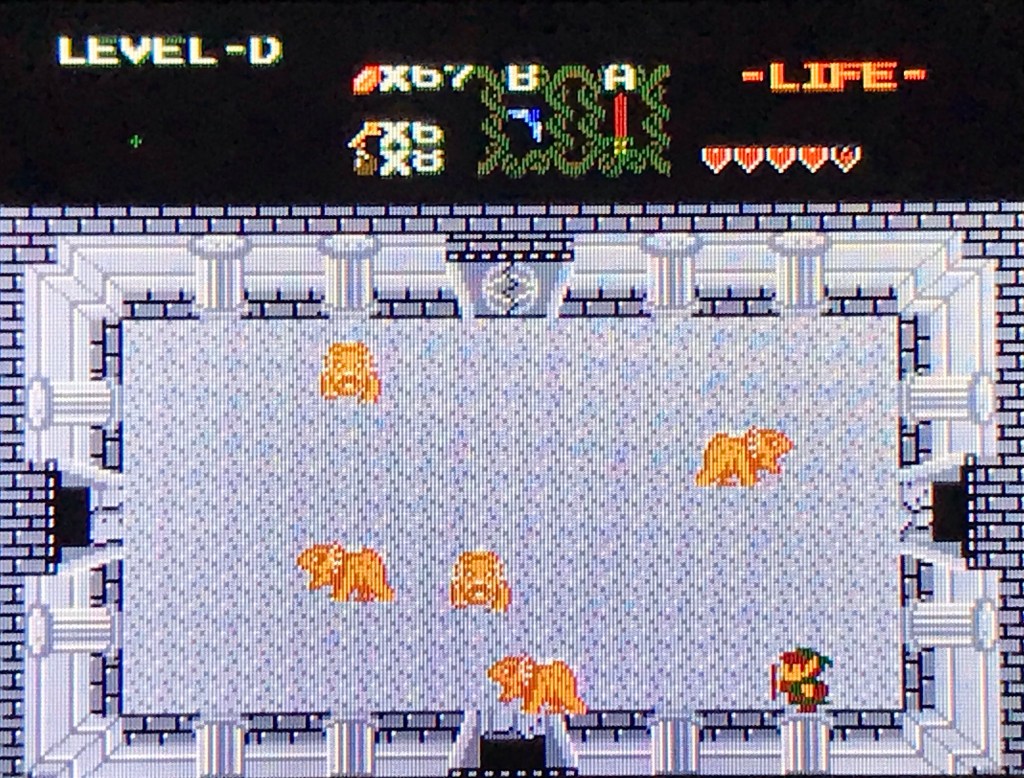
This, as implied by the dodongos, is a bomb-centric dungeon. It is also filled with a lot of monsters that have been bosses and mini bosses in the past. Like, in nearly every other room. This dungeon also has more meat which I promptly ran back to O with. Since D has its own hungry moblin…I was a little worried about…going down a path of no return. So far, I don’t think I have…but holy crap does O have a lot of hungry moblins.
Between O and D, Princess Zelda increases the bomb bag capacity by four in each of them. Once you figure out the reciprocal relationship between both dungeons, it’s pretty easy to release both of their Tetrarch Fairies…which seems to effect the ocarina.
Maybe? ‘Cause afterward, the ocarina can warp to different locations. My working hypothesis for now is that each Tetrarch Fairy unlocks a new location, with the lake near the respawn point as a kind of home base. It seems likely: I can’t remember an exact before and after point when the ocarina began warping during the first quest. Only that it was later in the game, which suggests that the number of fairies released has something to do with it. Not to mention, the flute in the original LoZ warped to each completed dungeon.
So. Because of the liberated Tetrarch Fairies or whatever the reason might be…we now have access to the landmass that was uncovered by the raft in the first quest. It’s only at this point that the second quest feels fully shod of the helplessness it begins with. While everything except the overworld is different, it now feels like the mobility of the first quest is largely regained.
With a little bit of digging, the Goron shop with the bow and arrow can be found, along with the Gerudo with Bagu’s letter. You’ll probably get robbed multiple times in other grottos you expose while looking for it…but it’s there. Now, then: I seem to remember a boss monster with one eye back in the U dungeon…
After the example of the famous Chinese NES bootleg, this version was made to be a closer reflection of the PS1 original. These adaptations were made by Lugia2009 with patching and translation support from Lindblum, who also provided the English translation for the first Chinese version.
The 2005 Chinese “Famiclone” is widely credited to Shenzhen Nanjing Technology, which tempts me to assume that the game engine is original. There are however unmistakable resemblances to the first three Final Fantasy games, including reused assets. For the most part, it plays like an early FF as well. A notable improvement is that your party has armor, weapons and materia from the very beginning, which I’m happy with since I’ve recently dealt with FF1’s initial grinding slog.
Of course, when I say materia, what I mean is magic that works the same way as the spells you learn in shops in FF1. Each party member has a single piece of materia when they join you and each one will grow its own roster of spells as you accumulate AP. Each party member can only equip a single materia at a time. Perhaps that was the best way to reconcile the materia system with the early FF scaffolds- simply integrate it into the existing equipment mechanic. It also simplifies strategy- even streamlines it.
To an extent, anyway. It gives each party member a distinct function. This comes through in the mid to late stages of the game when more healing spells are likely to develop (excluding Aerith’s Light materia- the only one with healing magic enabled from the beginning). The majority of your strategic freedom concerns elemental affinities, which is accommodated by the ability to equip and unequip materia in your inventory mid-battle.
On the other hand…elemental affinities are infuriatingly difficult to keep track of. Especially since the whole range of random encounter monsters could potentially show up at any point. Like in the image above- you can run into Christopher and Tonberries and stuff as early as the bombing mission at the start of the game. Sometimes there are vague encounter patterns, but you could potentially run into any monster anywhere. Some reasonable consistency is still maintained by how tough they are, though, relative to location and progression route.
This rom-hack retains a few of the base game’s sudden difficulty spikes but, fortunately, not all of them. In an NES format it would be maddening.
After the unpredictability of the monster encounters, the next biggest combat annoyance is the scarcity of group healing magic. Even without Aerith, you’ll probably end up having one of your party members carrying her Light materia. Then again, you could simply cough up for a ton of group healing items, depending on whether you prefer to rely on magic points or money. The former can increase its max limit with usage and regular stops at “magic shops.”
Which brings us to another key mechanic change- materia and weapon enhancement. Your character builds will hinge on two point values: conventional “grinding” by winning battles and the frequency with which you use both weapon and magic.
EXP, of course, raises your level and therefore stats, etc. AP is accumulated every time you use a weapon or a materia-based spell. When you reach a given maximum limit, you’ll need to stop at either a weapon or materia enhancement station to move the ball forward. Neglecting this can make you feel extremely naked and challenged early on so luckily it doesn’t take long to put it together.
Stat + items are also dropped way more frequently than they were in the base game, which is interesting. 4-8Productions, on YouTube, has a video about the only non-finite source of stat+ items: using the morph materia on any monster in the crashed Gelnika. This is, naturally, a huge pain in the ass because that means whittling down a ton of really strong monsters to roughly below 10 HP so the morph ability can knock them below 0. However, if you’re patient and persistent enough, you can unlock a HUGE work-around the leveling system. (Yes I’ve done this and yes it’s every bit as grueling as it sounds)
This can either be good or bad. Good because it enables more character build freedom or bad because it makes a group of PCs that feel kinda same-y even less unique. As much of a fanatical Final Fantasy VII fan girl as I am, I still can’t help noticing that the combat system lurched between stilted and fluid to the point of emptiness. In order to notice and take interest in the subtleties of FFVII’s character build avenues, you would almost certainly need to like the story and the fictional world enough to pay close attention. While I’m one of those people, it’s still kinda sad that the character build experimentation was not more accessible.
Since this is an 8-bit, NES demake of Final Fantasy VII, it is necessarily shorter which means less time to stop and smell the mako. Which means the finer points of gameplay need to carry more weight. Perhaps the frequent stat+ item drops from monsters were meant to add an extra layer of build variability. This, like healing magic from non-Light materia, will likely be at its most noticeable near the end. Chiefly because you’ll have the ability to travel between the different land masses and observe which stat + items are dropped where.
Essentially, the progression route follows the original as closely as it can. Some of the music, early on, is a little tinny, but evens out once Cloud makes it to the Seventh Heaven. The chip-tuney version of Lurking In The Darkness was a pleasant and charming surprise, especially since it gets used in a few more dungeons. Those Who Fight Further was converted nicely which matters- in graphically simple turn-based RPGs, music carries a lot of weight.
As per the necessary shortening, certain musical cues are adjusted. During Cloud’s brief dream dialogue before waking up in Aerith’s flower bed, I was surprised to hear Listen to the Cries of the Planet (the music from the Forgotten Capital in the original game). Reunion is heard for the first time inside Gaia’s Cliff, which I appreciated. I realize that Reunion is basically Aerith’s Theme with a lower, mysterious-sounding key change. But I always thought it was unfairly overlooked.
One interesting consequence of the shortening was a new presentation of Cloud’s mental struggles. We simply hang out at the Inn room in Kalm as Cloud tells everyone. No actual flashback. Which means, when the party gets to Nibelheim, the player is seeing it for the first time. Unless you hang out nearby for the grinding, you won’t see it again until the illusion just outside of the Northern Crater. It’s a neat way to build tension; a series of small, gradual reveals that create questions about why Cloud told things the way he did.
Obviously there are far less side quests and stuff like Wall Market are pretty linear in comparison. I noticed some collision detection oddities on the world map (which, mechanically, functions no different from anywhere else) which made me wonder. I’ve been playing through the second quest on the Challenge Games Legend of Zelda rom hack, so I have been doing some compulsive wall-testing lately.
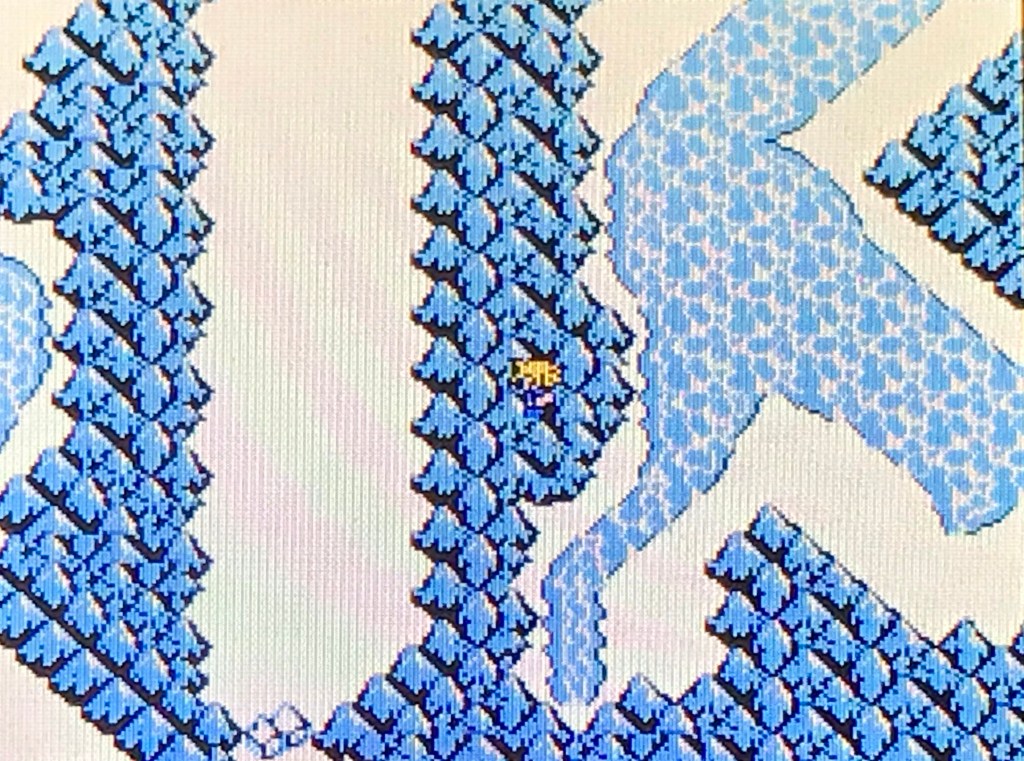
Maybe the Zelda hack is making me obsessive…but after I found a short length of mountain you can walk over in the Icicle area, I immediately doubled back and started testing other terrain barriers. Particularly around Wutai and the area between the Mythril Mines and the place where Fort Condor is in the original. You can see little entrances under mountain ranges and house sprites in inaccessible areas.
Like…you can see the entrance to the cave with the old miner who gives you the mythril key item in the original (to be traded for Aerith’s Great Gospel limit break). If you explore in the northern oceans, you can see a house that looks like it might be the home of the Chocobo Sage. On the southwestern continent, you can get a view of a circular pond collected from a waterfall that then feeds into a lake, like Lucrecia’s hideout.
Then again, the moogle construction site of Wutai was obviously there just to…pay tribute to the original and add a bit of cute, aesthetic consistency. Sort of a wink and a nod saying “Yeah, we get it, it should be there, but what do you expect? It ain’t like we got three discs!” Maybe the miner’s cave and the Chocobo Sage’s house are decorative, as well.
In an objective and qualitative assessment, this is equivalent to a streamlined NES-era Final Fantasy. Other than this one, I’ve played some of the very first FF and the very beginning of the second. This reimagining of FFVII has an intuitive and accessible combat system and some simple “high score” rewards that let you enhance your weapons and materia. The adaptation of the soundtrack from the original also adds to its stylistic distinction from other NES Final Fantasy games. But this second iteration of NES Final Fantasy VII doesn’t exactly “push boundaries.”
But for FFVII fans who also like retro gaming, this game is rather more than the sum of its 8 bits. Also like the original Final Fantasy VII, the storytelling is the main distinction here. The portrayal of Cloud’s background is significantly altered, as is the date with Aerith in the Gold Saucer. The location within the Northern Crater where Sephiroth’s original body is located, right next to Sapphire, Ultima and Diamond WEAPONs, is named “The Mako Tree” and the Prelude music is heard there, like the crystal chambers in FFIV and FFV. Since the original FFVII was such a huge tone shift from all others before it, I was both bemused and charmed to see this thematic tie-in with the older, “swords and sorcery” games.
The “tree” part is also an interesting touch. Especially given the shortening of Sephiroth’s name during combat. I know it’s an NES remake which means that menu commands, item names, monster names etc. get shortened sometimes, what with the limited information storage. But when you name the antechamber of Sephiroth’s stronghold “The Mako Tree” and you drop the “h” from the end of his name…it kinda puts the whole Tree of Life symbolism closer to the foreground. Maybe it’s not the biggest deal in the world, but I think it’s cool.
Meat outside of the floor compartment. What would Dracula say D:
Since I’m playing through the second quest, I’m gonna exercise zero restraint on spoilers.
The first moments of quest one can be a little intimidating. But a modest amount of exploration will reveal that your sword is sitting there for the taking in the first dungeon. After that, a little lateral thinking will set you straight on how this rom hack differs from the original Legend of Zelda: run back and forth between dungeons, the “One way!” teleportation caves, etc.
Second time around, though…after the “New Adventure Awaits!” notice when you bump off the Thunderbird…it’s, uh…pretty tough.
Before now I never really stopped to consider what a security blanket the sword actually is, in a Zelda game. Being without it is pretty damn inconvenient, but on top of having to rely on bombs, the candle and the boomerang to kill and stun monsters…you just feel naked without it.
So you find ways to compensate. I stumbled across a cave with a moblin giving away rupees, early on. From there, the question is what to buy with the most possible utility, since no sword means you won’t be milking enemies for item drops as frequently as the first time around. Like an idiot, I went with bombs instead of the candle. Both the candle and the bombs can harm enemies and unlock hidden paths, but they also have different strengths and weaknesses. The bombs do more damage and the candle is easily replenished between screens. Coming and going from the screen next door to renew the candle is less of a test of patience than spending twenty rupees every time you run out of bombs.
Get ready for lots of THIS shit
Luckily, one of the early dungeons offers a solution: like-likes, who probably have the best item drops out of any monster you’ll have access to in the very beginning. Lots of money and bombs. With persistence and luck, you’ll be able to farm enough rupees for both the first boomerang and whichever of the two initial purchases you didn’t go with the first time around.
After that point…you’ll probably notice that the dungeons have letters instead of numbers. Meaning that the progression route will be even less linear than last time, perhaps? Less linear than the first play through that was distinguished largely by it’s non-linearity?
Like linearity itself, this has it’s own set of possibilities and limitations. We know, from our first quest, that an item obtained in one dungeon may unlock an obstacle in another, or elsewhere in the Outlands. Therefore, finding yourself with bombs, the candle, one boomerang or another and some occasional meat with no path forward in the “first” two dungeons is not a death sentence. It just means you have to keep looking.
As per the original Legend of Zelda and our first quest in the Outlands, the typical methods of revealing hidden paths include: pushing rocks, bombing walls, burning bushes, crawling with the ladder, sailing on the raft and playing the ocarina. That last part is an addition from GameMakr24 that I’m really happy with. It contributes to the exploration of what the lore of Ocarina of Time would be like if it were present in the first game.
So we dart all over burning things, blowing stuff up, pushing rocks and playing the ocarina. This process is narrowed by my lack of a power bracelet: only the plain, cubic blocks and the headstones can be pushed right now. After several failed bombings (hehe…sorry, I couldn’t resist) I remembered a pattern from the first quest: lots of breakable walls and very few flammable bushes. Maybe the distribution is reversed in the second quest?
Maybe a little less of a reversal, as it turns out. While breakable walls are in hiding so far, flammable bushes are only slightly more numerous…and they usually only have moblins who pay you to keep the secrets of their woodsy little holes.
(I know they’re called Goriyas in the NES games…but it’s hard for me to shake the resemblance they have to moblins. Like how the Wizzrobes look like Subrosians from Oracle of Seasons or potion vendors from A Link to the Past. My mind just seems to…have it’s own preference. And it’s not like we don’t call the armored foes Darknuts even though Nintendo canonically named them Iron Knuckles)
Rupees are perfectly good but they don’t really help, if you already have some of the early equipment. Excluding keys for dungeons, of course. Still haven’t found any amazing Goron shops with bows and stuff yet, though, so rupees aren’t high on my list. Given how open LoZ: Outlands is, though, I wouldn’t be surprised if there is a way to access it even at this point.
I found the step ladder in dungeon O. This opens up the territory beyond streams, which shows promise at first. If you can scrape together the rupees, you can pay a Subrosian for a hint. The cute, robed sorcerer makes it sound like the cemetery puzzle in the lower lefthand corner of the map can be solved in the same way it was in quest one. Until I realize that I need the power bracelet to see that through…
…X_x…
The systematic method can be seriously frustrating if you overthink things. Especially if you haven’t played the original Legend of Zelda in a while like me. See, earlier, when you get the ocarina from Zelda, she tells you to look for a hidden path in the Graveyard of Serenity. And you happen to have the step ladder which lets you access the lower-left cemetery. So…it…it almost starts to feel like the game isn’t playing fair…
Then I took a break and realized two, blatantly obvious things I’ve overlooked: the Graveyard of Serenity refers to a specific graveyard and the first quest had three of them. We’ve ruled out one. The other is on the other side of some water. And in the last paragraph, where and when did I say Zelda gives you the hint?
Oh. Right. When she gives you the enchanted instrument that’s used for revealing paths and warping. Thing is…I sorta wrote that off for the same reason I did the flammable bushes: it only ever seemed to unlock rupee moblins and a heart container. And the cemeteries are flooded with ghostly floor masters that I just can’t kill yet.
Back when I was trying to set all the plant life I see on fire, I usually had to clear the screen of moblins and scrubs before I could start testing the bushes one by one. And I didn’t want to keep spending money on bombs so I would come and go from the screen to keep reusing the candle. That requires waiting for them to get close to a wall so the fire can continue to burn them after it knocks them backward. And, if you want to spare yourself as many screen to screen refreshes as you can, you should probably camp out near a wall with the boomerang so you could stun and burn a whole group.
The lady said it was the Graveyard of Serenity, though, so off we go. And that means the floor master ghosts. Which, presumably, means a whole lot of dodging. And the floor master ghosts spawn every time you touch a tombstone. It’s a risk…but not impossible.
This was almost too much for me. Guess what’s in there? A rupee moblin. Just a moblin with more money. *eye twitches*
But did Zelda say to push aside a tombstone? And as much of a bust as the ocarina had been so far…it has unlocked secret paths in places without water before.
…
So. Not only is the path to level T unveiled but…
Oh Zelda. My orange-headed savior. I’ve never been happier to see you. At long freaking last, my A button is no longer useless!
I mean, yeah, other stuff happened before I got the sword but I had to get it out of my system
While Charlie Murder has a world map, character building and other RPG-lite mechanics, it mostly stays in it’s beat’em up lane. The progression route is linear and grinding like you would in an RPG may or may not help as much as you’d think. At this point, tackling a difficult battle the way your build already is seems to pay off more. The auto save feature is blessedly reliable and you usually pass through at least a few screens on your way to a boss or a melee obstacle.
With an auto save between screens, you’ll still be better off on your next respawn even if you do lose some resources after getting KO’d. I mean, so far exploration hasn’t been that big of a factor and that’s one of the things that helps grinding not be an abject chore. Like I said- the game mostly stays in it’s lane, with combat, rhythm games and rail-shooter segments taking up most of the foreground.
I love seeing stuff like this: the contact-damage obstacles in the cemetery clearly contained germs of the Whispermen and Hanged Men from S&S ♥️
In my mid to late childhood, gaming arcades were still common. Consequently, I got a few fond memories of pumping quarters into beat’em up arcade cabinets so I could keep trying to get passed a single, frustrating melee obstacle. Obviously, this is only one example of gamer rage, but it’s a kind of gamer rage that makes Charlie Murder’s design satisfying for me.
Speaking of the design- you have two different forms of EXP: pocket change and social media followers. I think the scrounging for pocket change as it drops from fallen zombies kinda makes the social media thingie less repugnant through association.
Yeah I get it: social media is not doing so hot when rolling zombies for quarters makes it look more comfortable through association. Think it through, though: aren’t social media accounts promoting content creation (*sits there innocently, totally not self-aggrandizing* 😇) more interesting than most of them? I’m not wrong 😺
It’s also delightfully random when your followers plunge to zero because you just leveled up ^^
So when we last left off, we learned that a jilted ex-band member was gonna be our primary antagonist.
After each boss fight, there’s a flashback to older Charlie Murder gigs where you play a rhythm game as whatever band member you’re playing as. After that, there’s a more conventional cutscene showing the anguish of ex-band member Paul before he takes his fatal steps toward becoming a supervillain.
Is it weird that this is more fun than the aerial combat in FFVIIR?
There are also swag shops immediately after boss fights allowing you to cash in your pocket change for stat buff booze, equipment shops and tattoo parlors. Earlier I compared the tattoos to the brands from S&S but it might be more accurate to say they’re kinda like limit breaks. The more you fight, the more you fill a blue energy gauge. When it’s full, you can hold down a button which lets you unleash special attacks bestowed by the tattoos in addition to your chi-blast death metal scream.
The rail shooter segments also become more common as your progression route leads you to obtrusive terrain, requiring you to drive, fly, grapple, etc. The one that made me spaz out enough for my wife to take pictures of me was the shootout with witches on broom sticks.
This plays exactly like Einhander or Defender which makes it simple from a gameplay perspective. But there’s just something really fun about witches on broomsticks pulling out automatic handguns and shooting at you, like a gang war. How the fuck has this not been used in The Magicians or something?
There’s stories like The Prophecy and certain Anne Rice books in which supernatural creatures are either confused or intimidated by human technology. With the right world building, that can work. But a lot of stories don’t bother with that, so why hold back? Prolly afraid to be compared to Underworld ‘cause it looks campy but there’s also a good way to do camp as well. I’m raving about how much I like this game, aren’t I?
Maybe it’s just me and my witch-shootout fixation but just looking at this image almost makes me smile
After getting caught up on the progress of Paul’s rival band after his Faustian deal, we learn that he’s been present in the story every since we were resuscitated in the first level.